Microsoft Exchange Integration
EnterpriseSetup in Microsoft
To enable automatic synchronization of your contacts, a new app registration must be created in Azure Entra ID.
App Registration
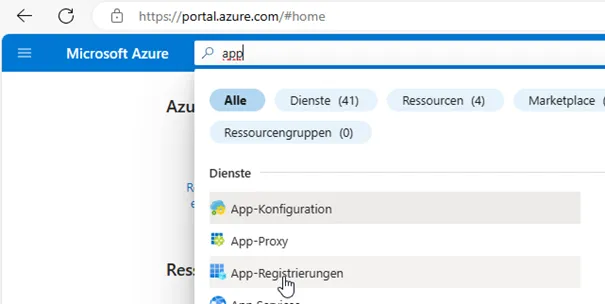
Access the App Registration service in the Azure portal.
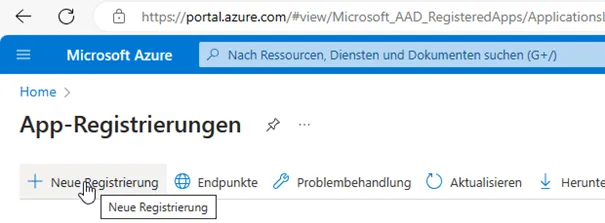
Select + New Registration from the menu.
- Provide a descriptive name for your app.
- Select the appropriate account type for your environment.
- Complete the registration by clicking Register.
You will be directed to the app registration overview page. Note down the Application ID (Client) and the Directory ID (Tenant).

Configure the Client Secret
A client secret must be created to establish a secure connection between oneVcard and your Azure app.
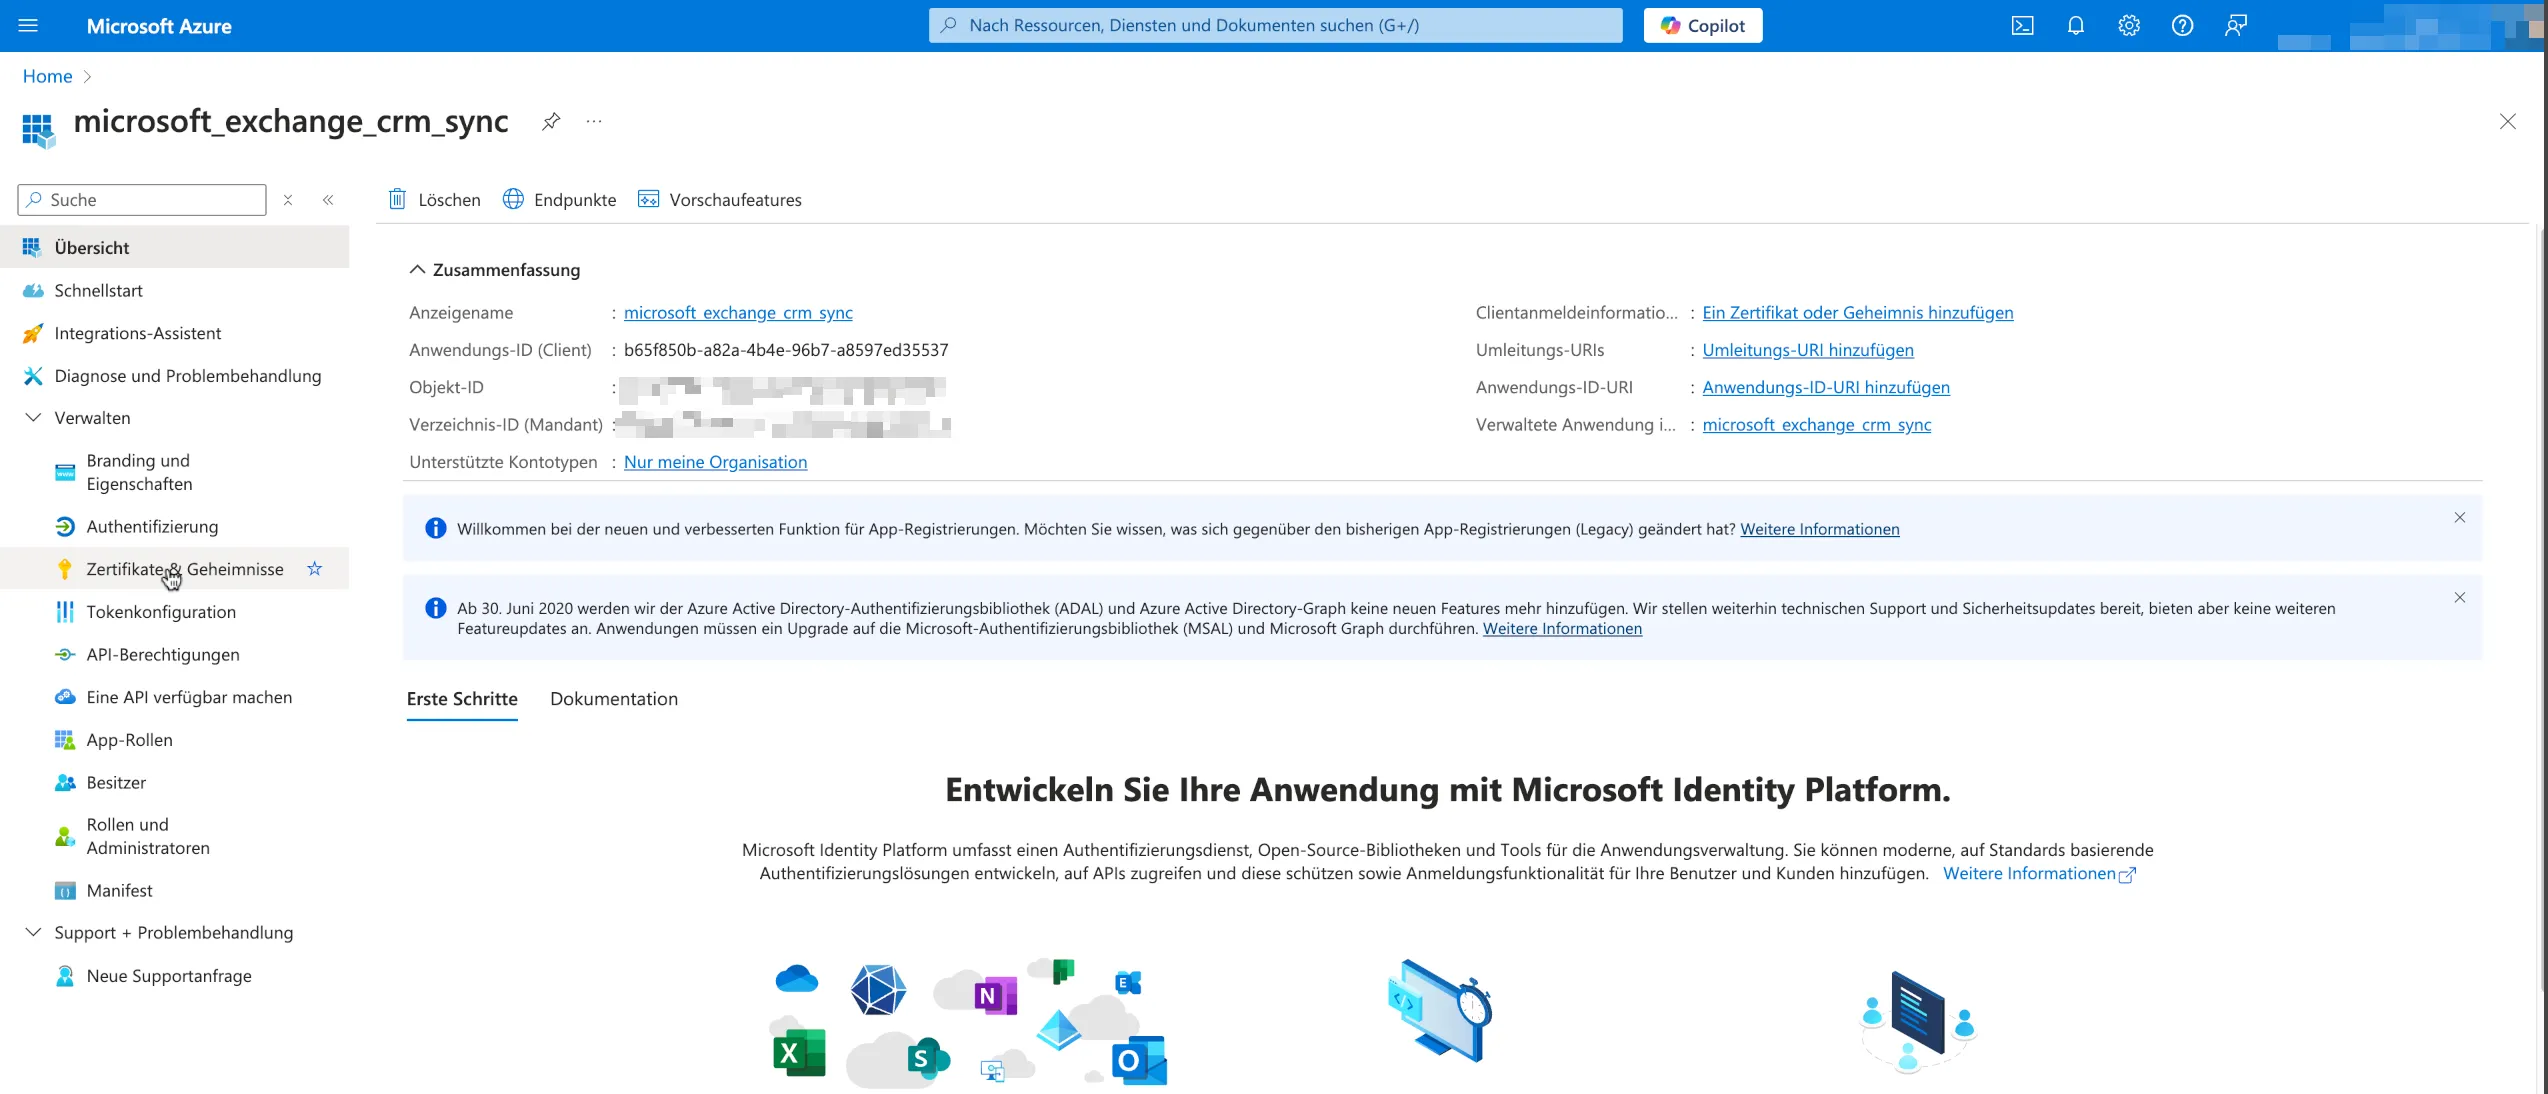
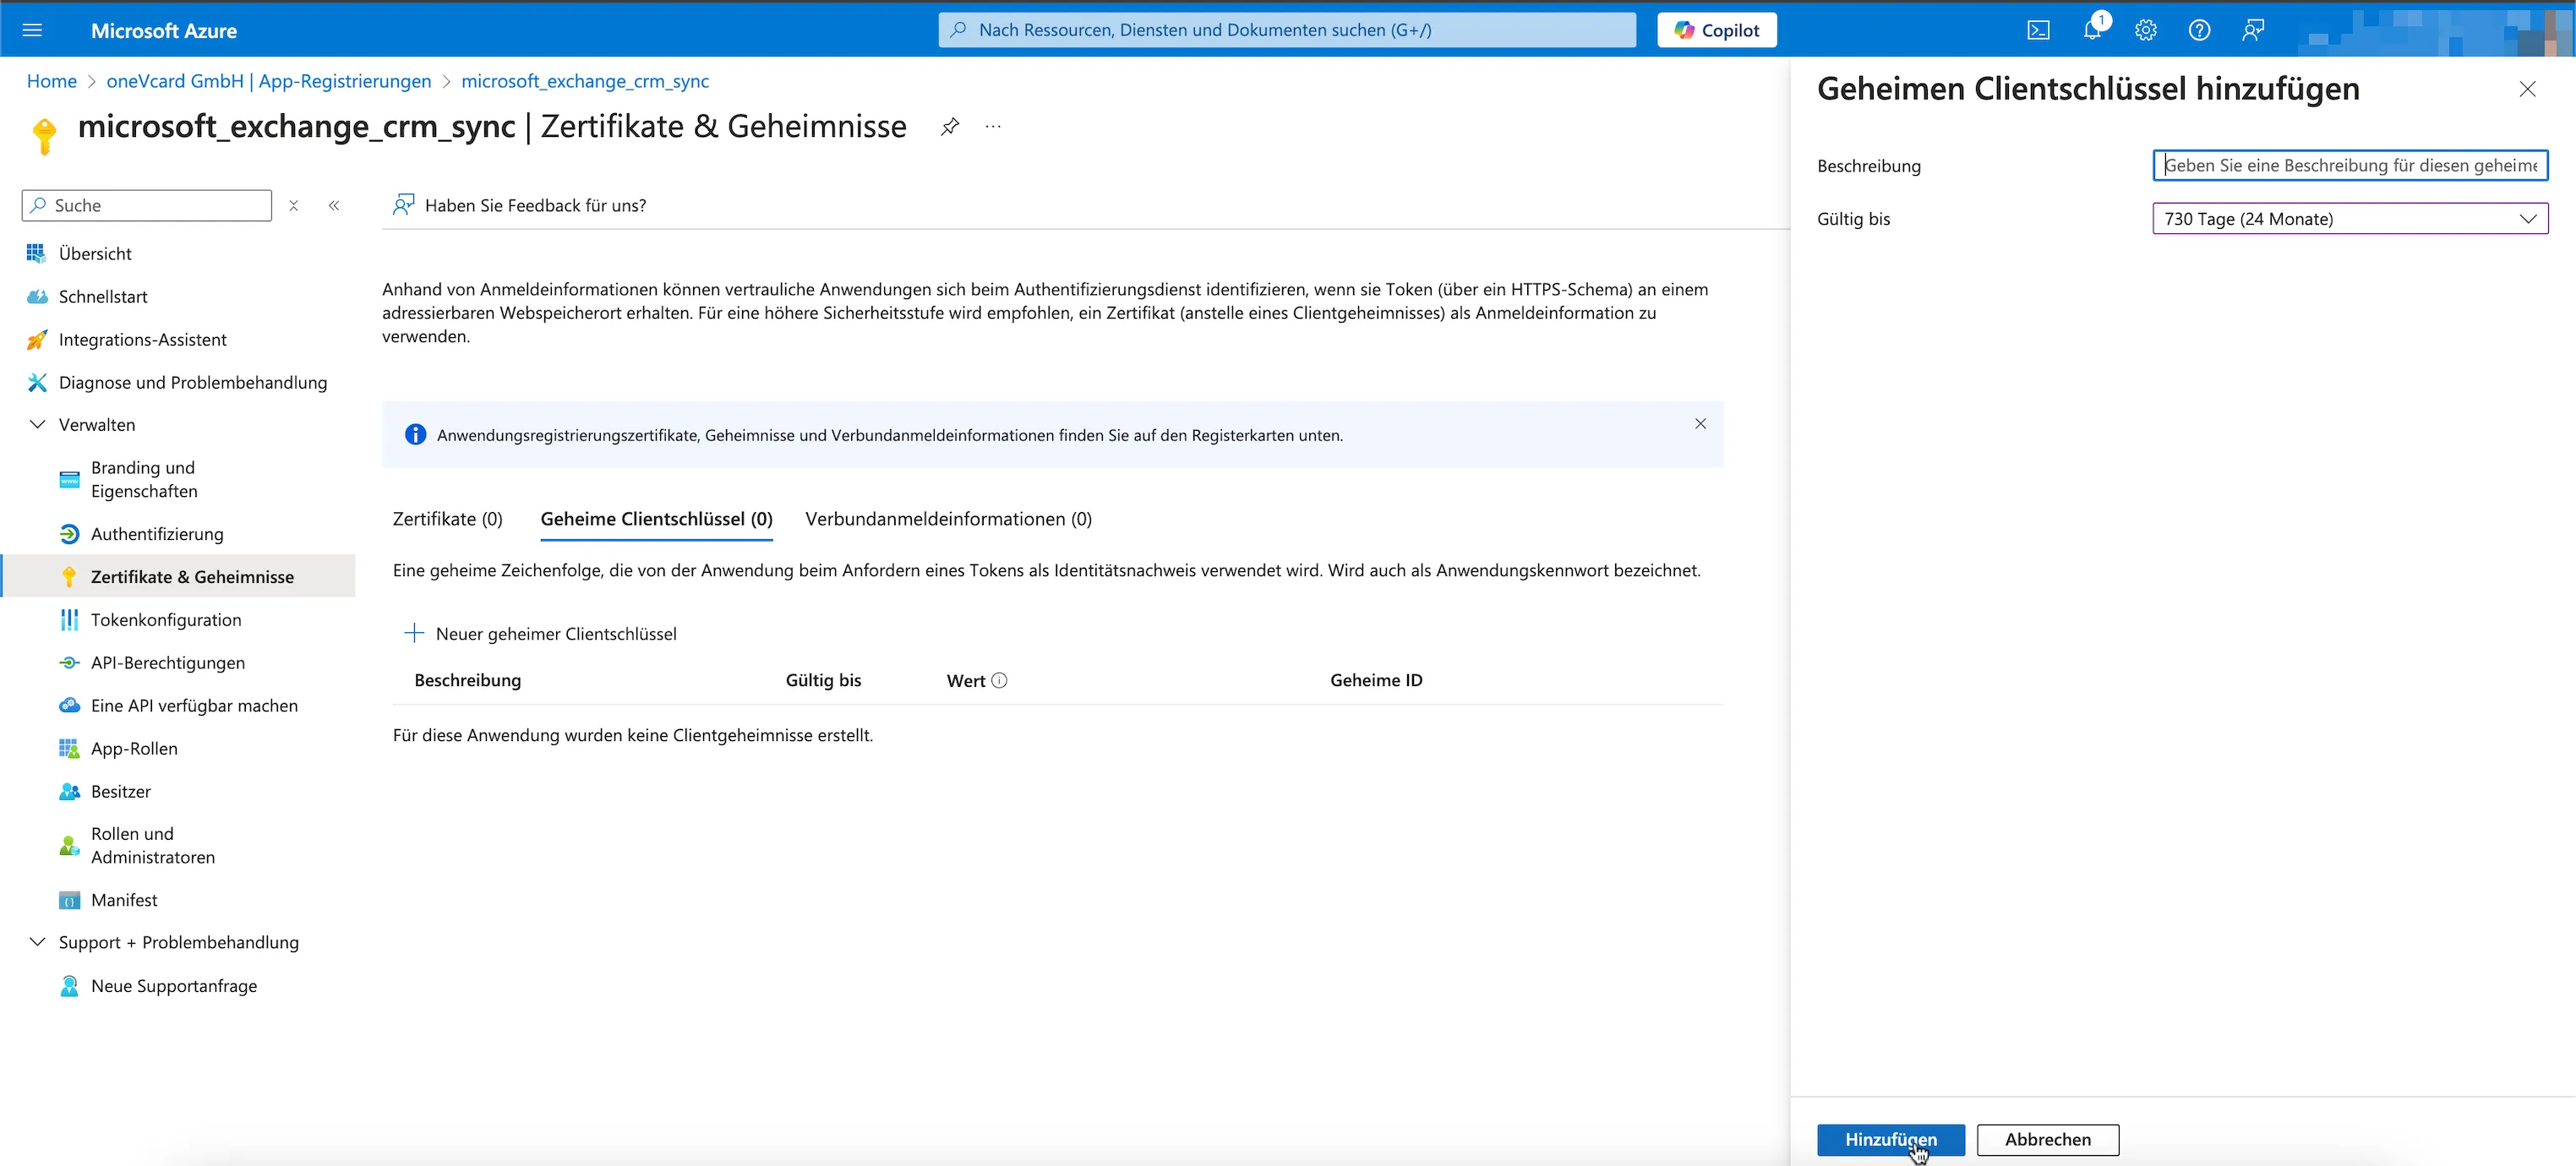
Go to the Certificates & Secrets tab and click + New Client Secret.
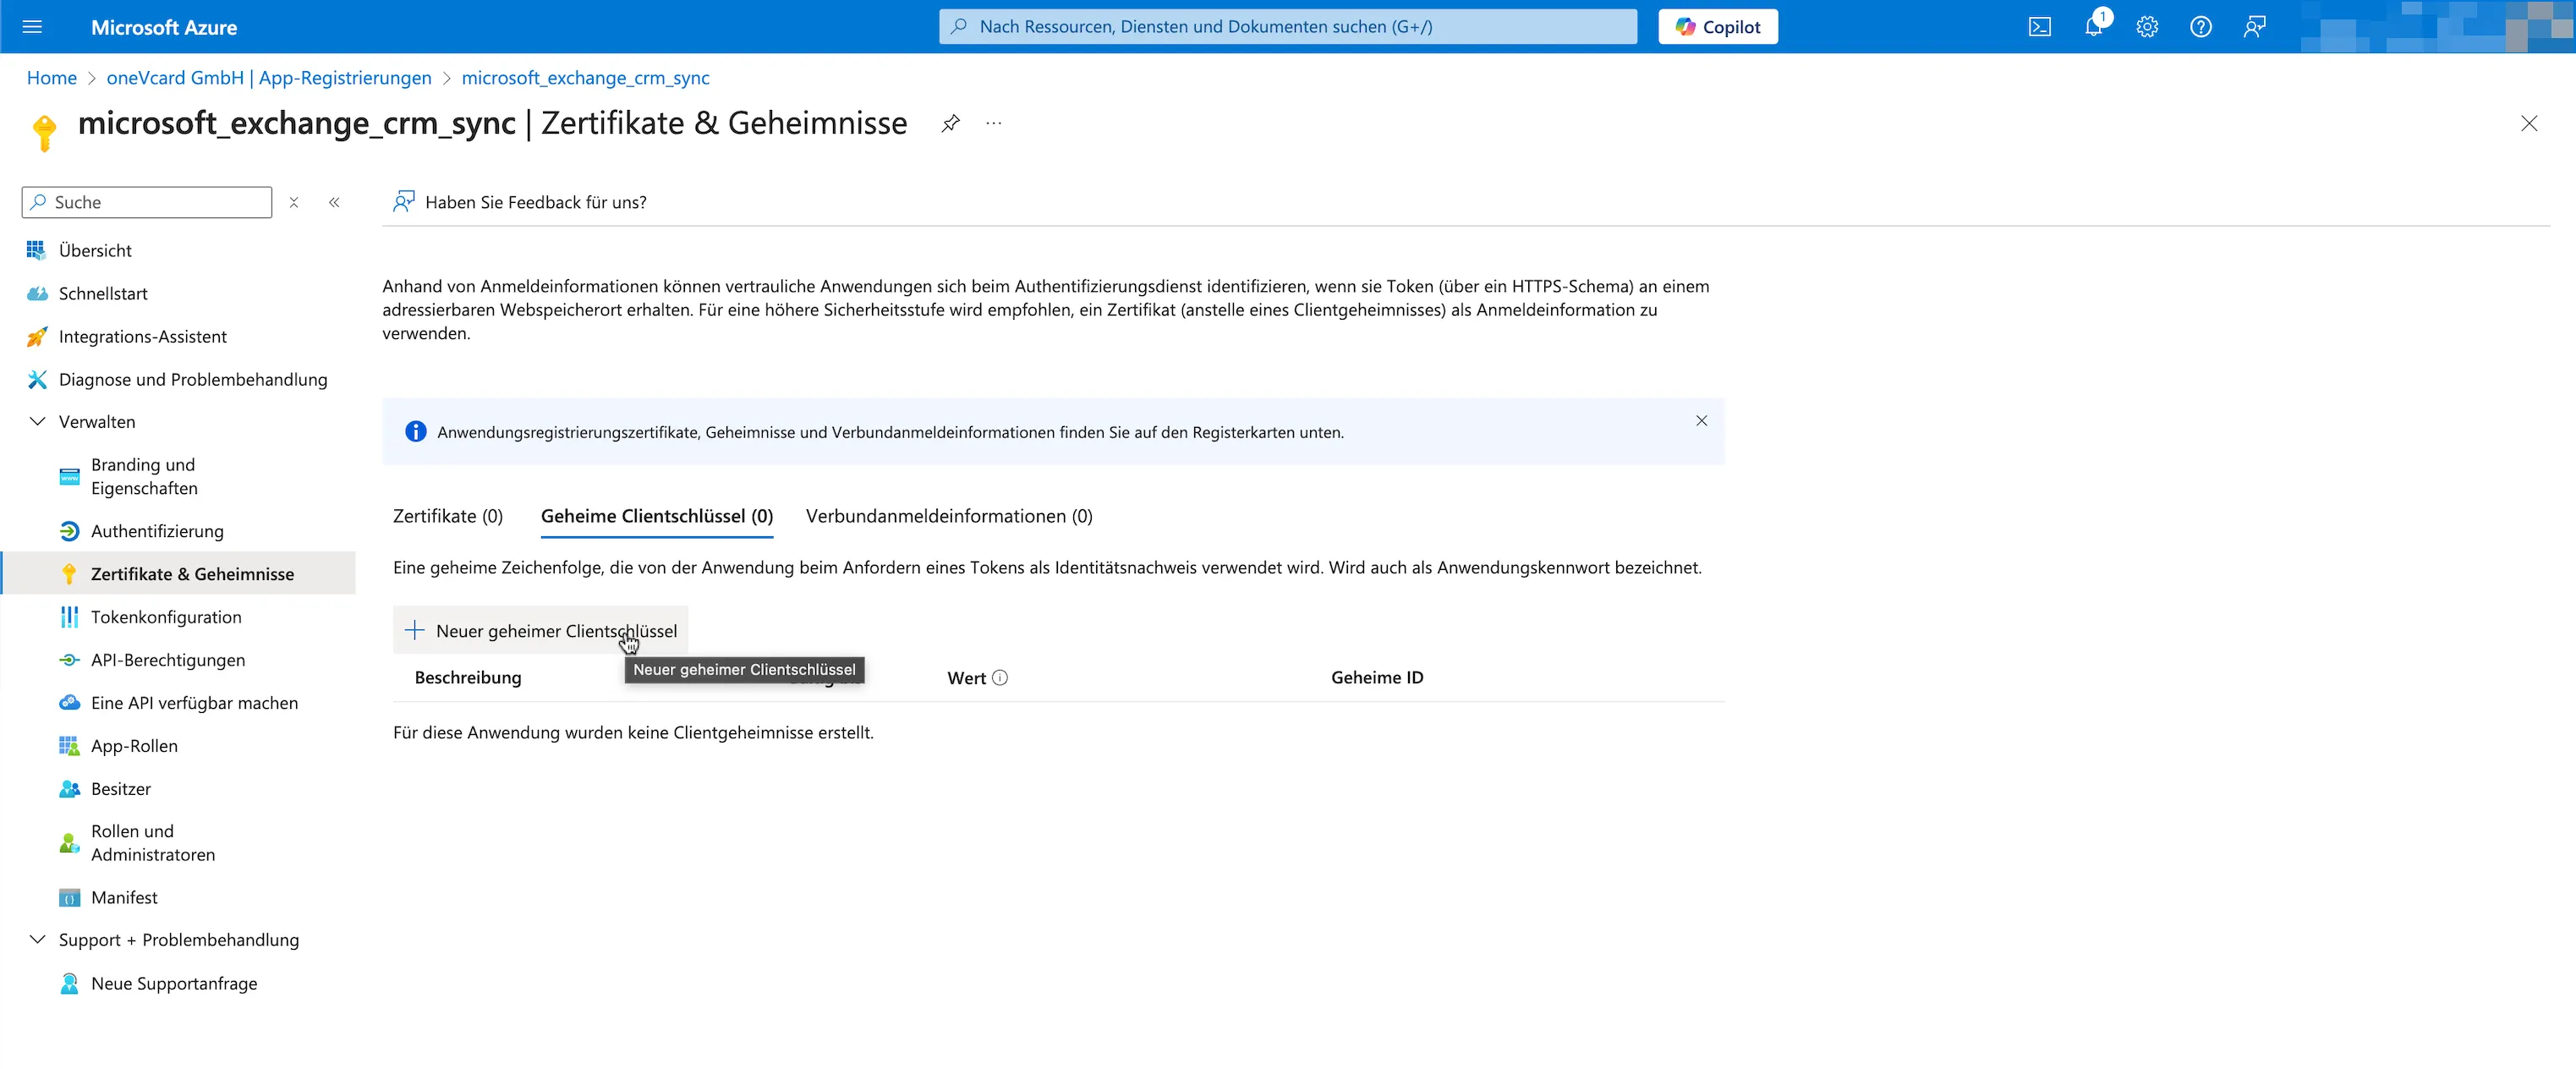
- Provide a description for the secret.
- Set an expiration period (up to 24 months). After expiration, the secret must be renewed in both Azure and the oneVcard app.
- Click Add to finalize.
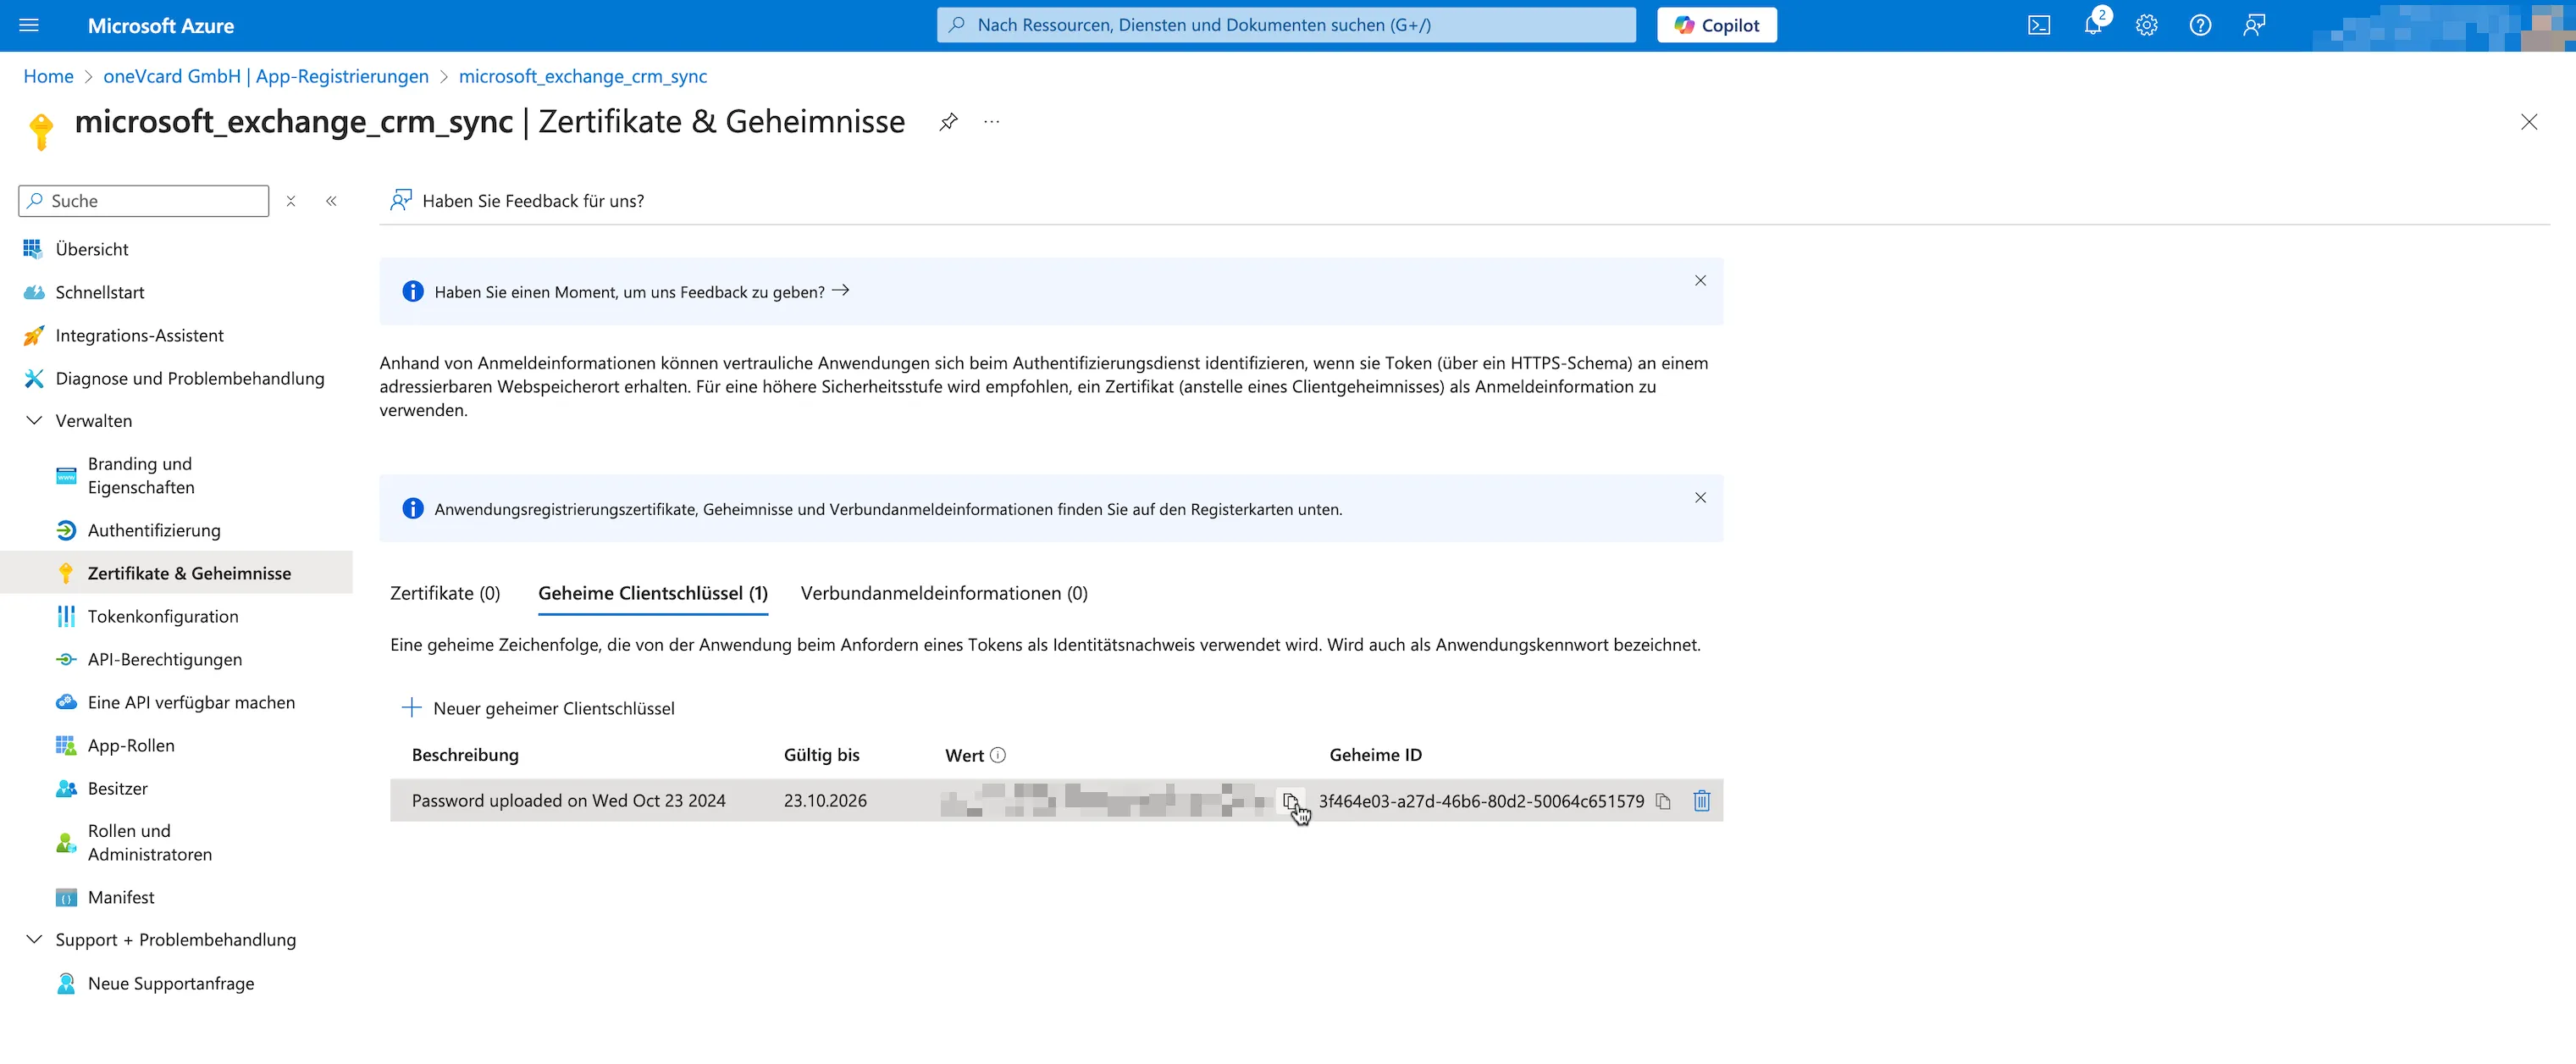
Copy the value of the secret using the Copy button.
Grant Permissions for Contact Management
To allow the app to access user contact data, permissions must be granted.
- Navigate to the API Permissions tab in the left sidebar.
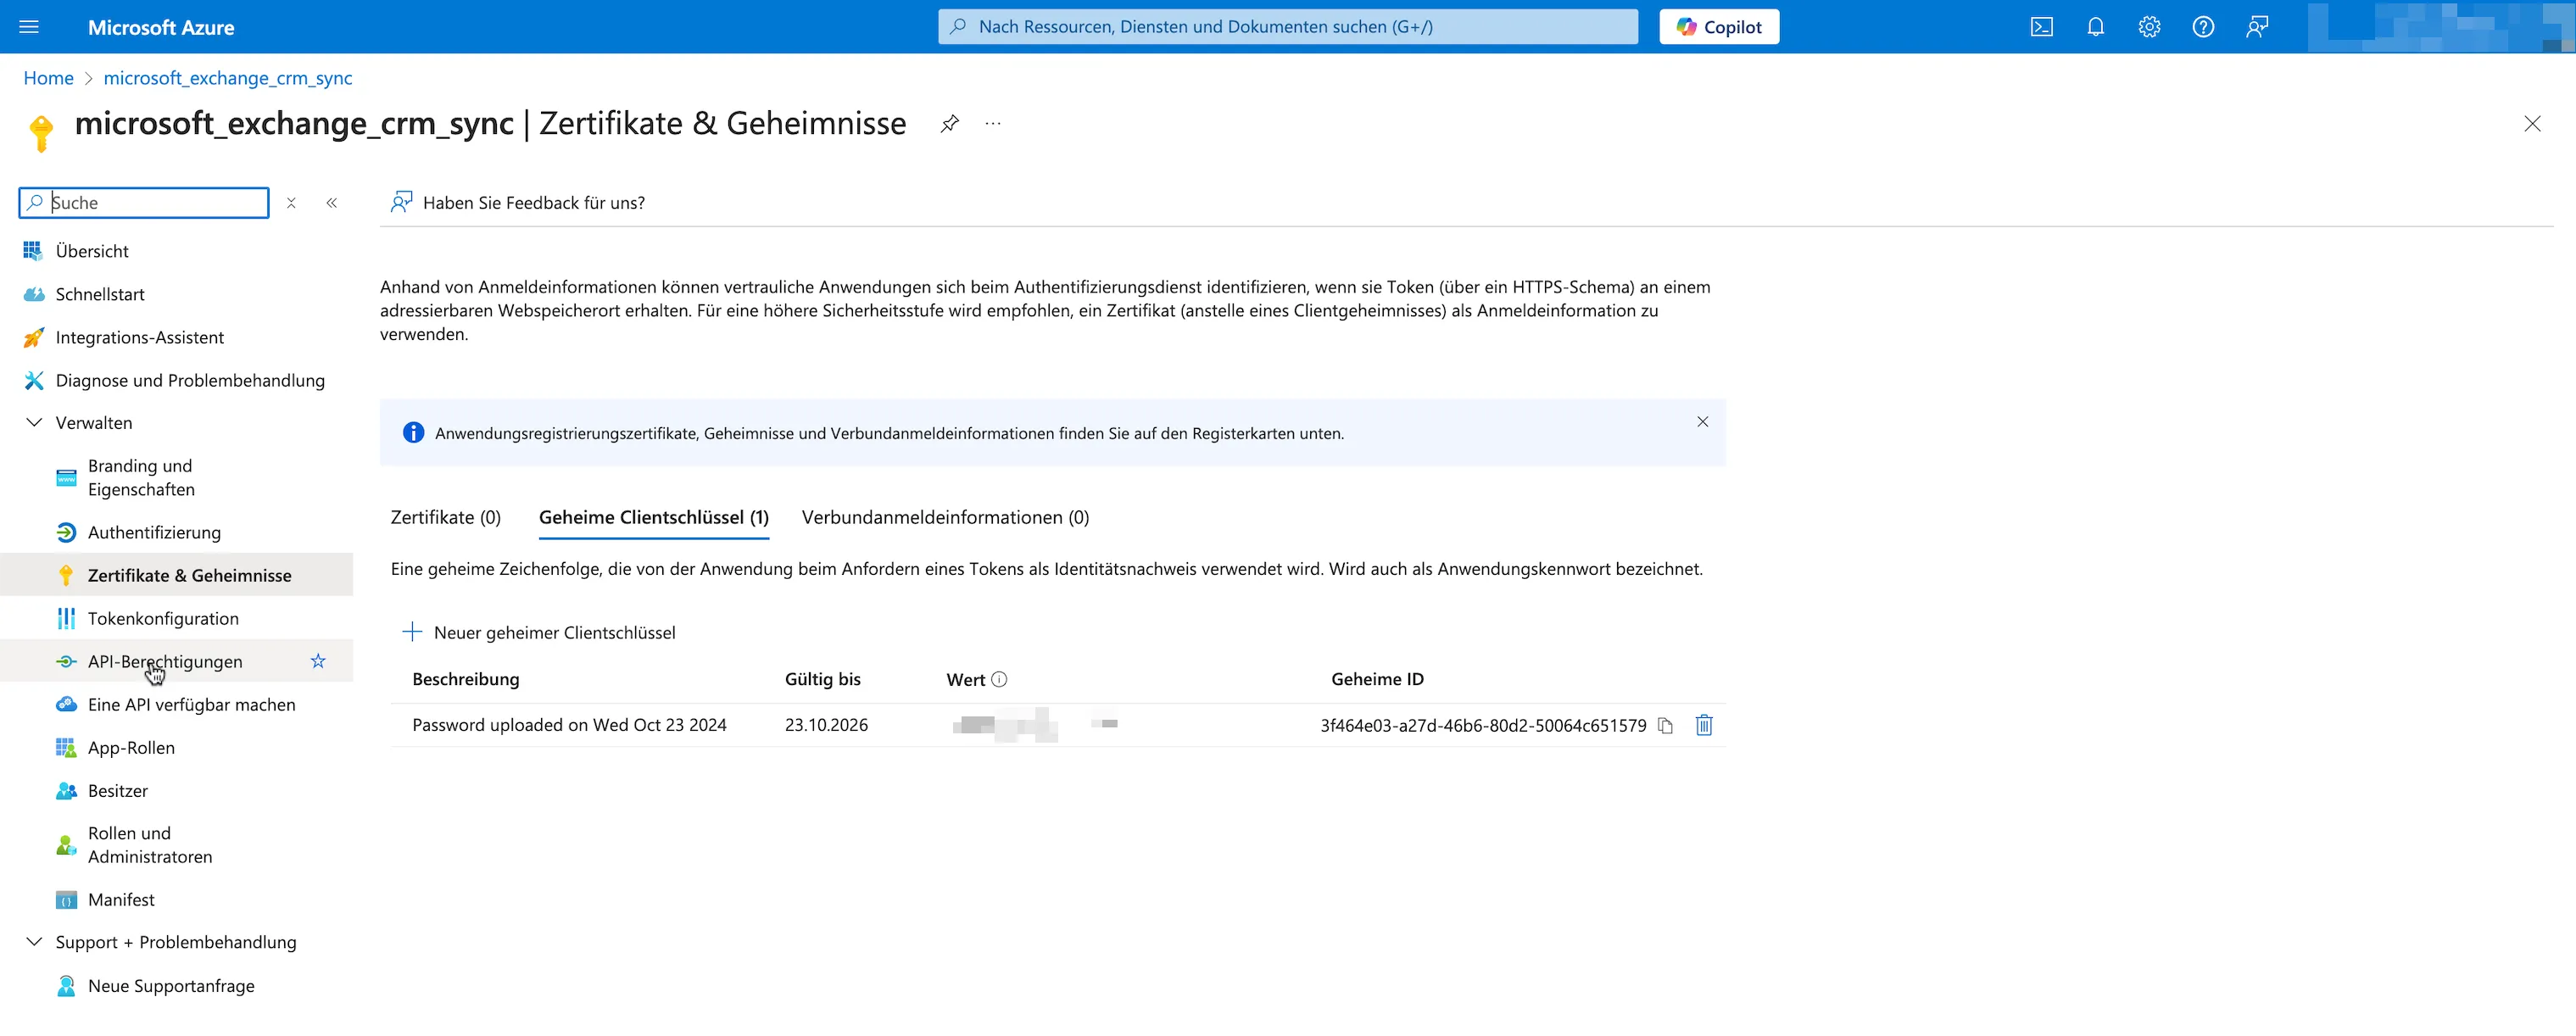
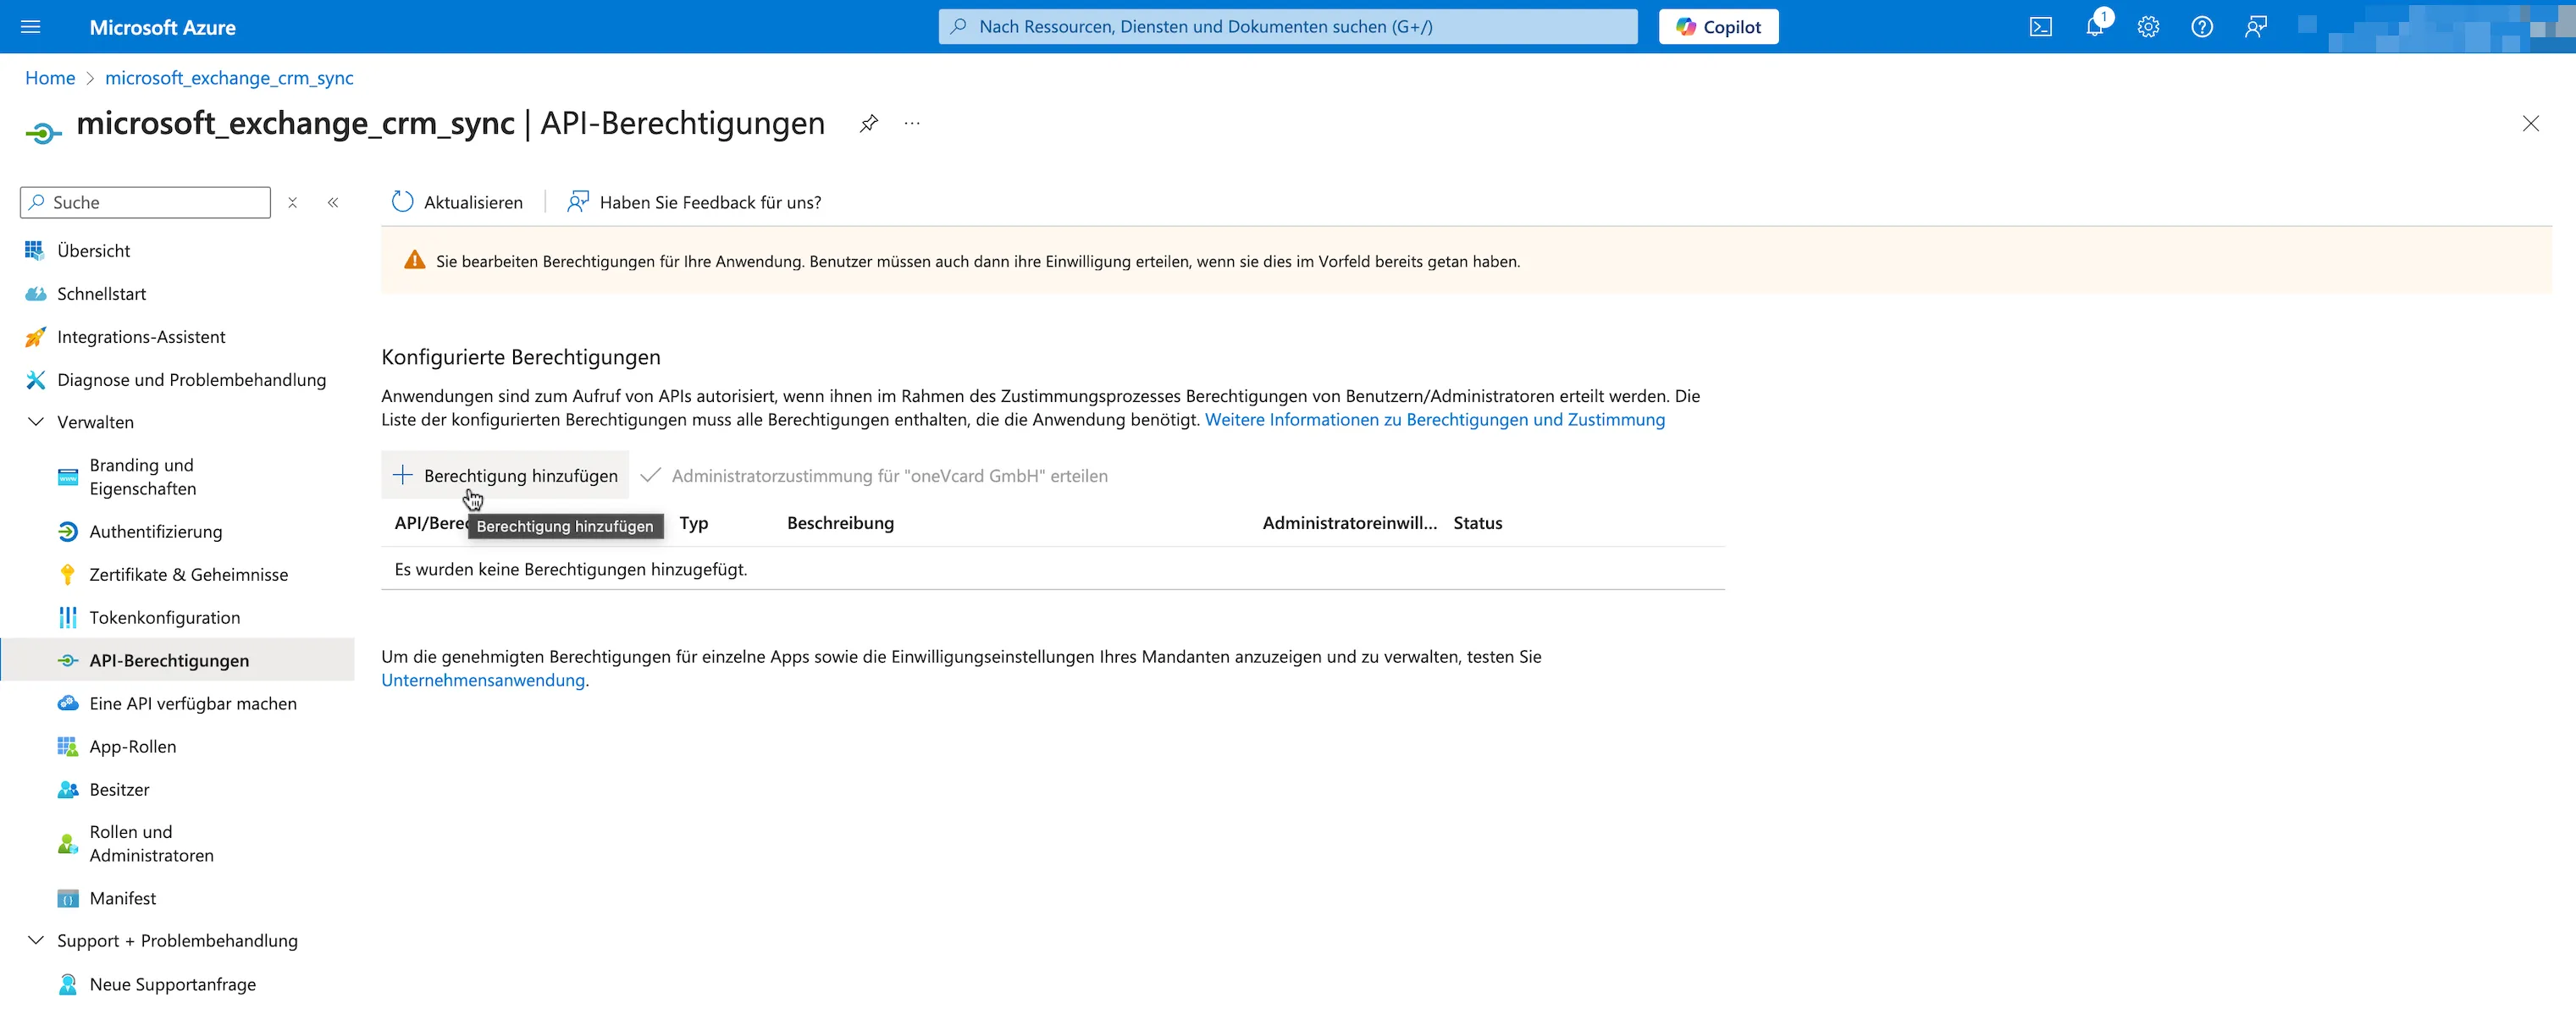
- Click + Add Permission.
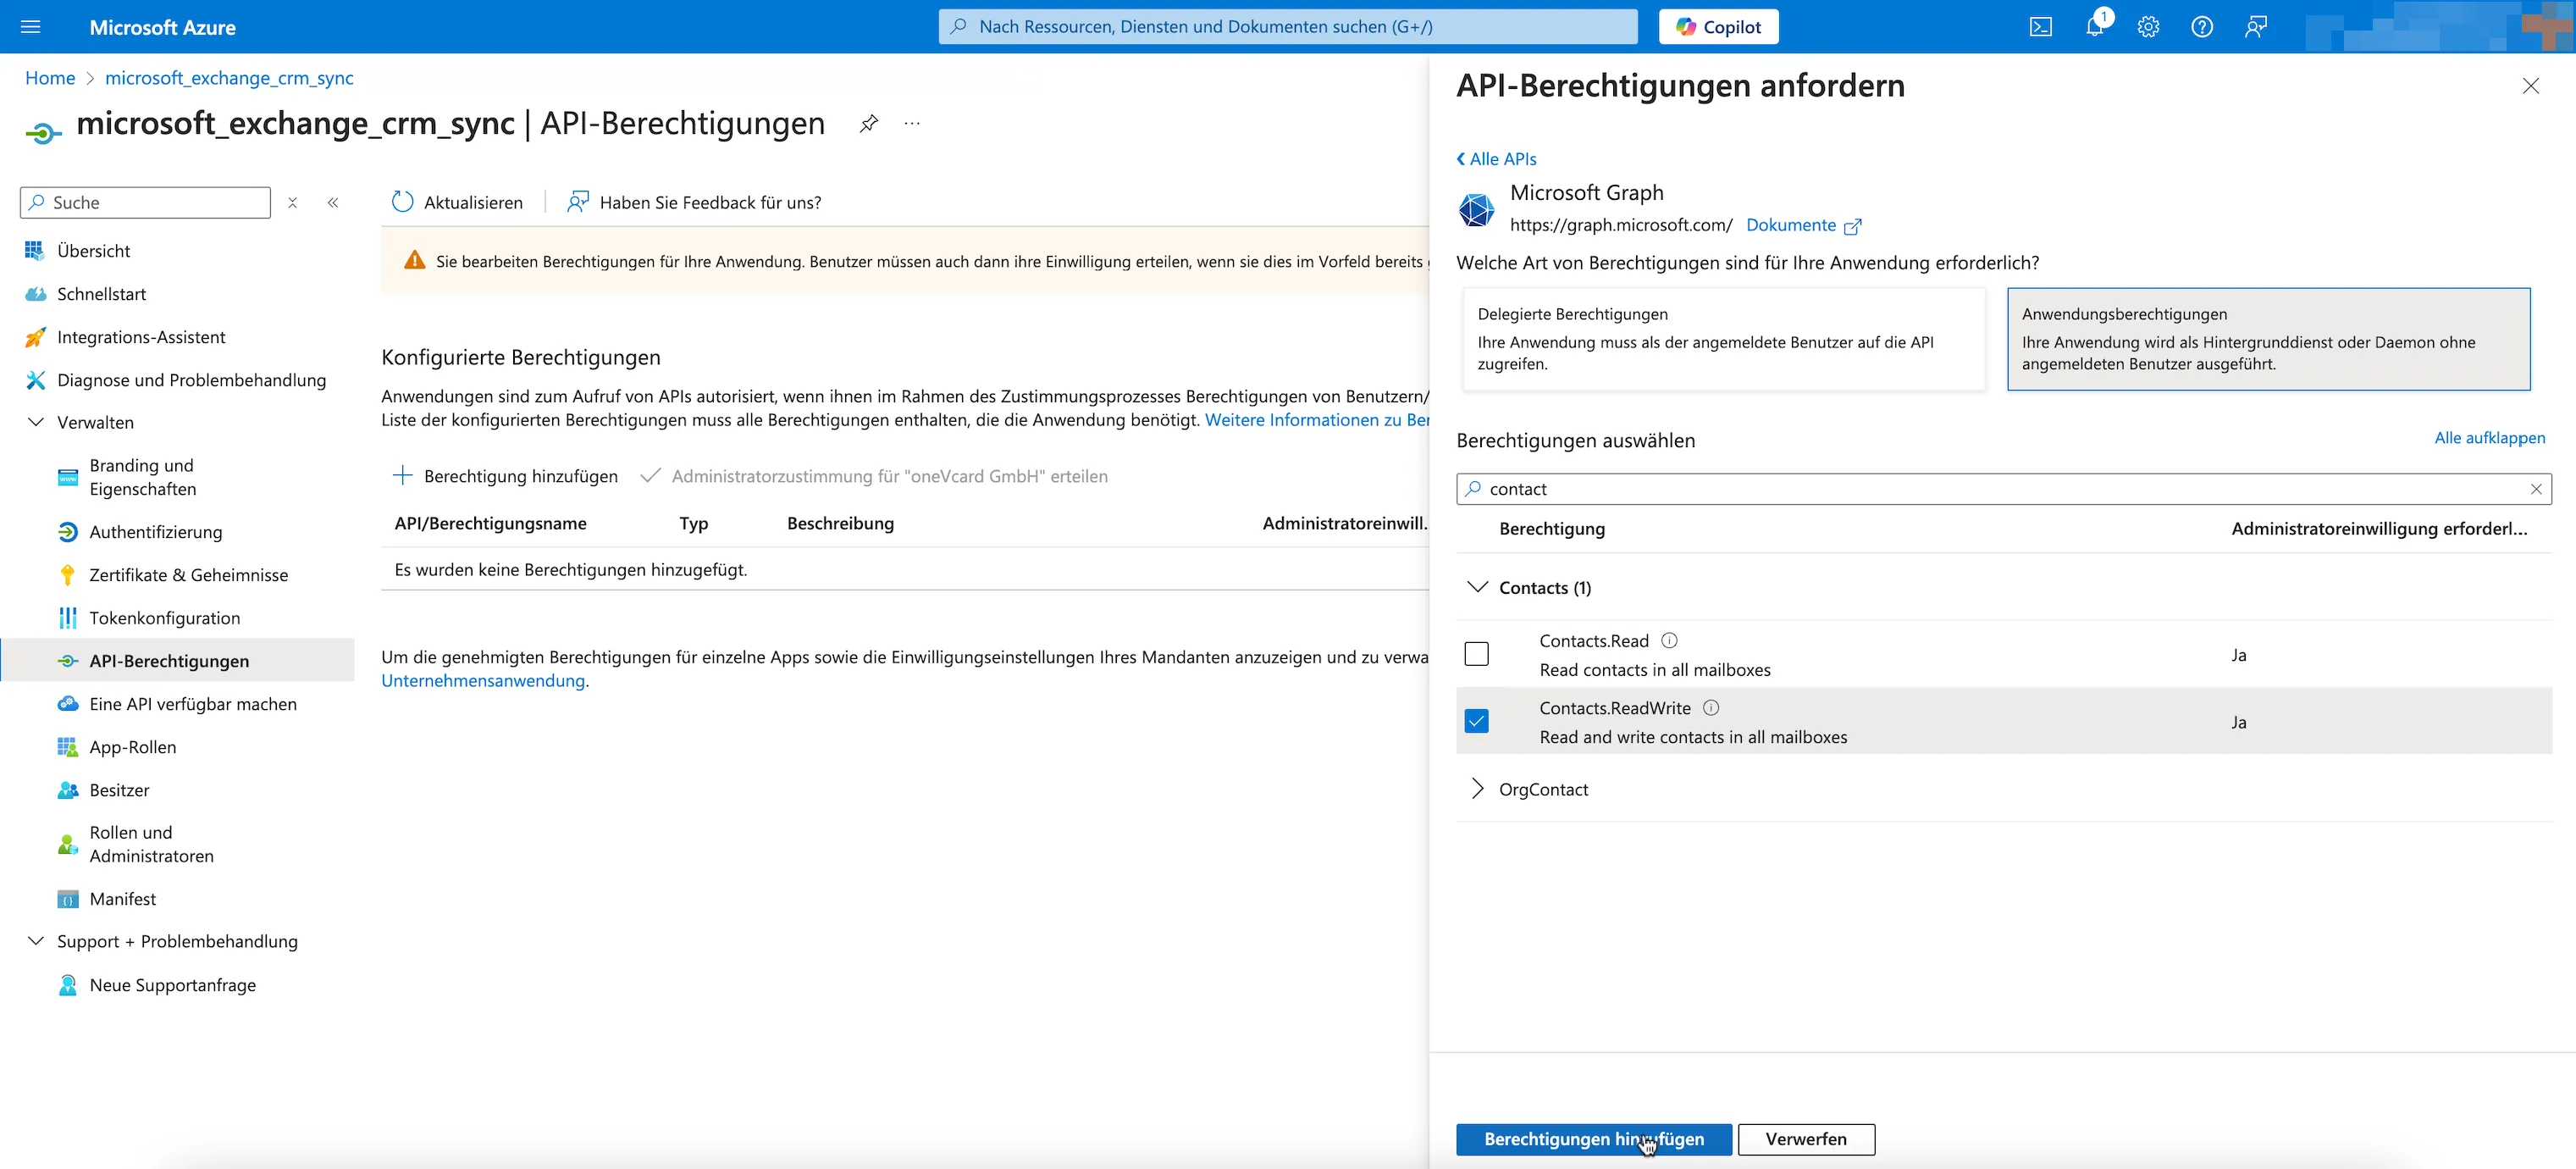
- Select Microsoft Graph and choose Application Permissions.
Search for Contacts and enable the Contacts.ReadWrite permission.
Add the permission by clicking Add Permission.
- Grant admin consent by clicking Grant admin consent for [your organization].
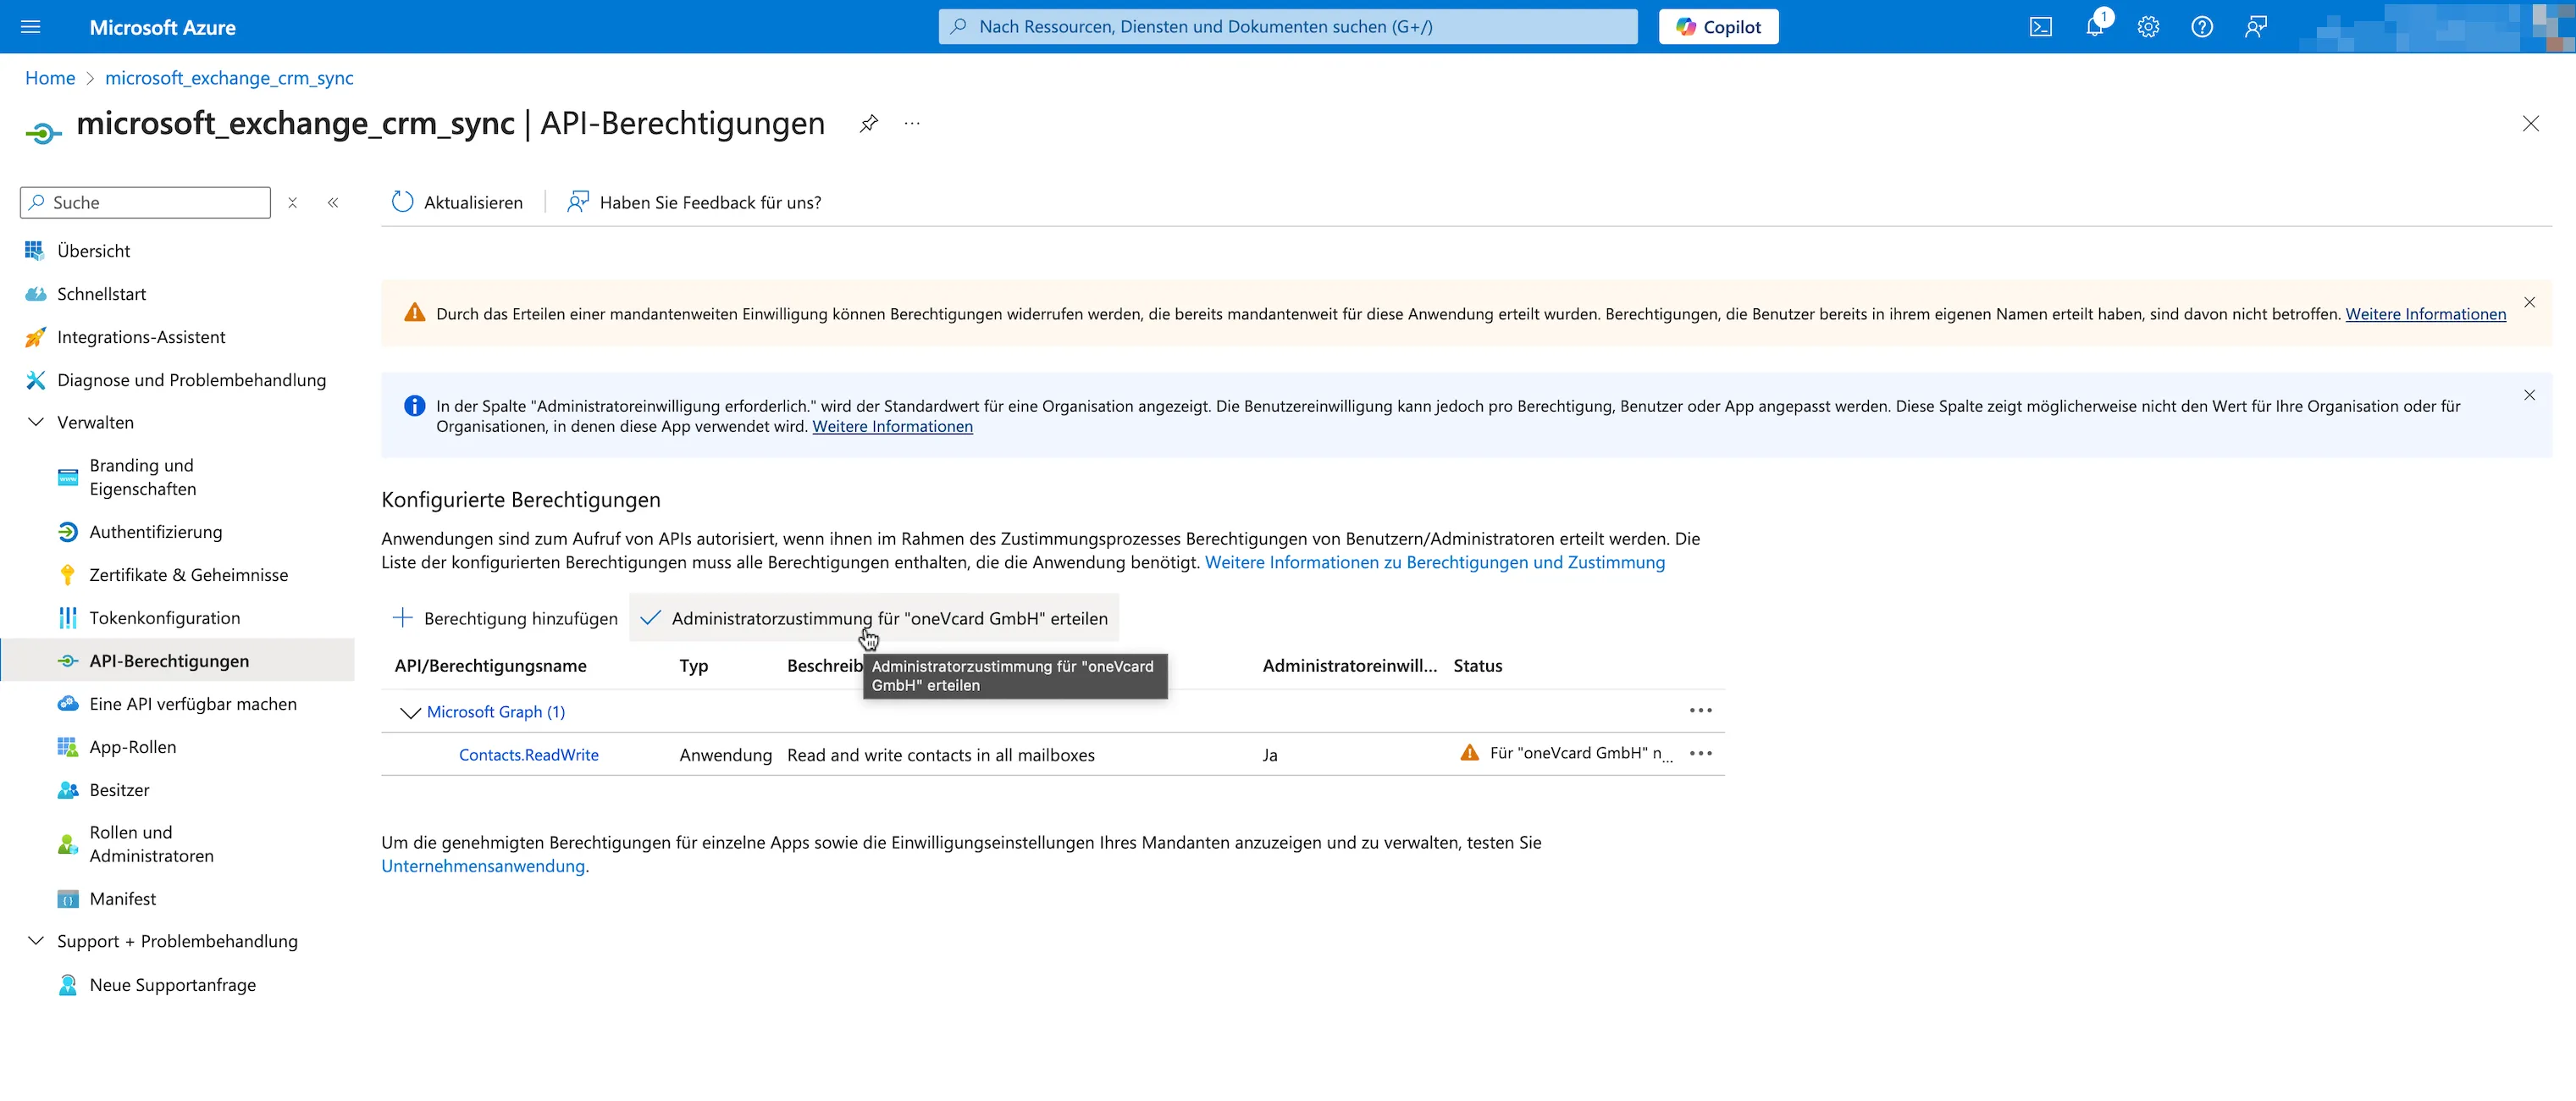
This completes the Microsoft setup.
Setup in oneVcard
-
Log in to oneVcard and select the team where you want to set up the integration.
-
Ensure that the Connect button is enabled for your digital business cards.
-
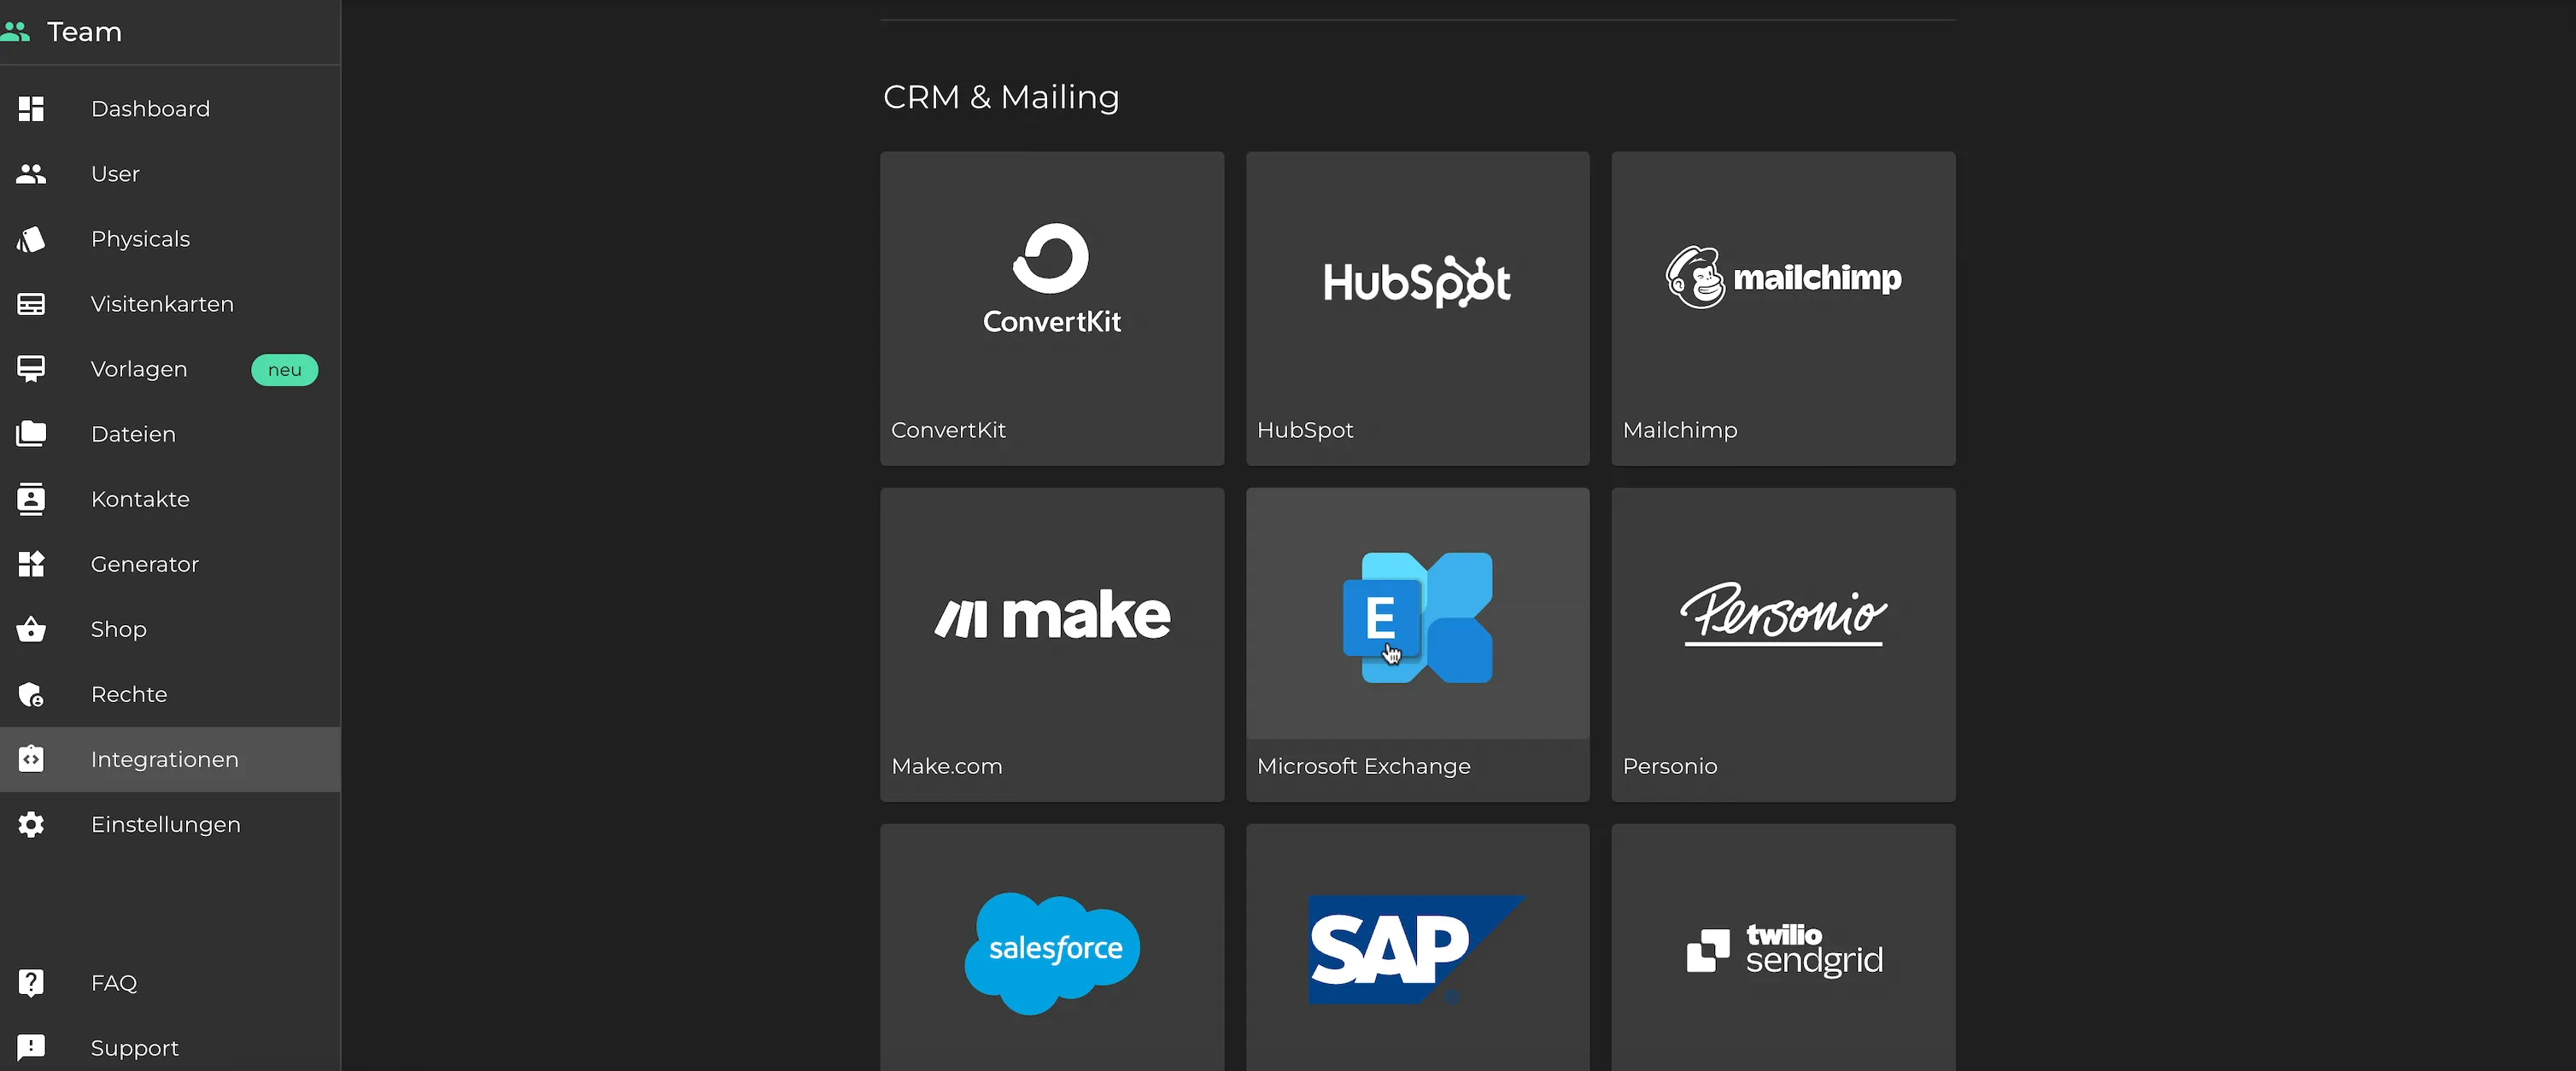
Navigate to the Integrations section in the sidebar.
-
Select Microsoft Exchange under CRM & Mailing.
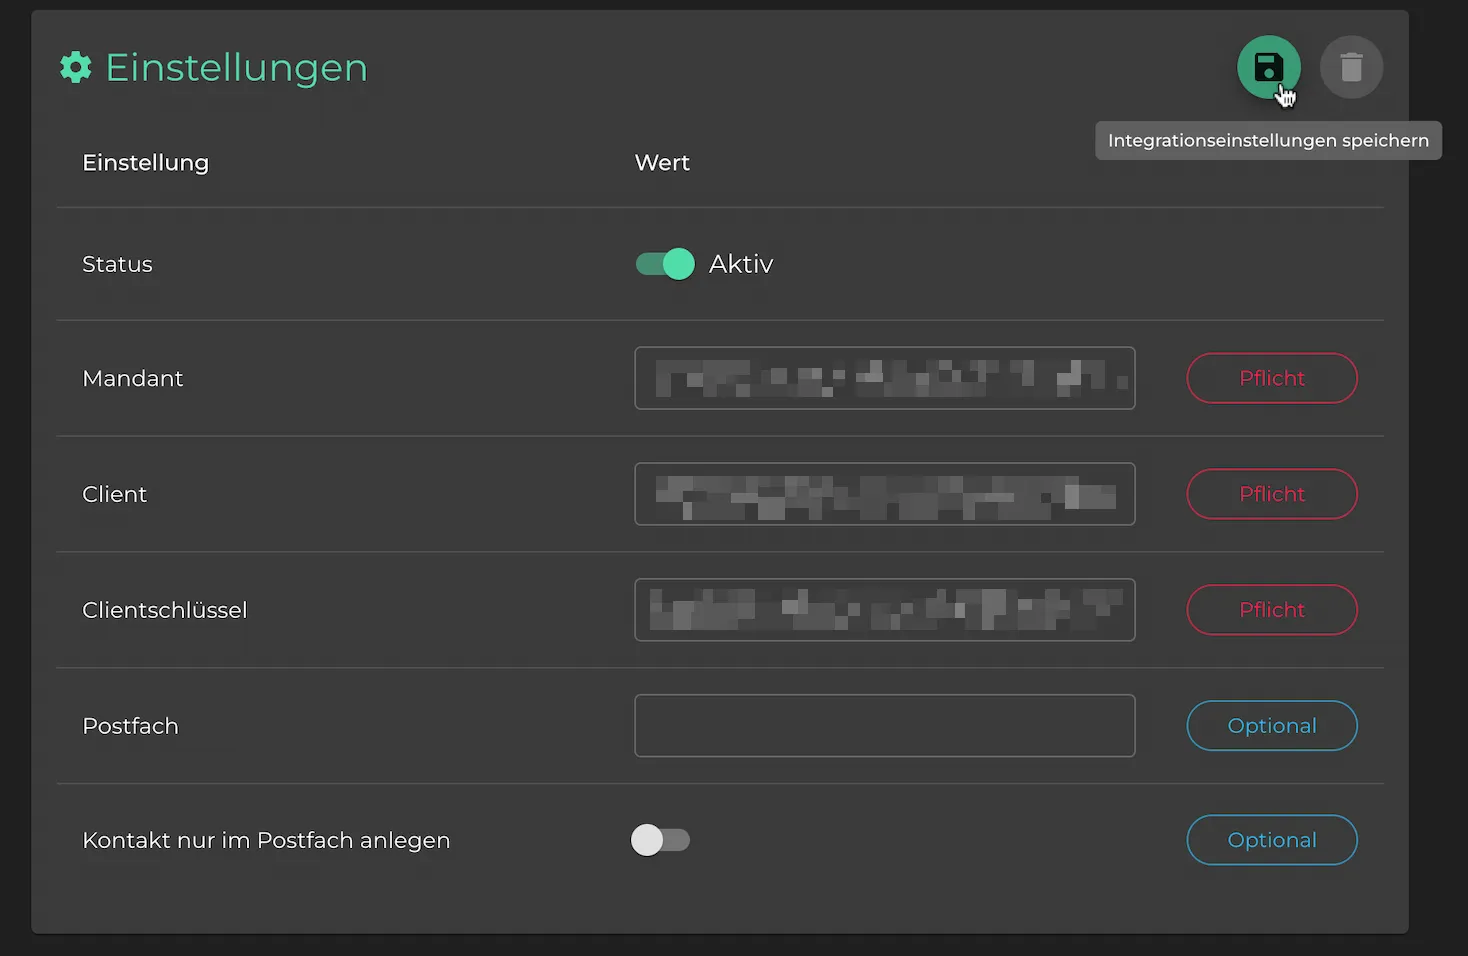
- Enter the data copied from Azure into the respective fields in the oneVcard integration and set the status to Active.
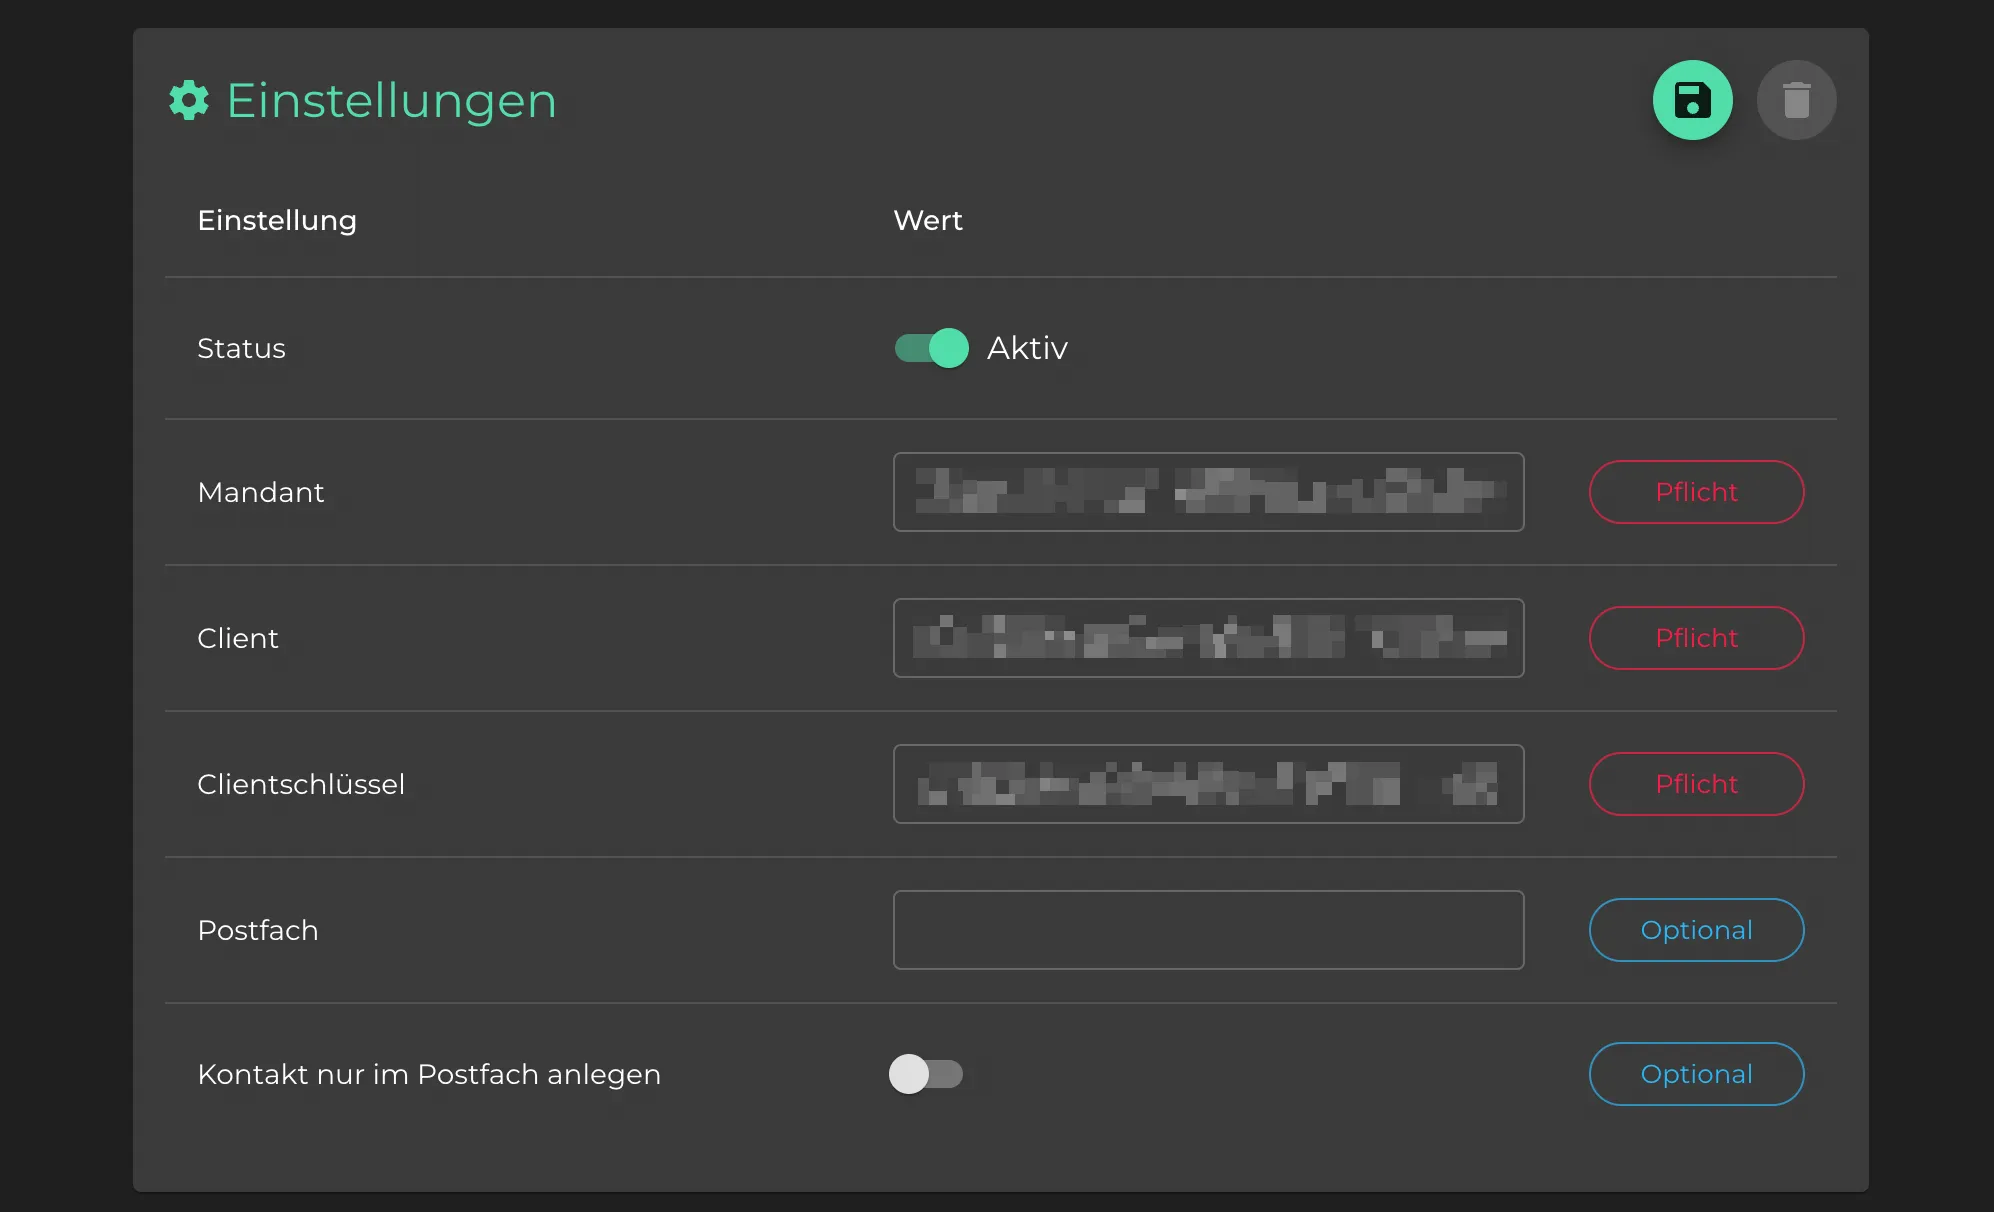
Note: If contacts should be stored in a specific mailbox, you can fill the Mailbox field with an email address. Use the toggle to decide whether contacts are stored exclusively or additionally in the mailbox.
Click the Save button at the top.
This completes the setup.
Testing the Integration
Finally, you can test the connection. Open a digital business card in your team and use the Connect button to create a test contact.
If the integration is correctly configured, a new Exchange contact will appear in the owner’s account with the entered details.