Salesforce Integration
EnterpriseSetup in Salesforce
To enable automatic synchronization of your leads, a new “Connected App” must be created in Salesforce.
Creating the Application
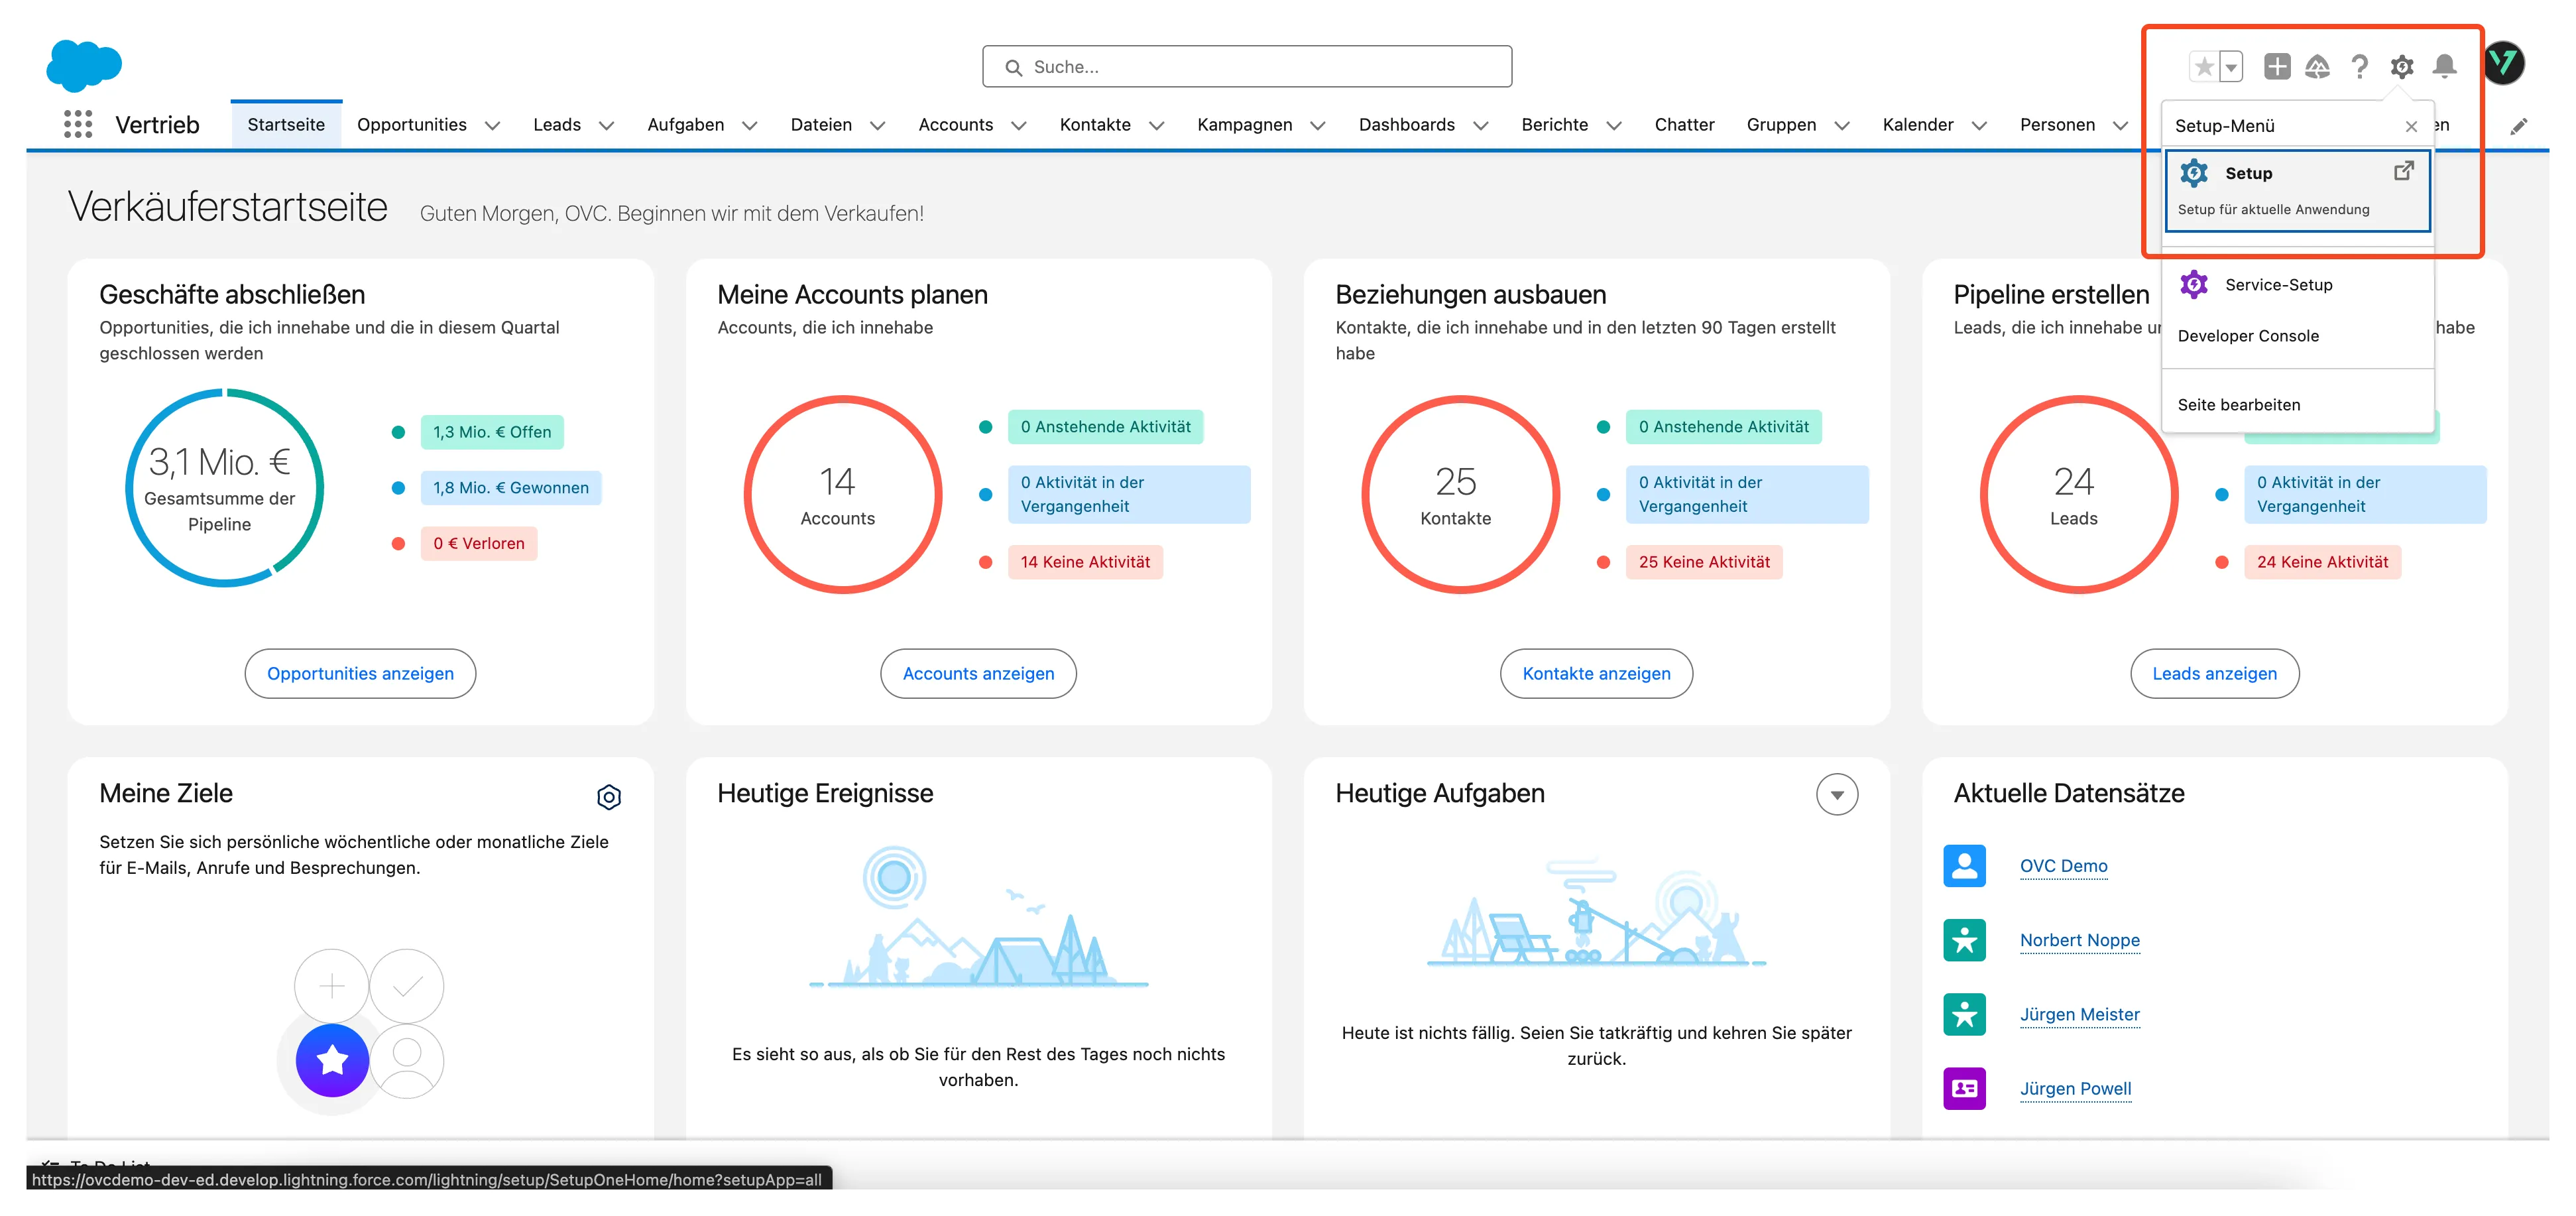
Click on the lightning bolt gear icon in the upper right corner. In the submenu, click on Setup.
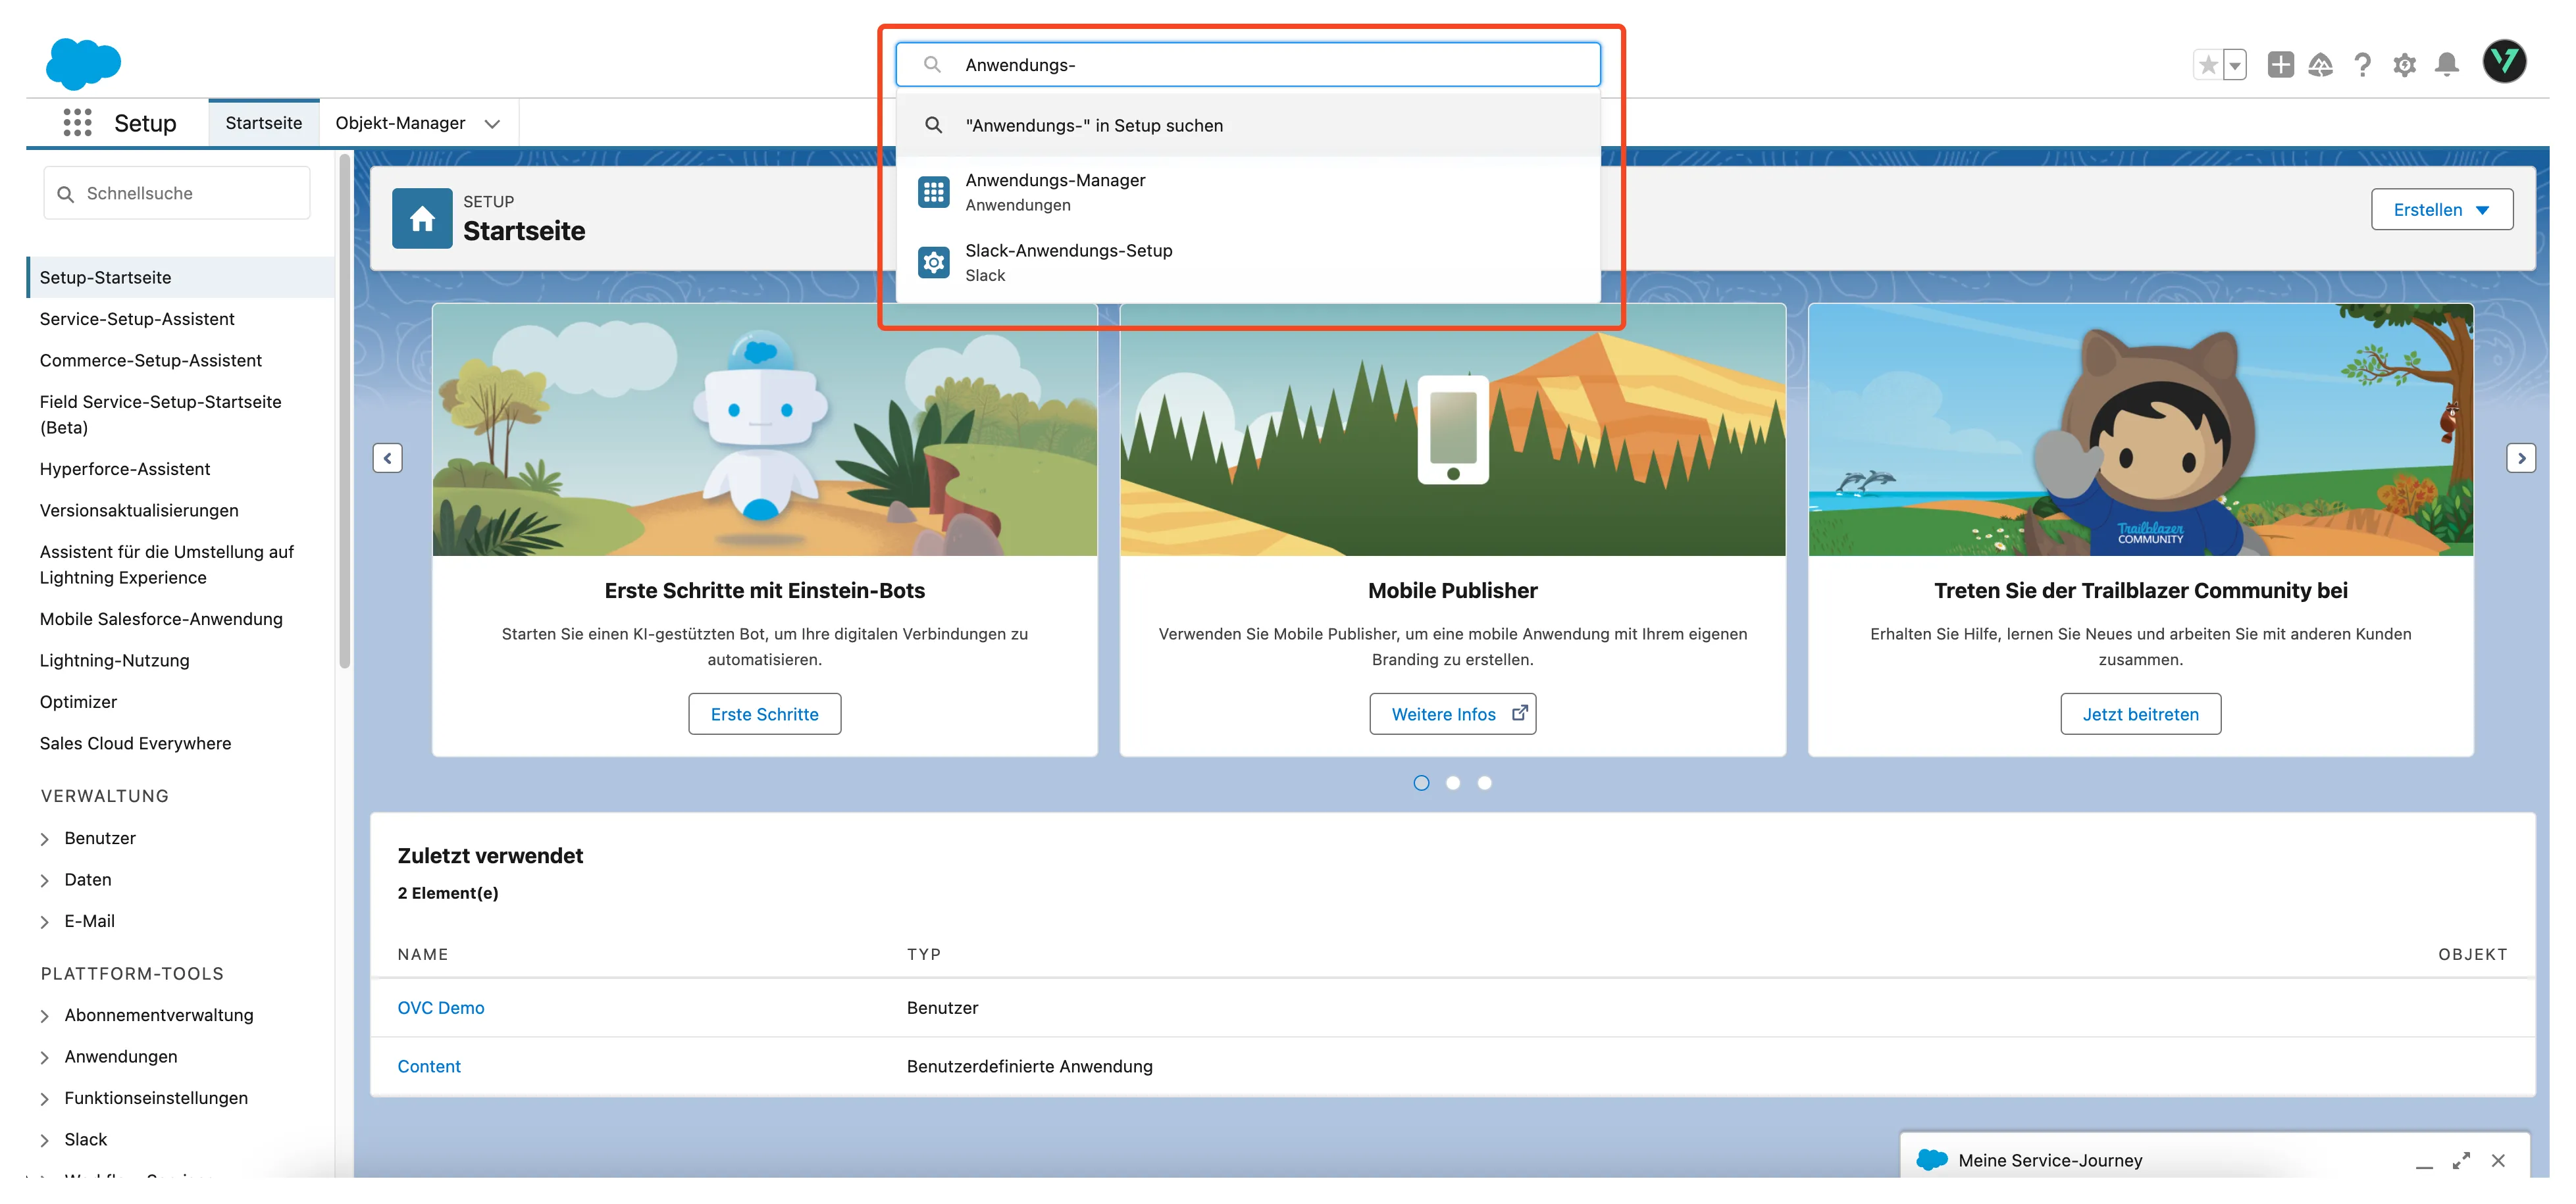
Enter “App Manager” in the search bar and click on the corresponding result.
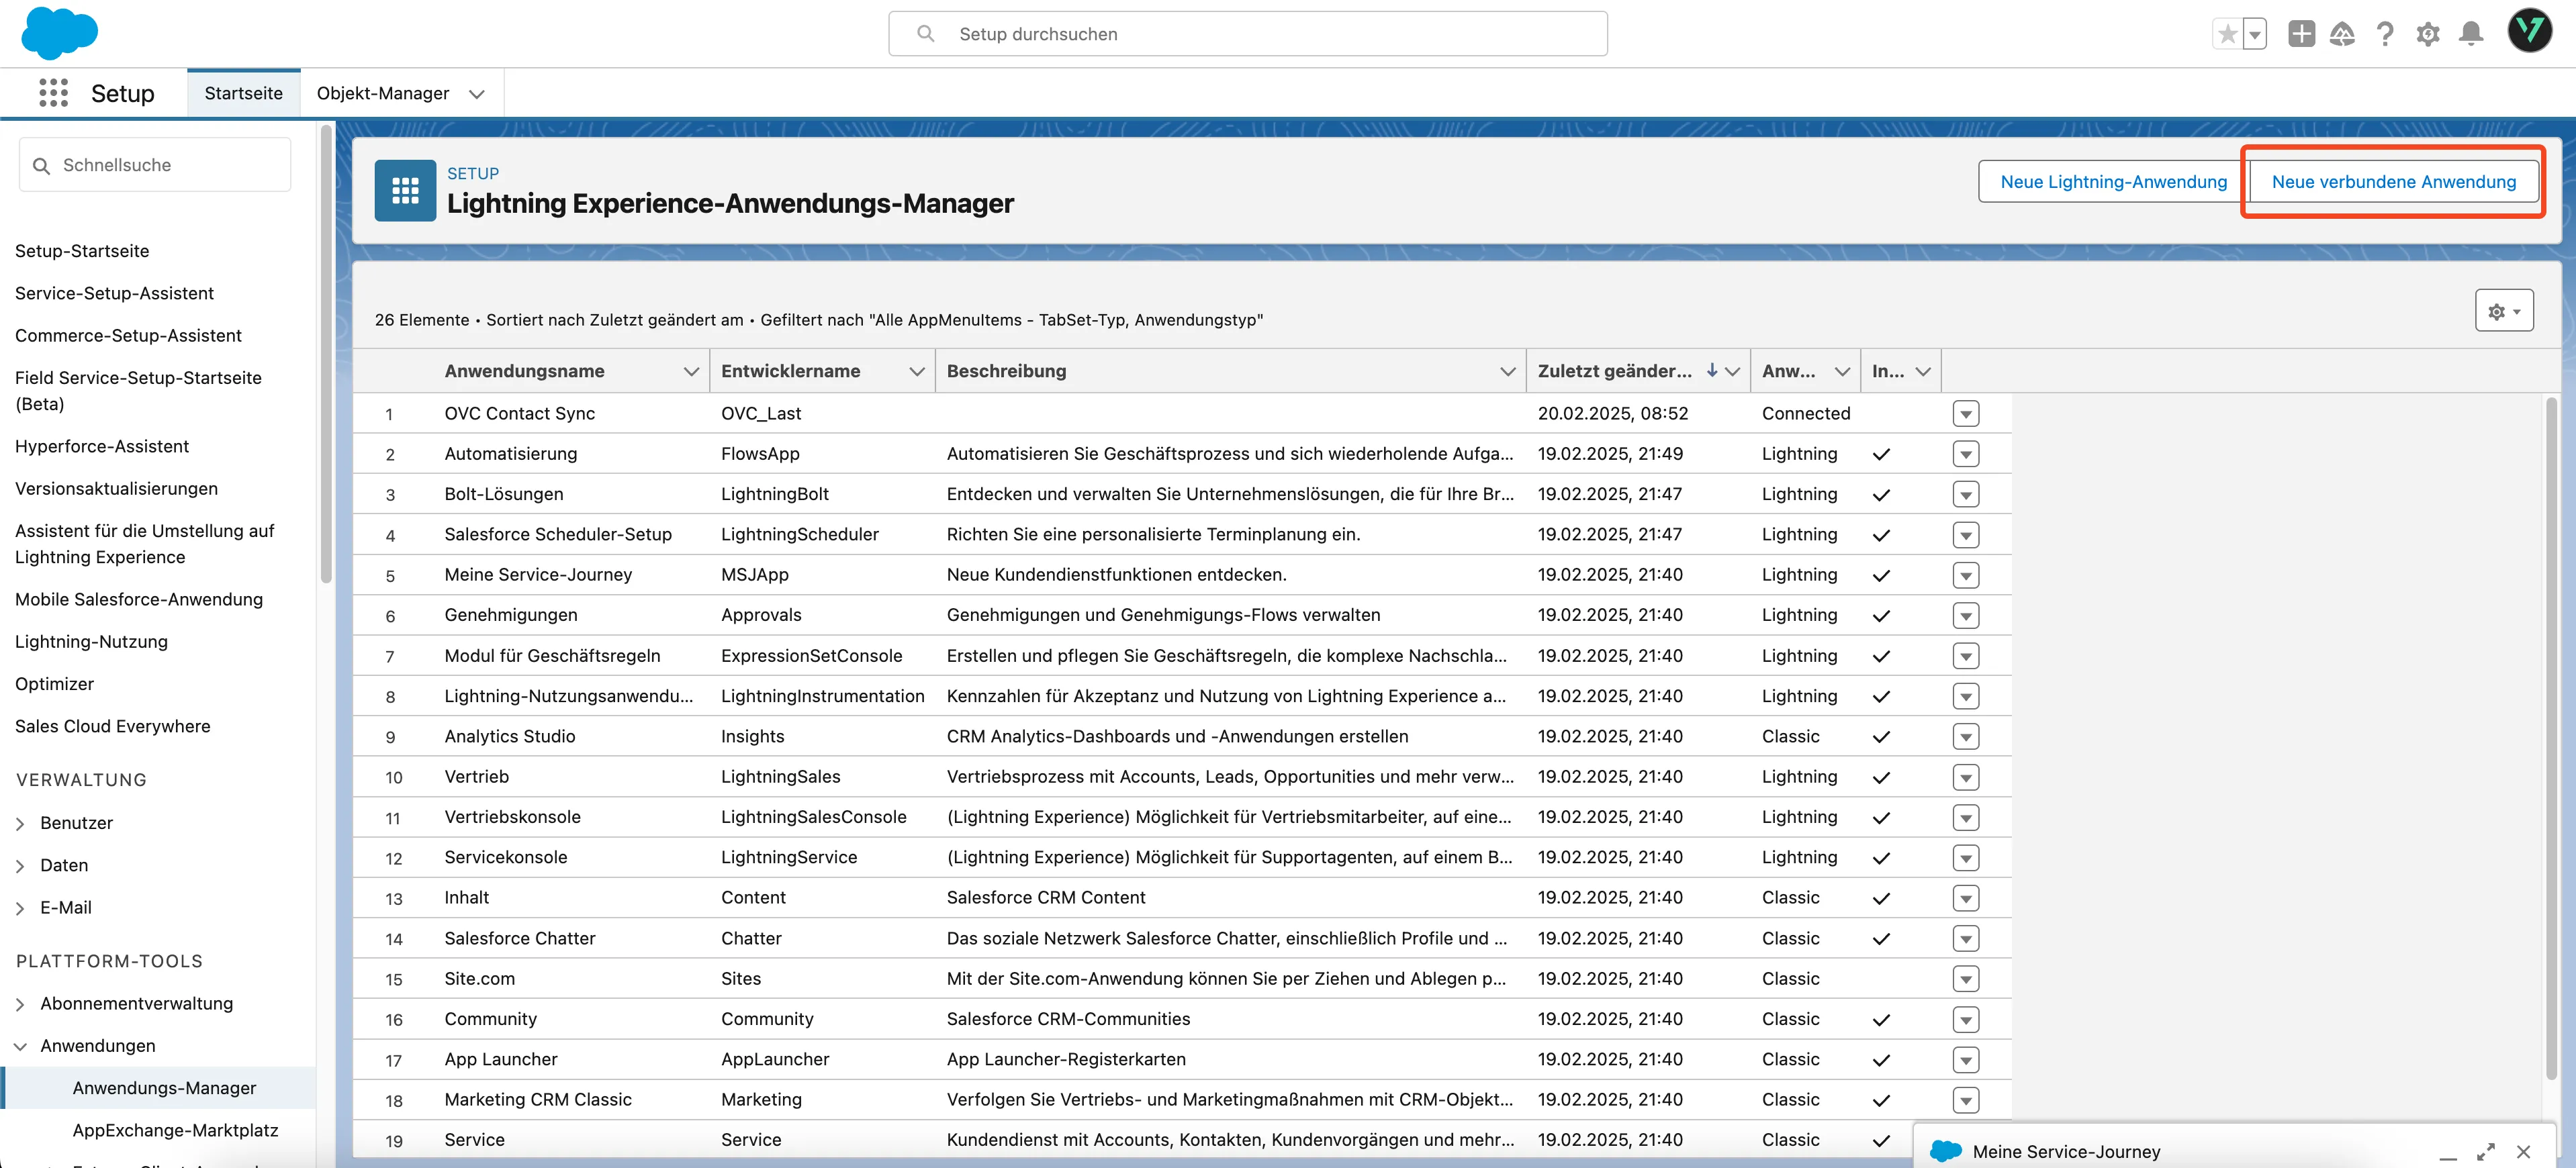
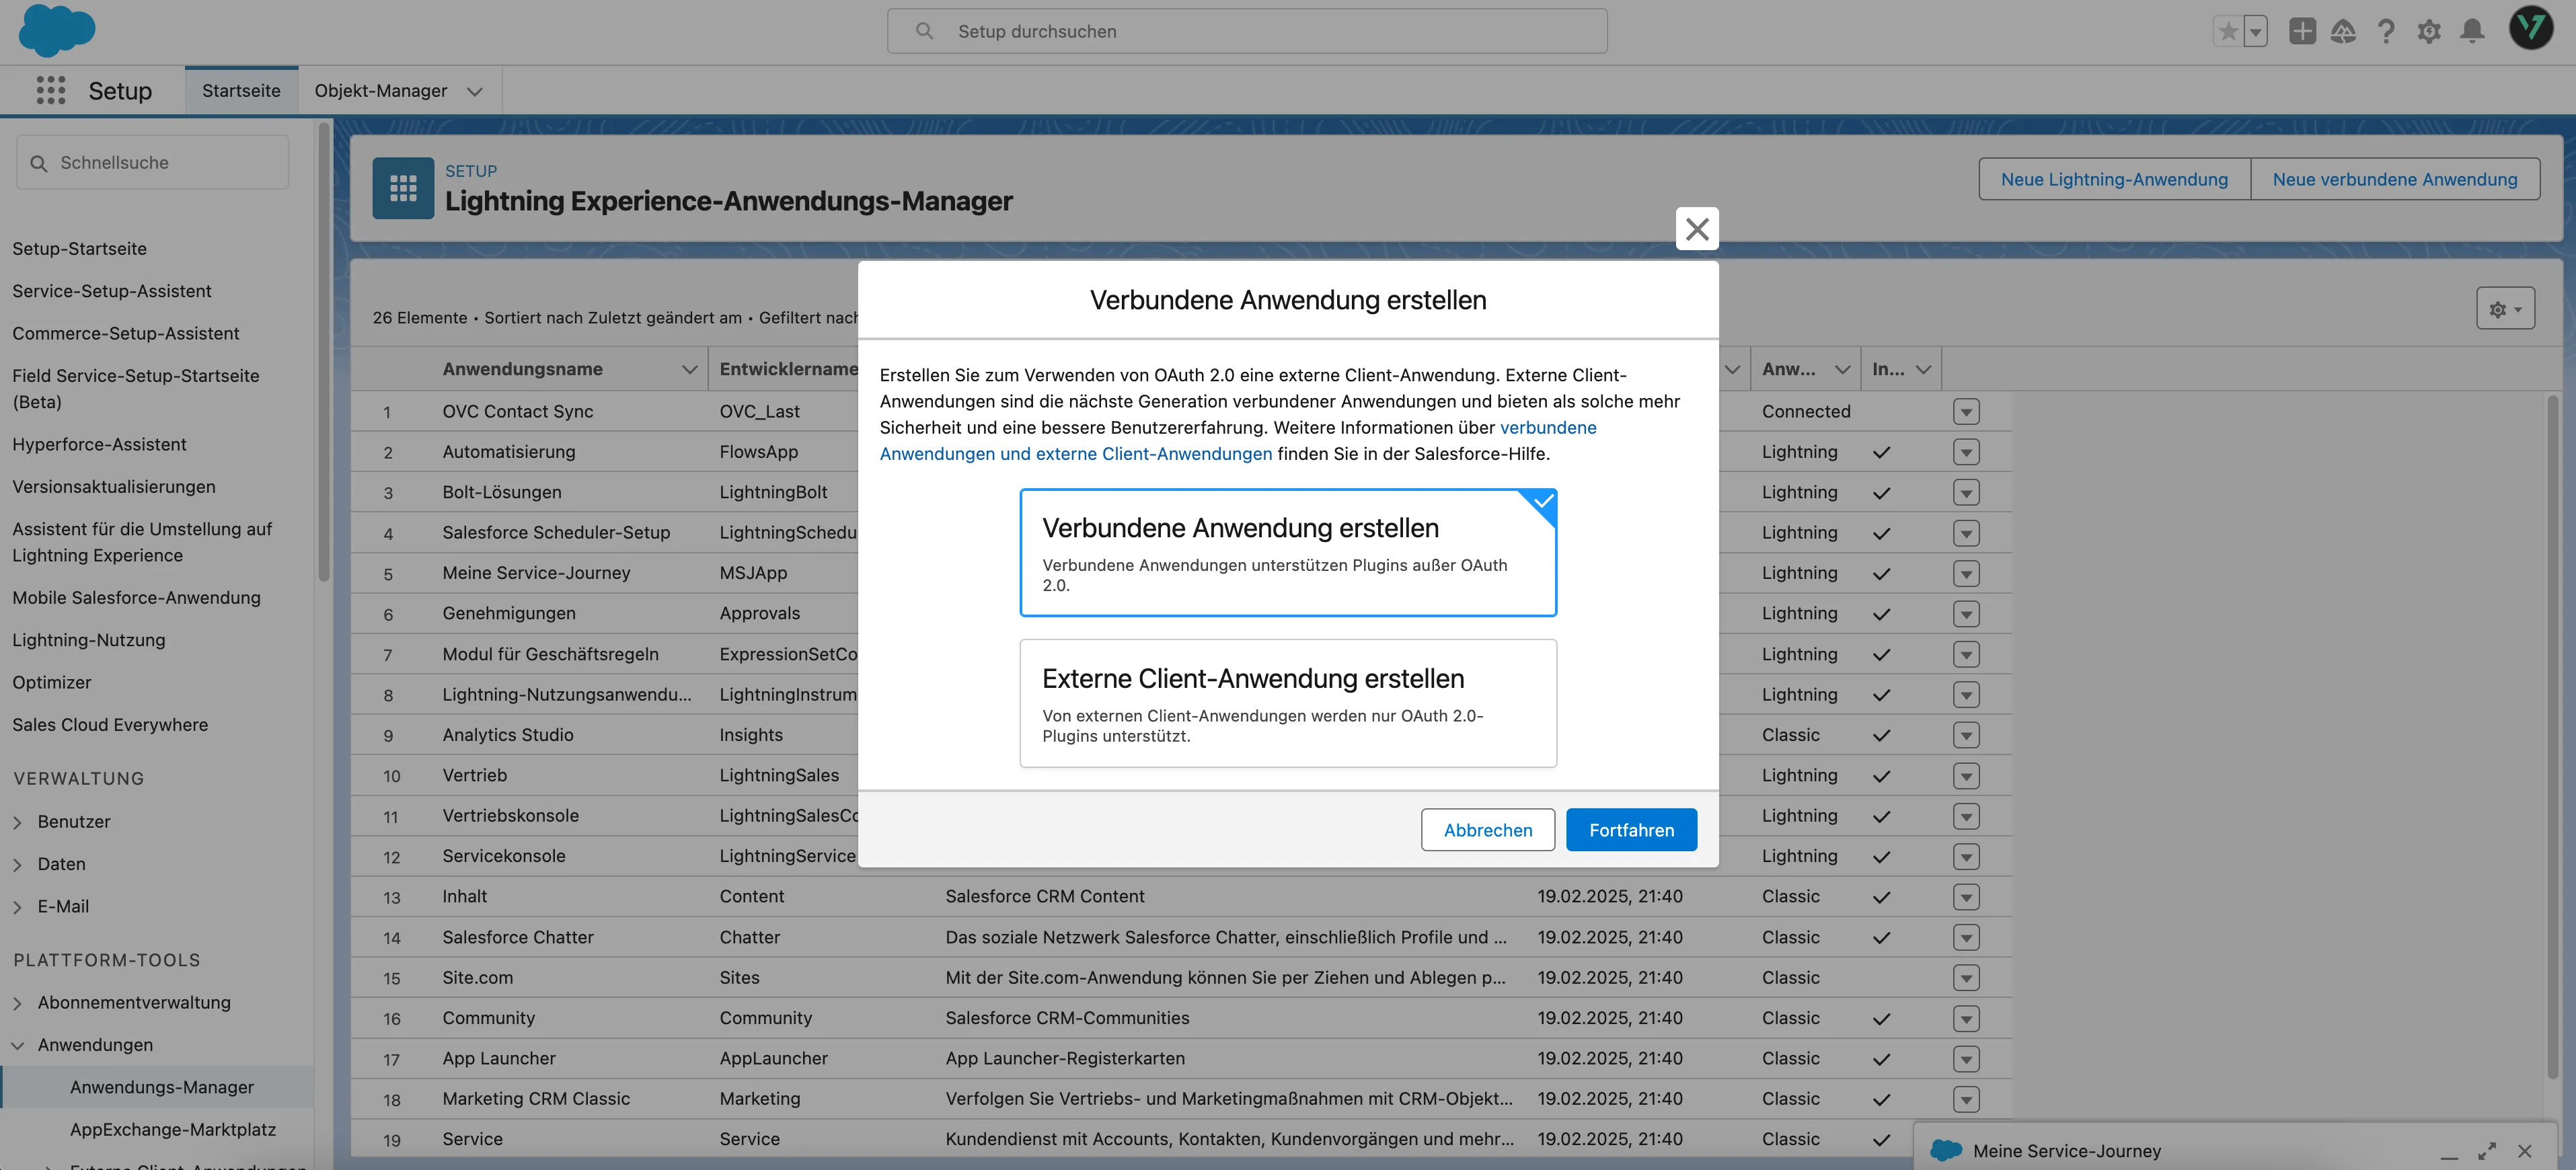
Next, click on the “New Connected App” button.
Select “Create Connected App” and then click on “Continue”.
Basic Information
Enter the following basic information:
Name: oneVcard CRM Sync
API Name: This will be automatically generated from the name you entered previously
Contact Email: Enter a contact email
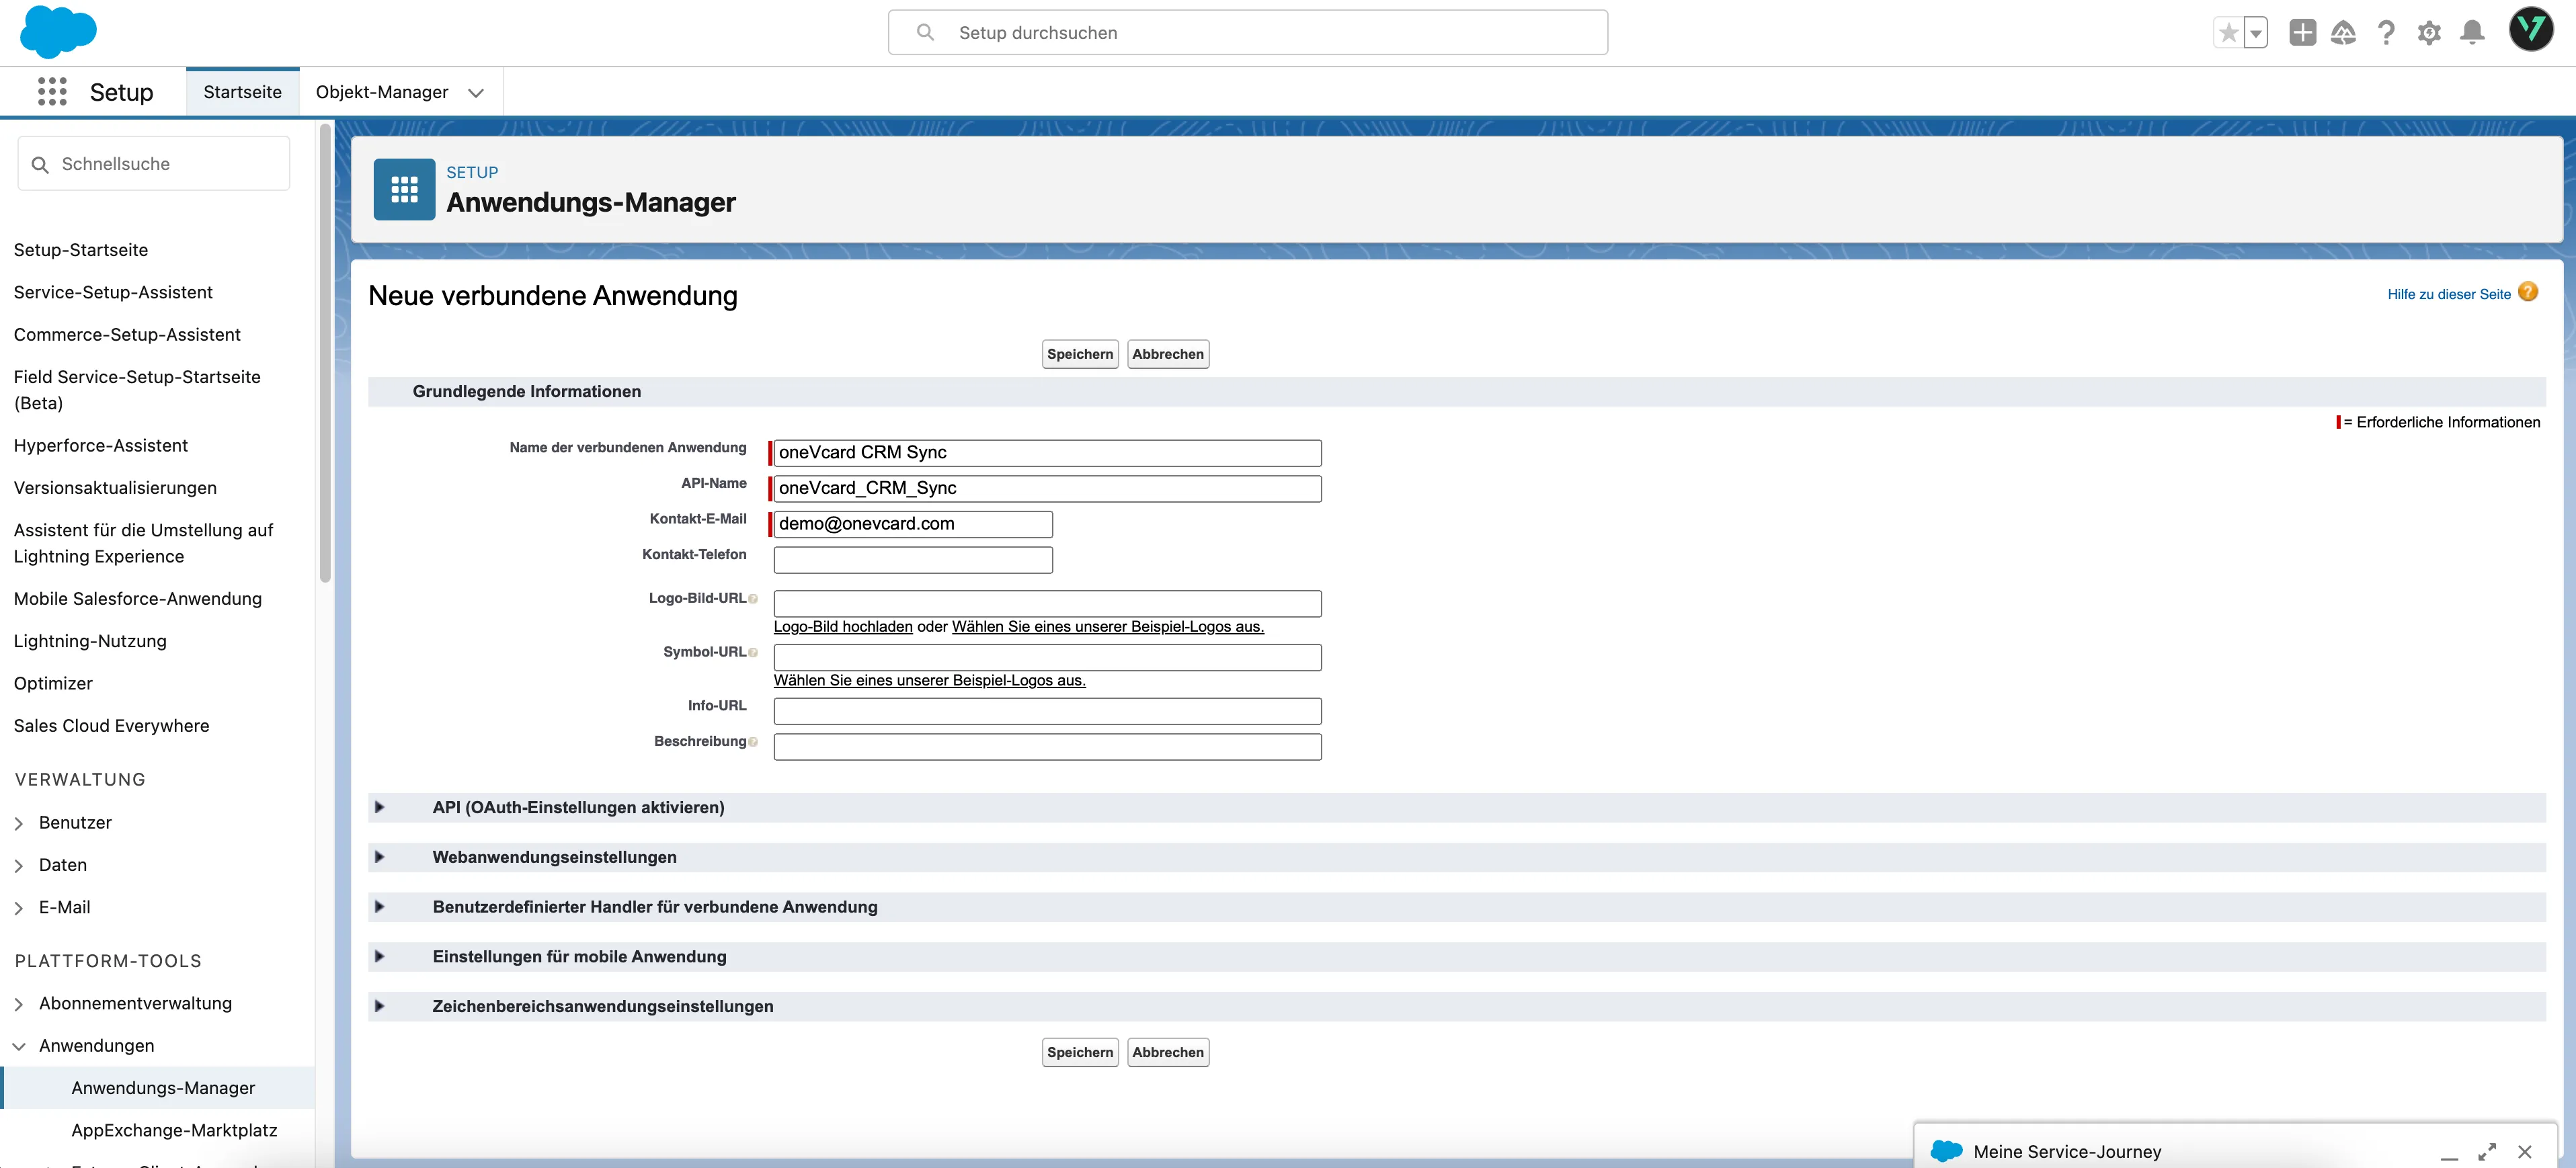
Now go to the “API (Enable OAuth Settings)” section.
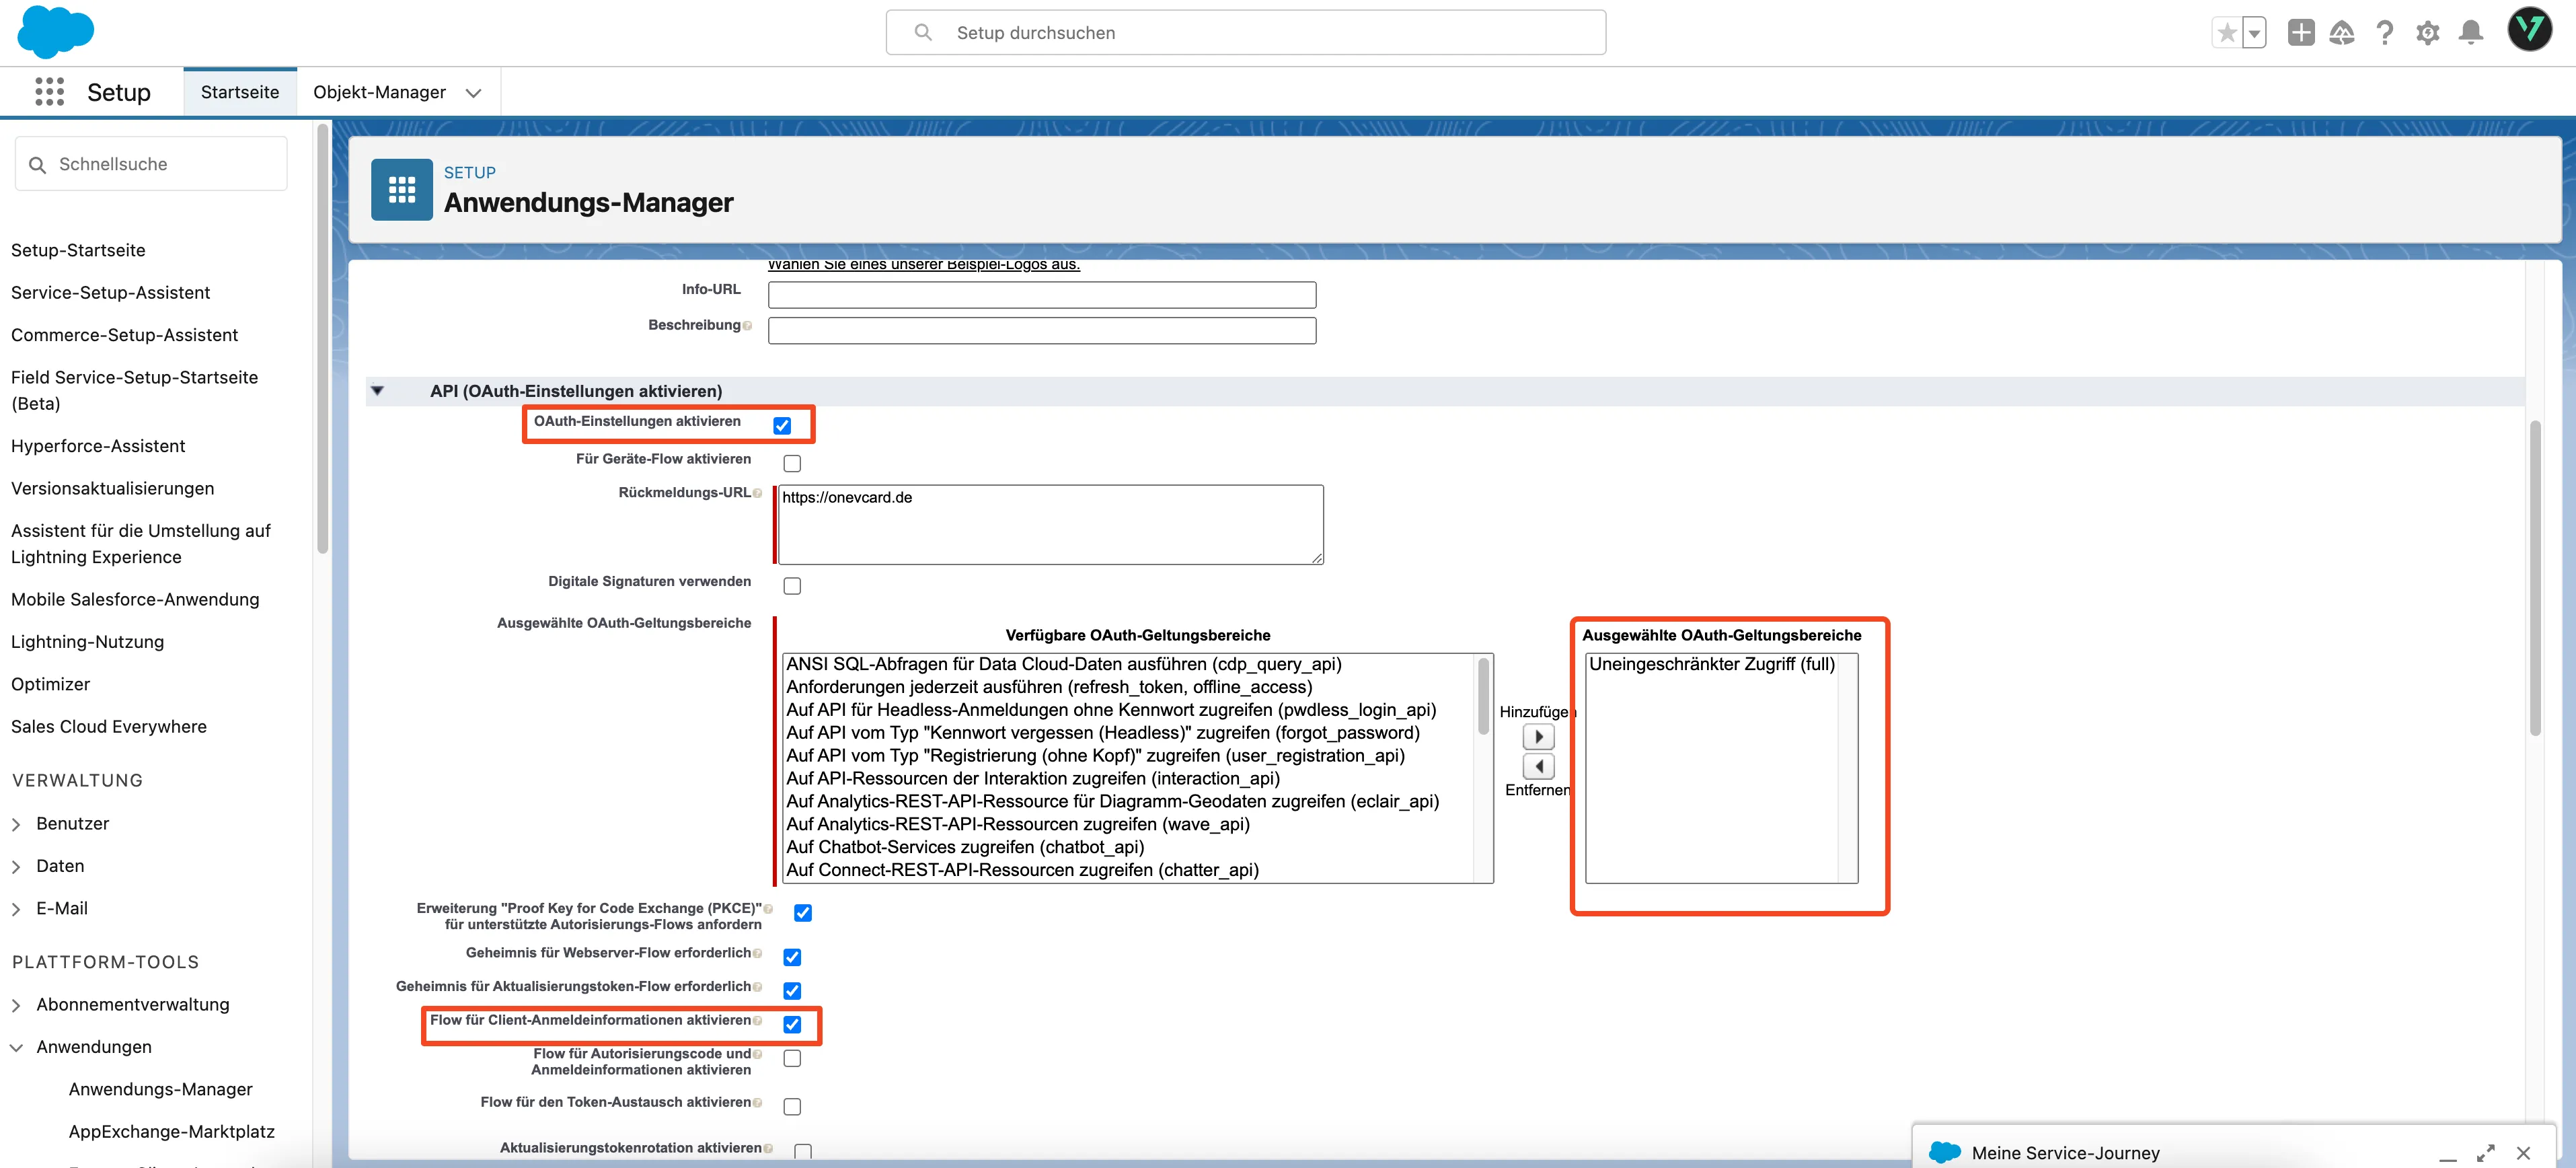
Enable the “Enable OAuth Settings” option.
Fill in the Callback URL with the value “https://onevcard.app”. This URL is not used by Salesforce but is a required field.
Now add the scope “Full Access (full)” (permissions can be controlled via the user set later).
Enable the “Enable Client Credentials Flow” option.
You have now completed the basic settings for the application. Click on the “Save” button at the top.
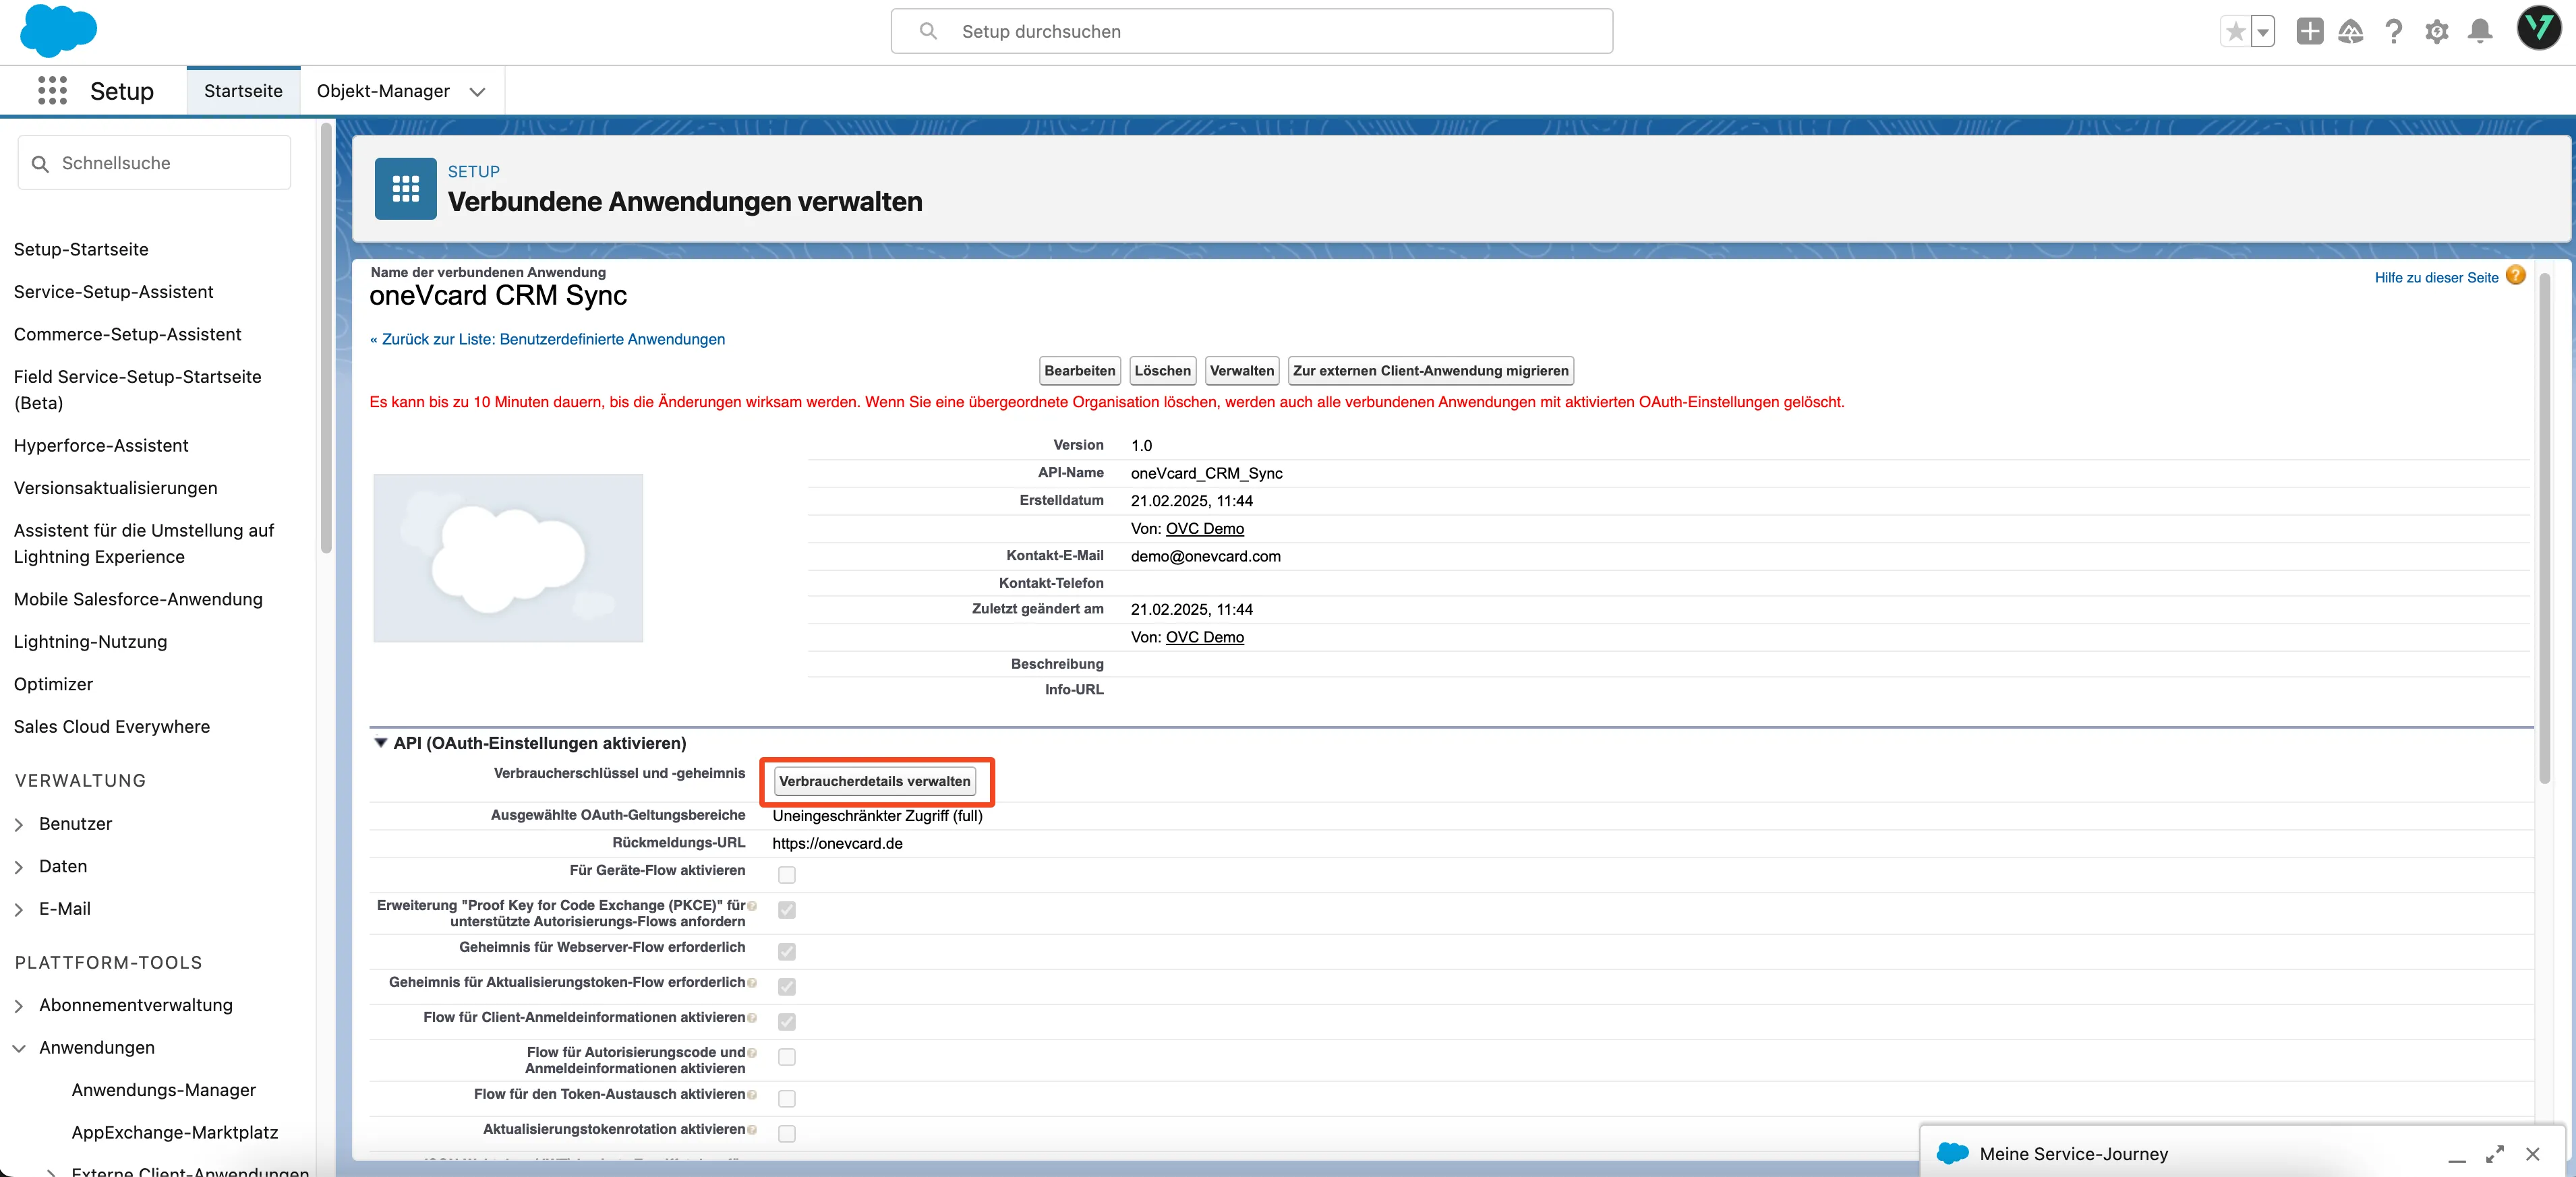
Copying Consumer Details
Click on “Manage Consumer Details”.
 +
+
Copy the Consumer Key and Consumer Secret to a separate location so you can enter them later in oneVcard.
Now click on “Cancel” to return to the application.
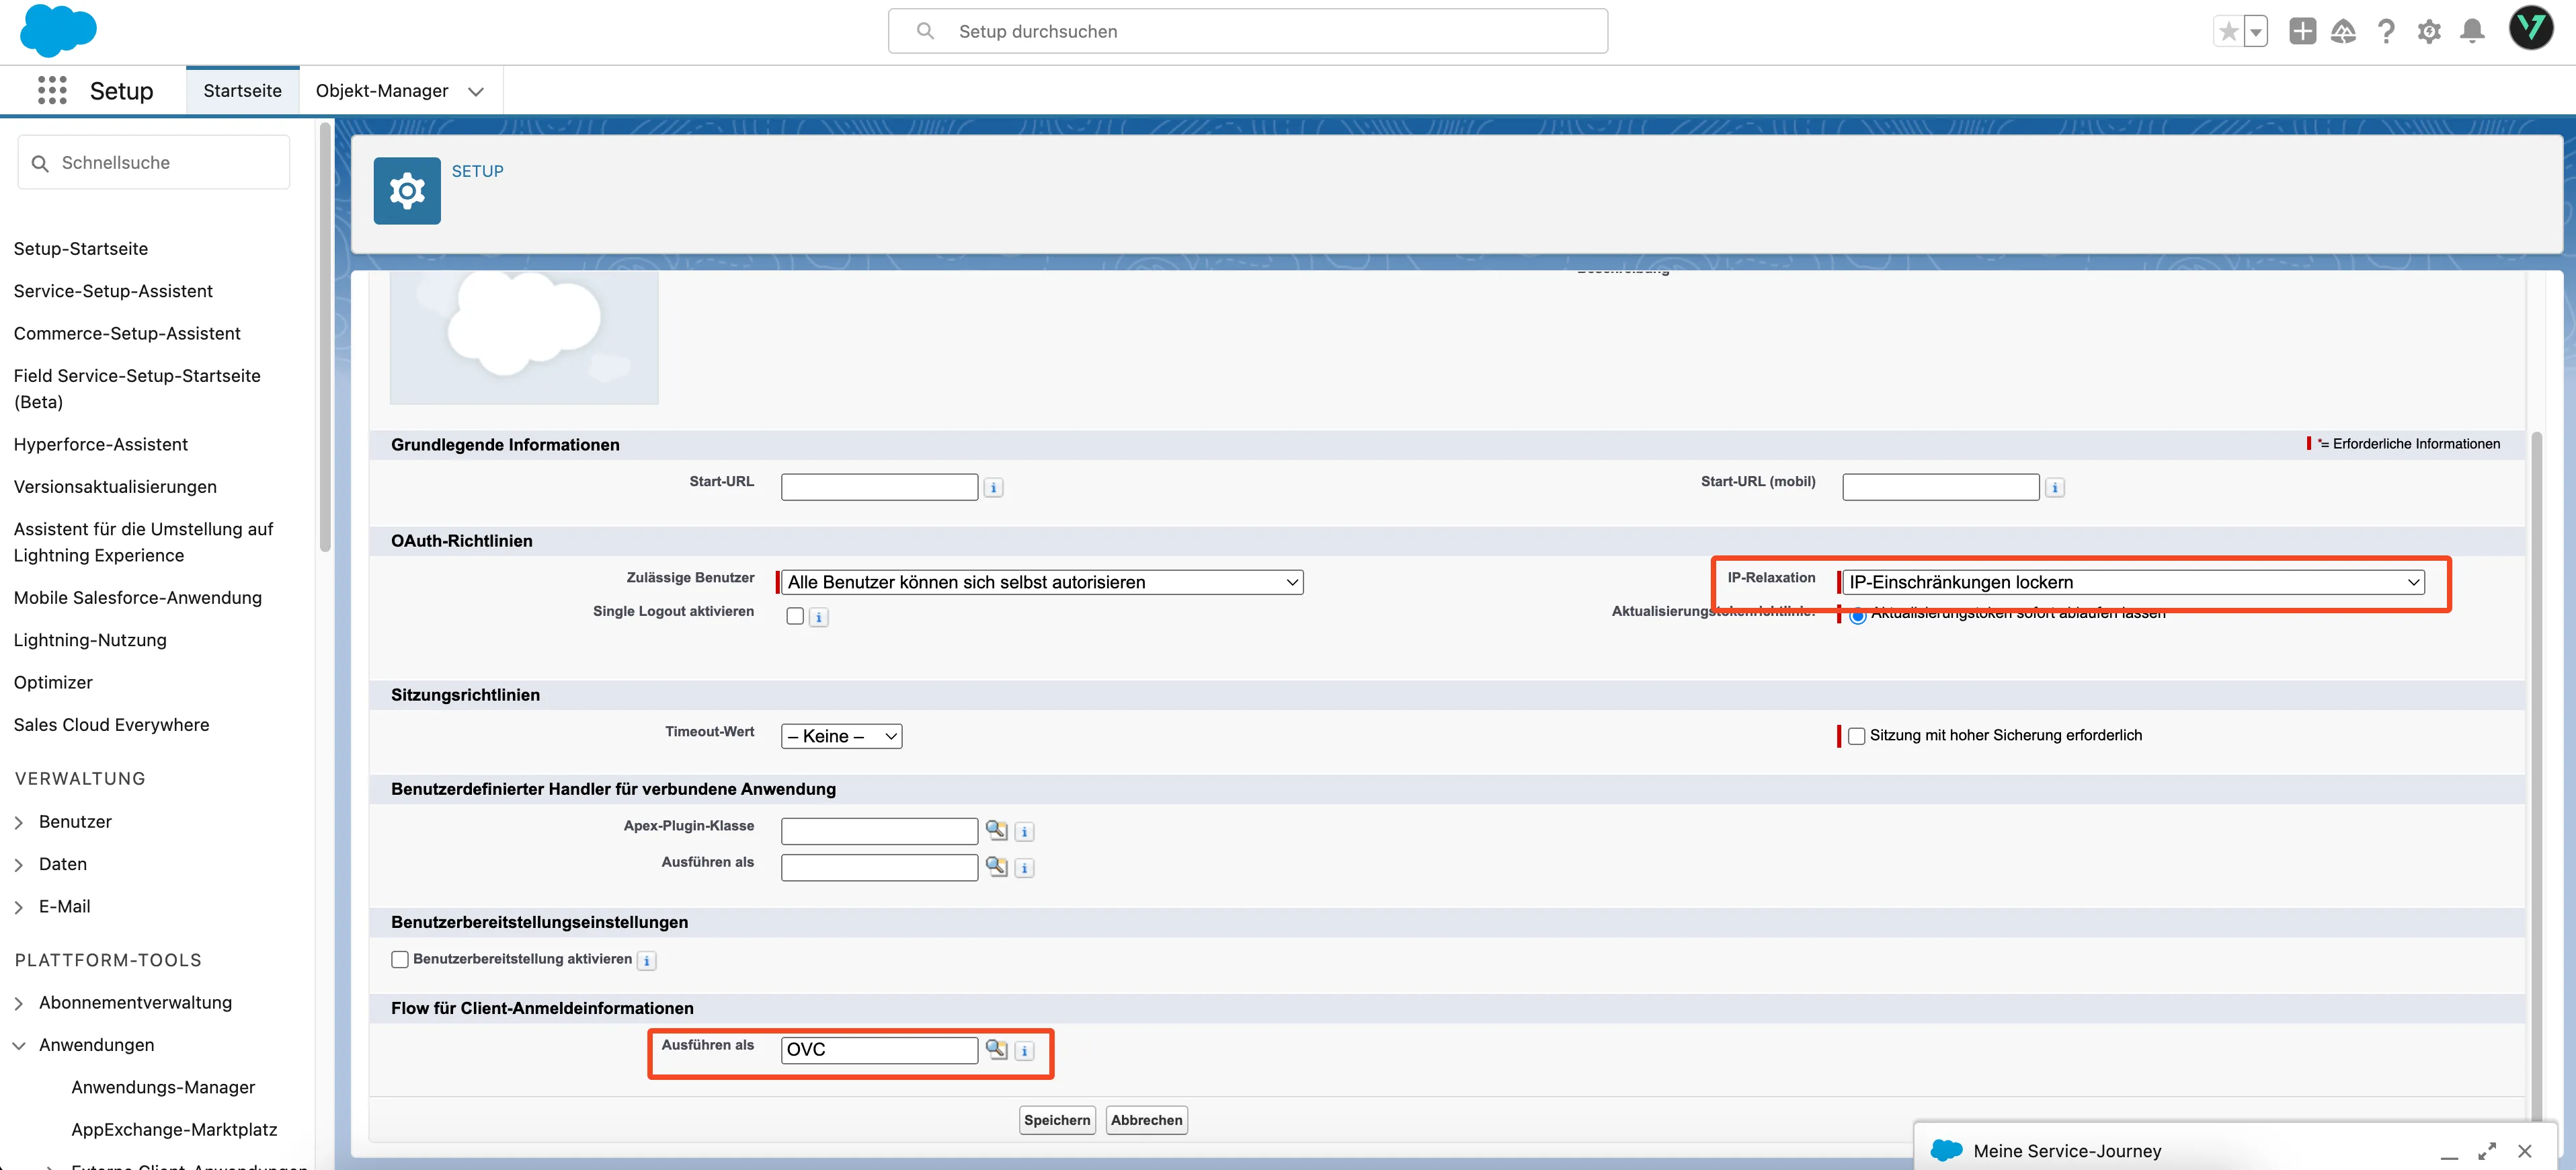
Edit Policies
Click on the “Manage” button at the top, then on the newly opened page, click on “Edit Policy”.
Enter the following values:
IP Relaxation: Relax IP Restrictions
Run As: Select the user who will later create the contact (they must have the appropriate permissions)
Finish the editing by clicking the “Save” button at the bottom.
The setup in Salesforce is now complete.
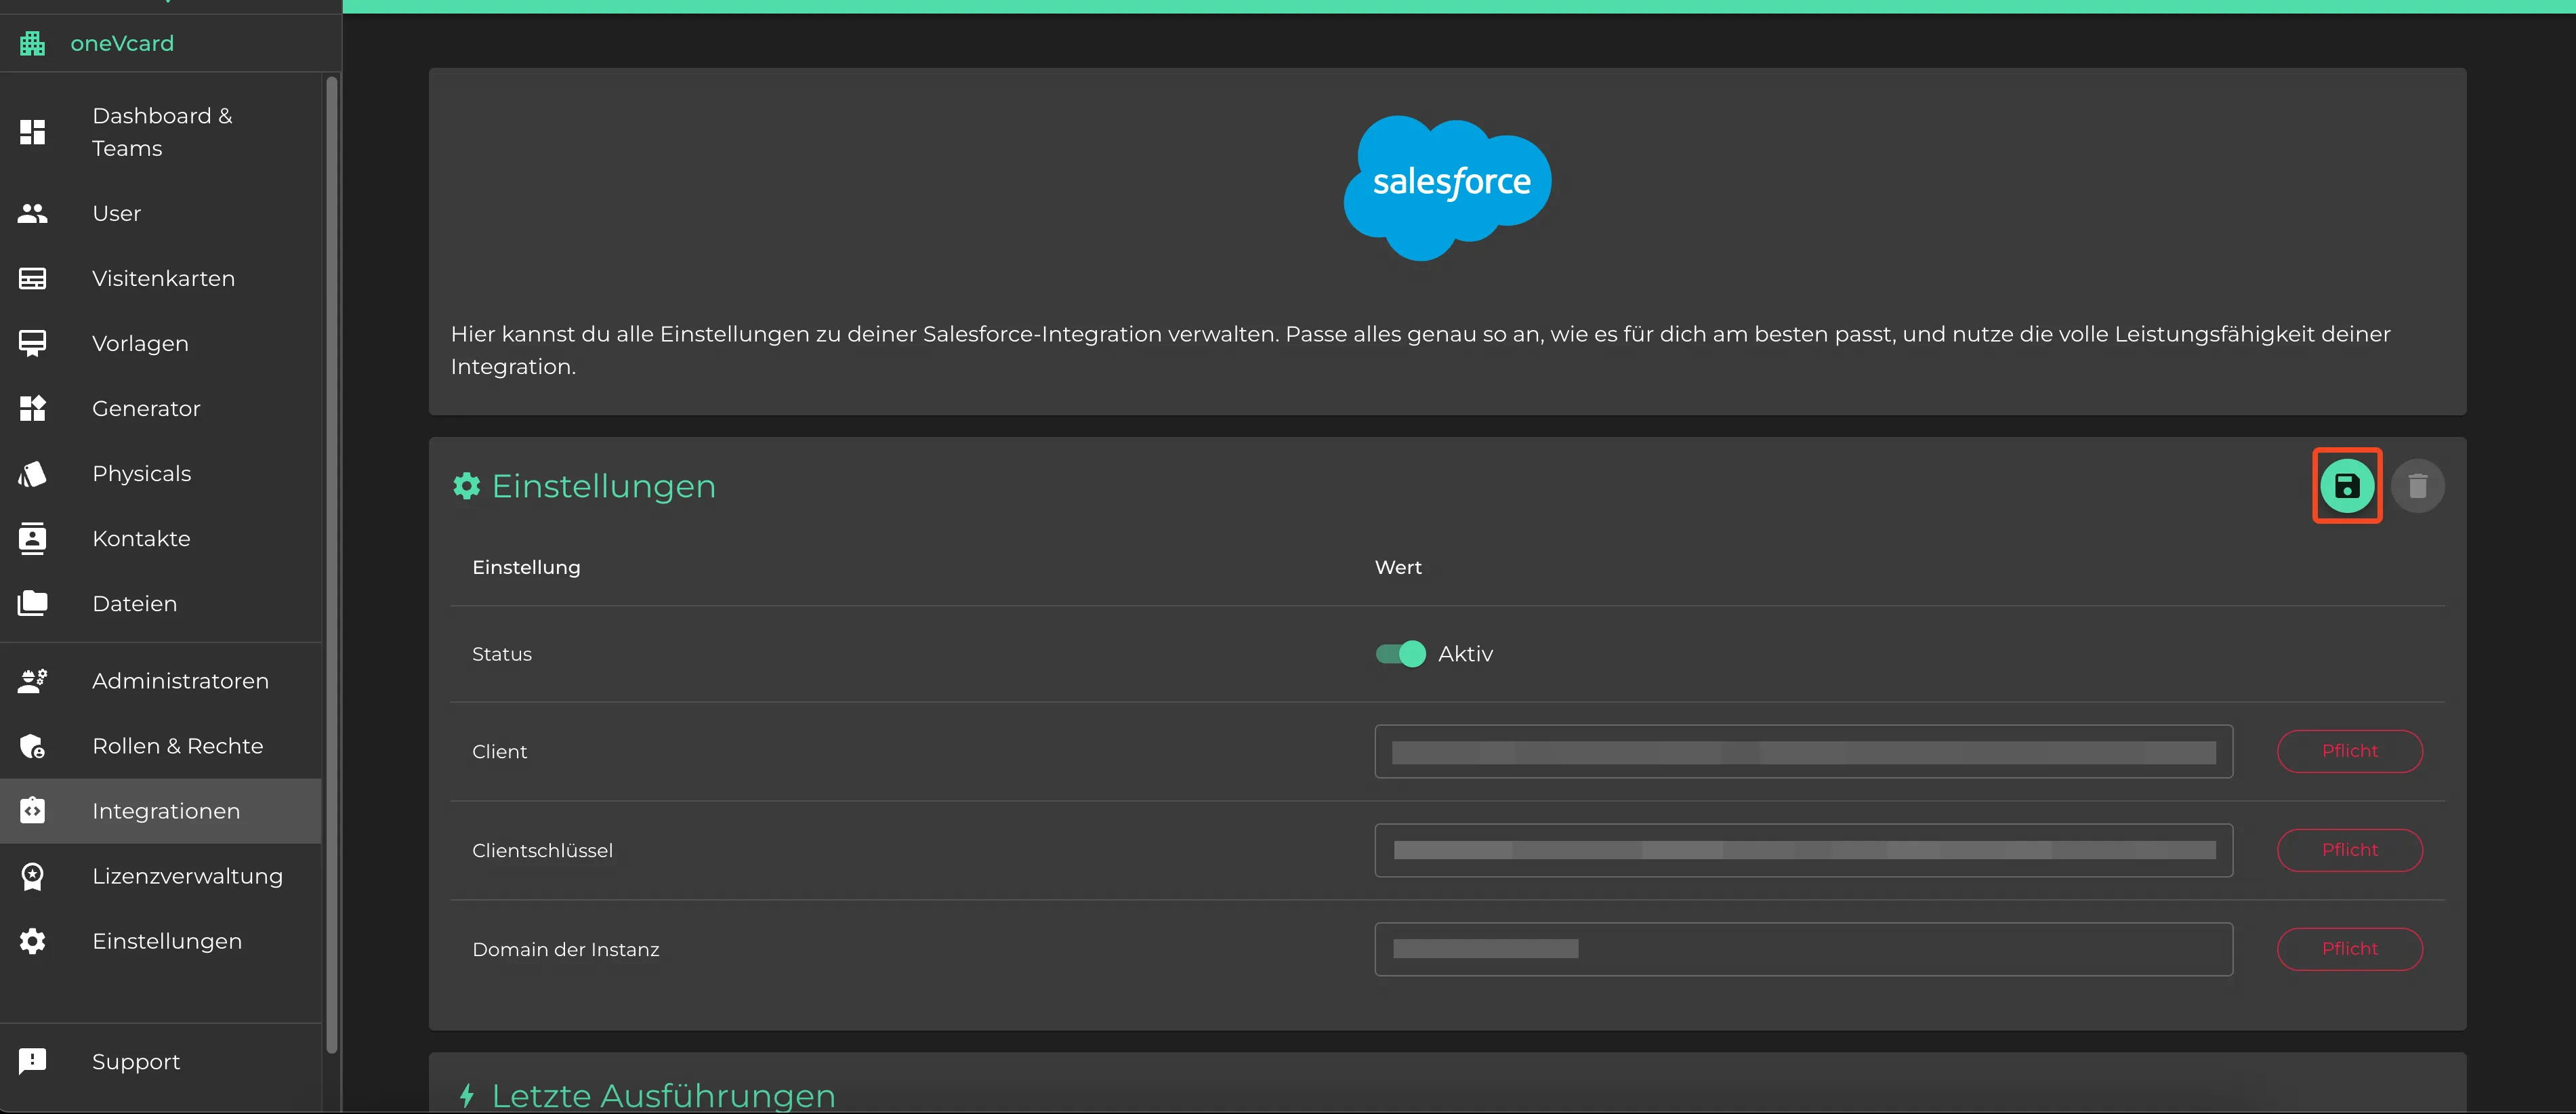
Setup in oneVcard
Log in to oneVcard and go to the Teams overview. Select the team for which the integration should be set up.
Make sure the “Connect” button for your team’s digital business cards is active.
Click on “Integrations” in the sidebar.
Now select “Salesforce” under CRM & Mailing.
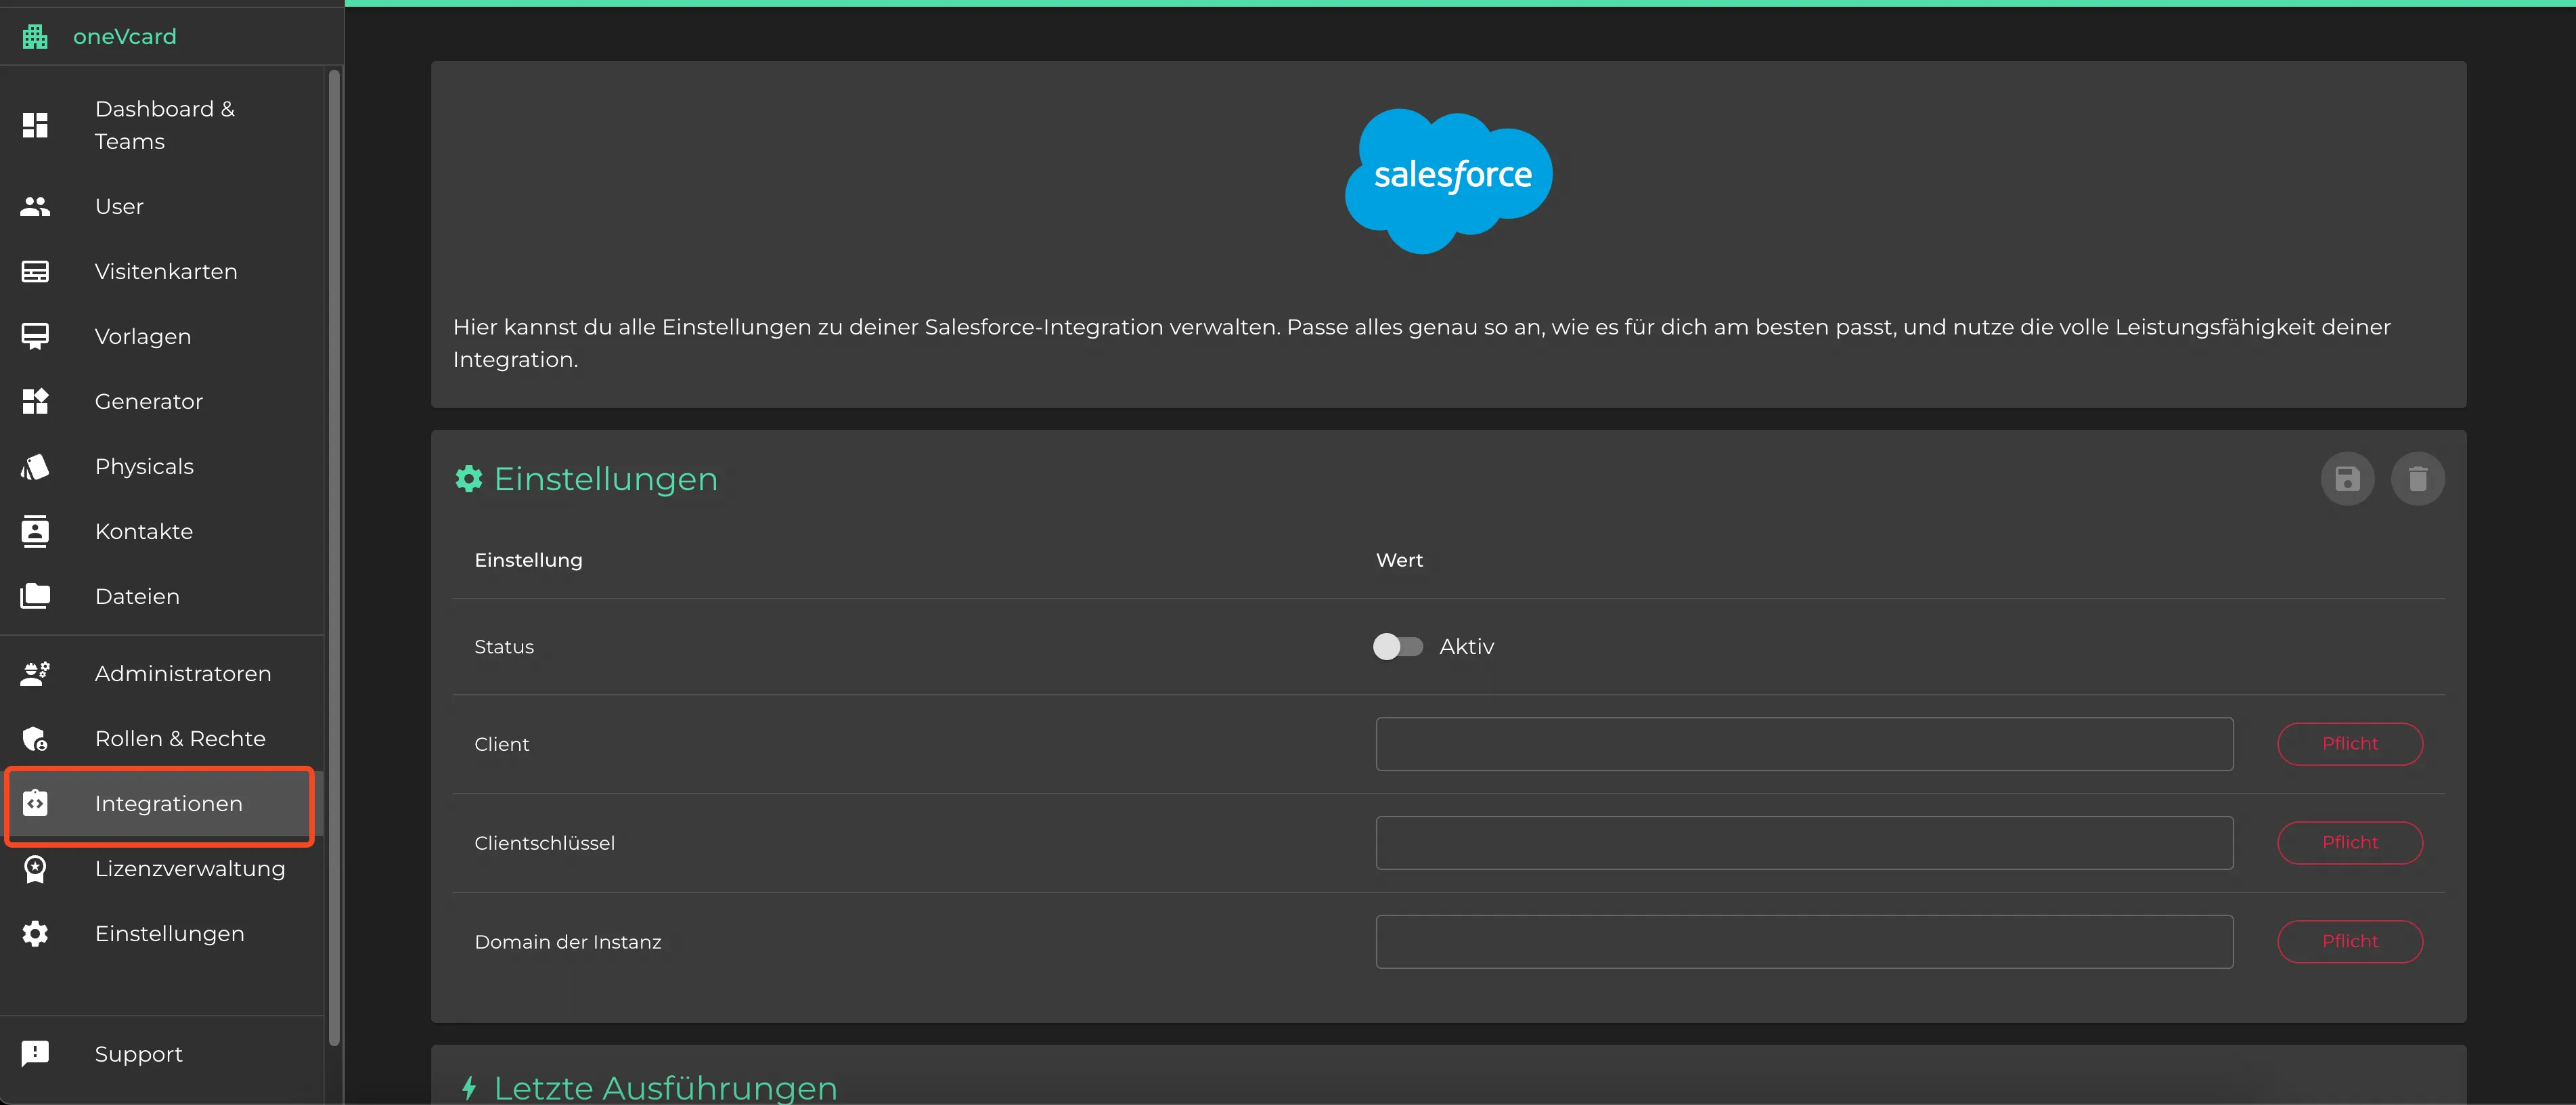
Fill in the copied data from Salesforce into the oneVcard configuration:
Consumer Key in “Client”
Consumer Secret in “Client Secret”
Your Salesforce instance domain in “Instance Domain” (only the value before “salesforce.com”)
Now click on the “Save” button at the top.