Connecting and Setting Up oneVcard Teams Enterprise with Google Workspace
EnterpriseThis article describes the requirements and execution of the Google Workspace integration to automatically create and maintain user and business card data in oneVcard.
Technical Requirements
- oneVcard Teams Enterprise Subscription (paid)
- Google Workspace
- Google Administrator with necessary permissions
A. Setup in Google
A1. Enable Admin SDK API
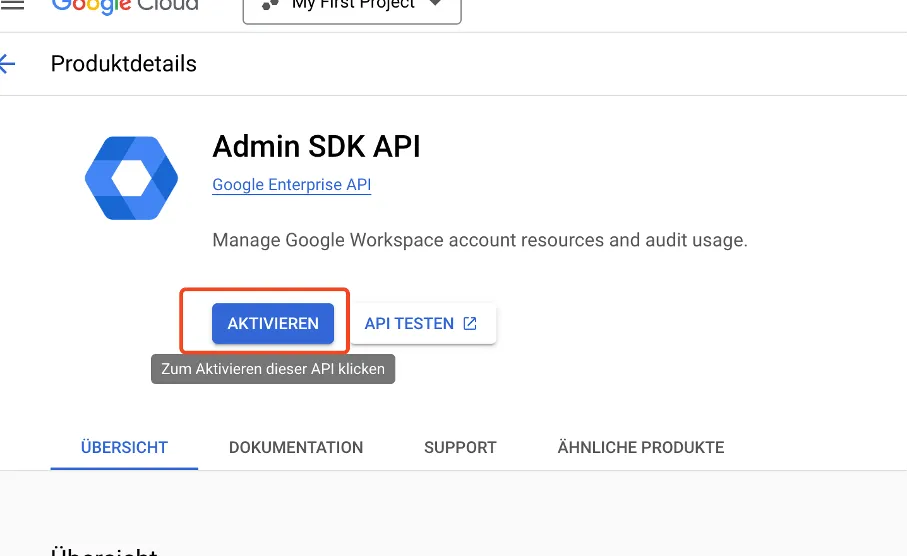
- Start by navigating to https://console.cloud.google.com/apis/library/admin.googleapis.com and click “Enable.”
A2. Set Up Service Account
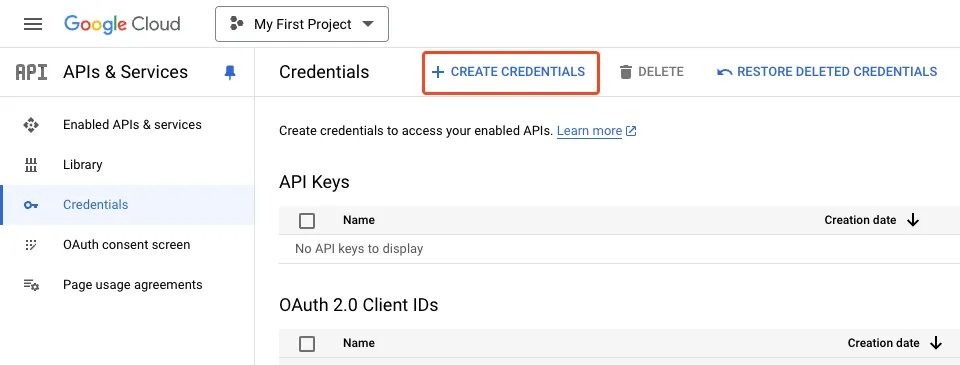
Go to “Credentials.”
- Next, click on “Add credentials.”
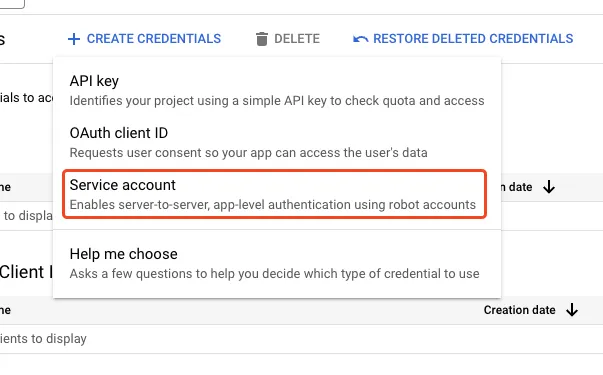
- Select the “Service account.”
- Give the service account an ID and click “Done.”
- Save the “OAuth2 Client ID” for later use.

- Now select the created service account and navigate to the “Keys” tab.
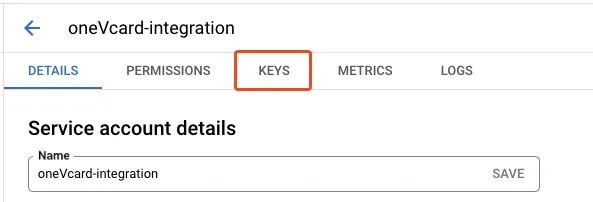
- Click on “Add Key” and then on “Create New Key.”
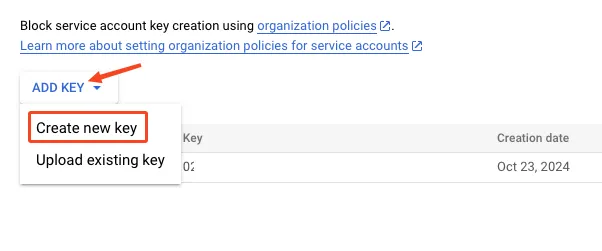
- Choose “JSON” and click “Create.” Save the file in a location where you can find it later.
A3. Google Workspace - Permissions
In order for oneVcard to access the data, permissions must be configured in Google Workspace.
- Navigate to https://admin.google.com/ and go to “Security” - “Access and Data Control” - “API Controls.”
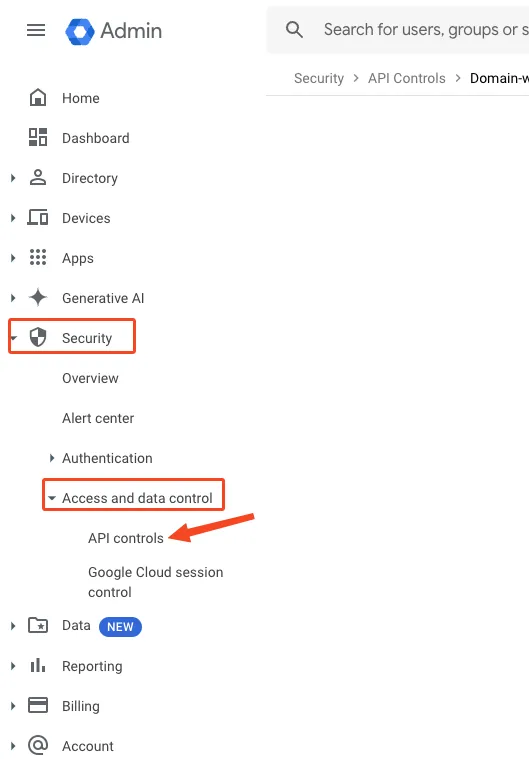
- Click “Add Entry.”
- Now, enter the “OAuth2 Client ID” from step “A2” into the Client ID field.
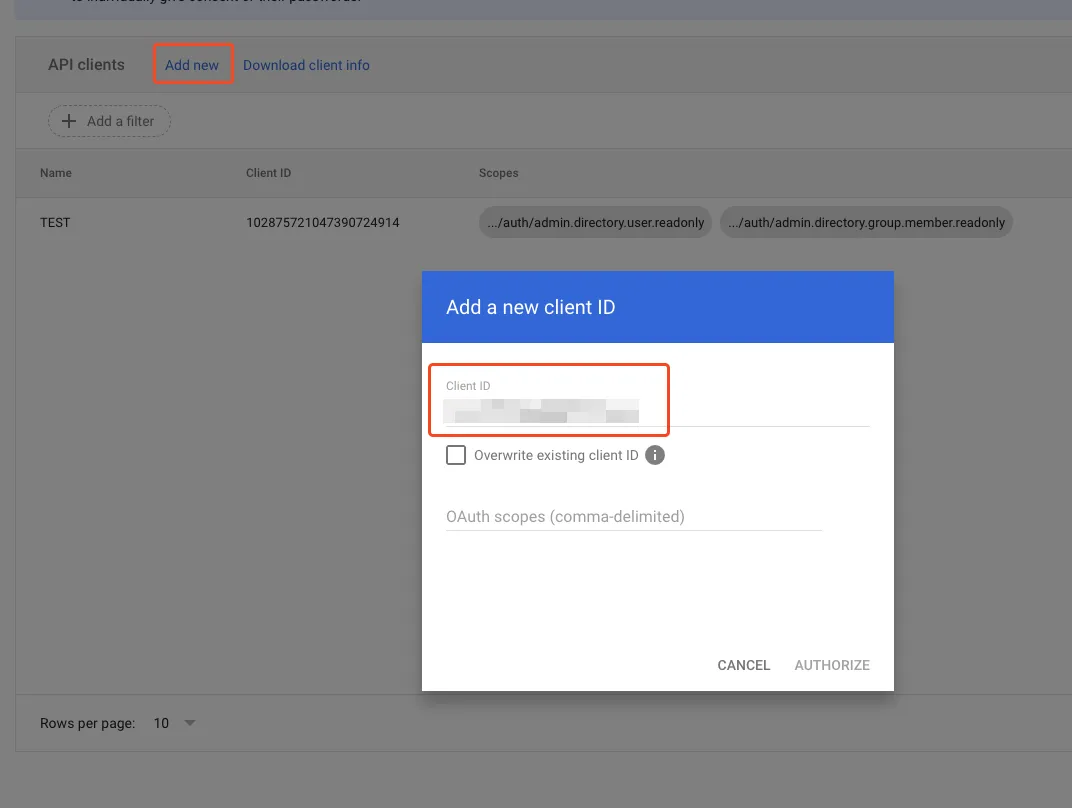
- Enter the following OAuth scopes:
https://www.googleapis.com/auth/admin.directory.user.readonly,https://www.googleapis.com/auth/admin.directory.group.member.readonlyExplanation: These two scopes ensure that oneVcard has read access to users who are part of a group or generally in Google Workspace. Without these permissions, no synchronization can occur, as the users cannot be read otherwise.
- Finally, click on “Authorize.”
B. Setup in oneVcard
B1. oneVcard Settings
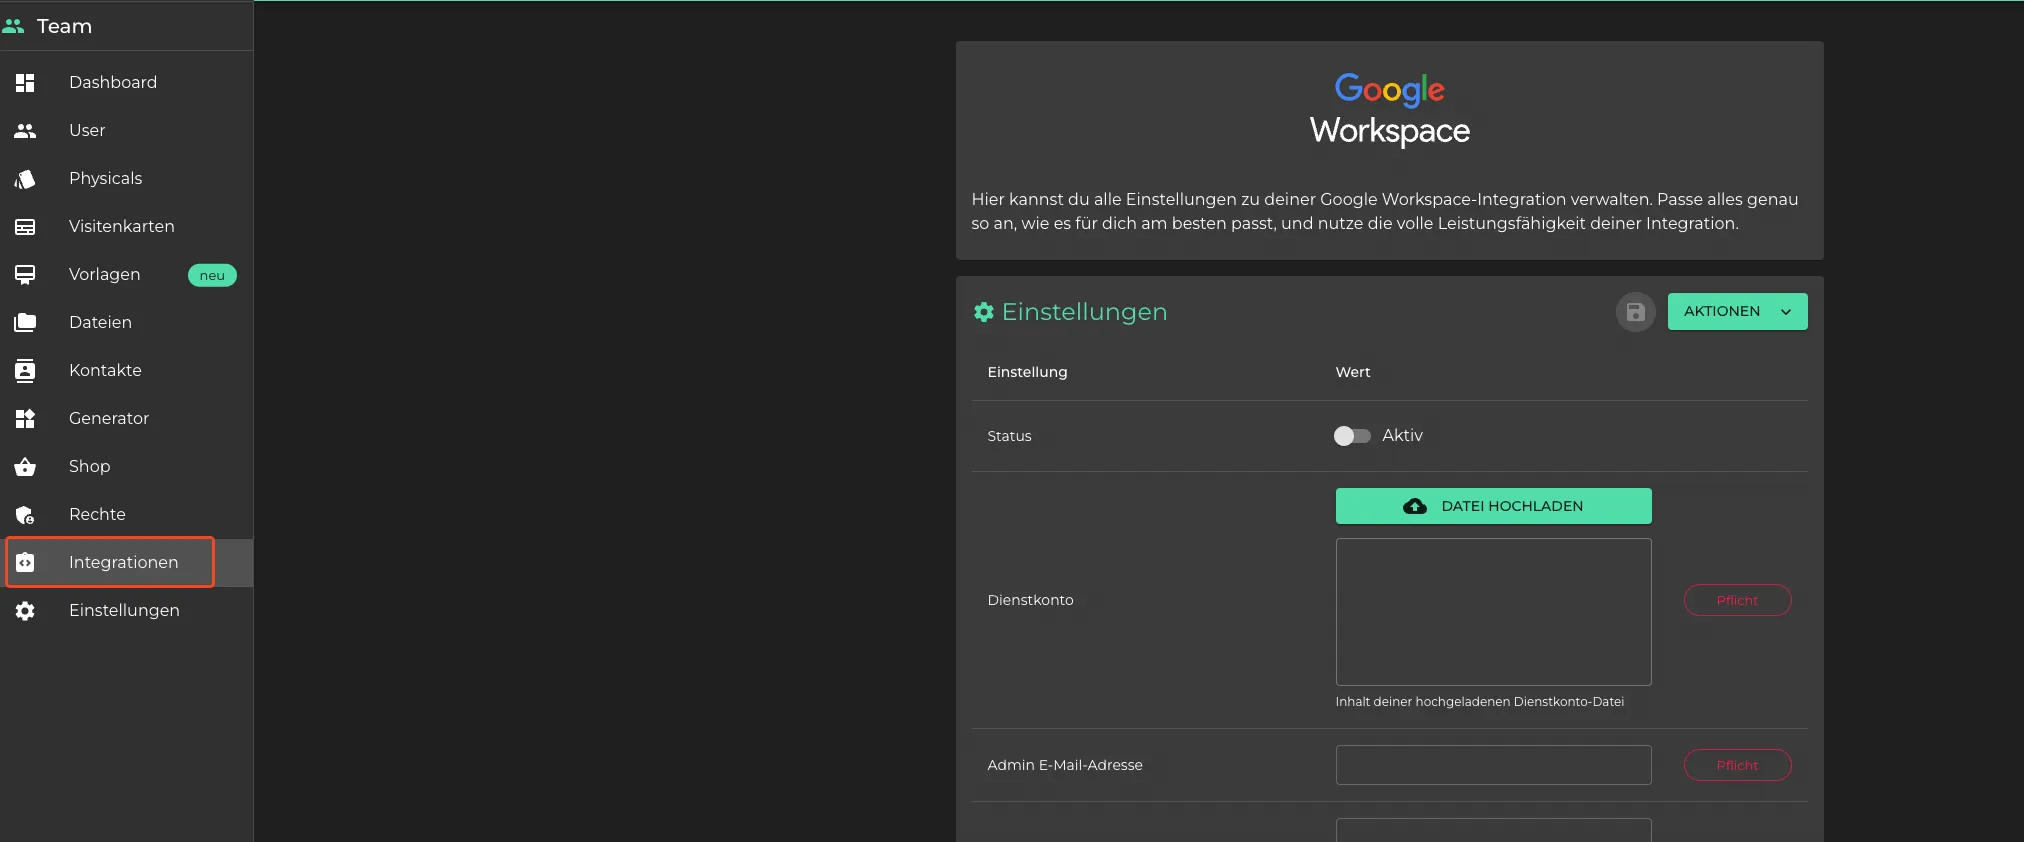
- Go to your oneVcard Team and open the Google Workspace integration under the “Integrations” tab.
-
Under “Service Account,” upload the service file saved in “A2.”
-
Enter the email address of a Google Workspace Administrator in the “Admin Email Address” field. This is required because the integration needs administrative permissions to access certain data such as user information. The email address also serves for authentication and tracking the actions performed.
Now you have completed all the necessary settings.
Save the settings using the icon next to the header.
Optionally, you can enable Single Sign-On for users and add specific groups. To set up Single Sign-On, you must contact oneVcard support to complete this configuration.
B2. Create field assignment
As described here, create a field mapping in the “Field Mappings” section below.
You can now start a synchronization by clicking “Synchronize Now.” After a waiting period, the employees will be created in oneVcard.
If the setup did not work, an error will be displayed under “Last Executions.” If you need help, don’t hesitate to contact us.