Documentation for connecting and setting up oneVcard Teams Enterprise with Personio
EnterpriseThis article outlines the requirements and implementation of the Personio integration to automatically create and maintain user and business card data in oneVcard.
Technical requirements
- oneVcard Teams Enterprise Subscription (paid)
- Personio
- Personio administrator with the required permissions
A. Restriction of employees (optional)
In addition to the automatic filtering of inactive employees, you can set an additional restriction to avoid transferring all employees. If you want to transfer all employees, you can skip this step.
Start by navigating to https://www.personio.de/login/ and logging into your Personio account if you are not already signed in.
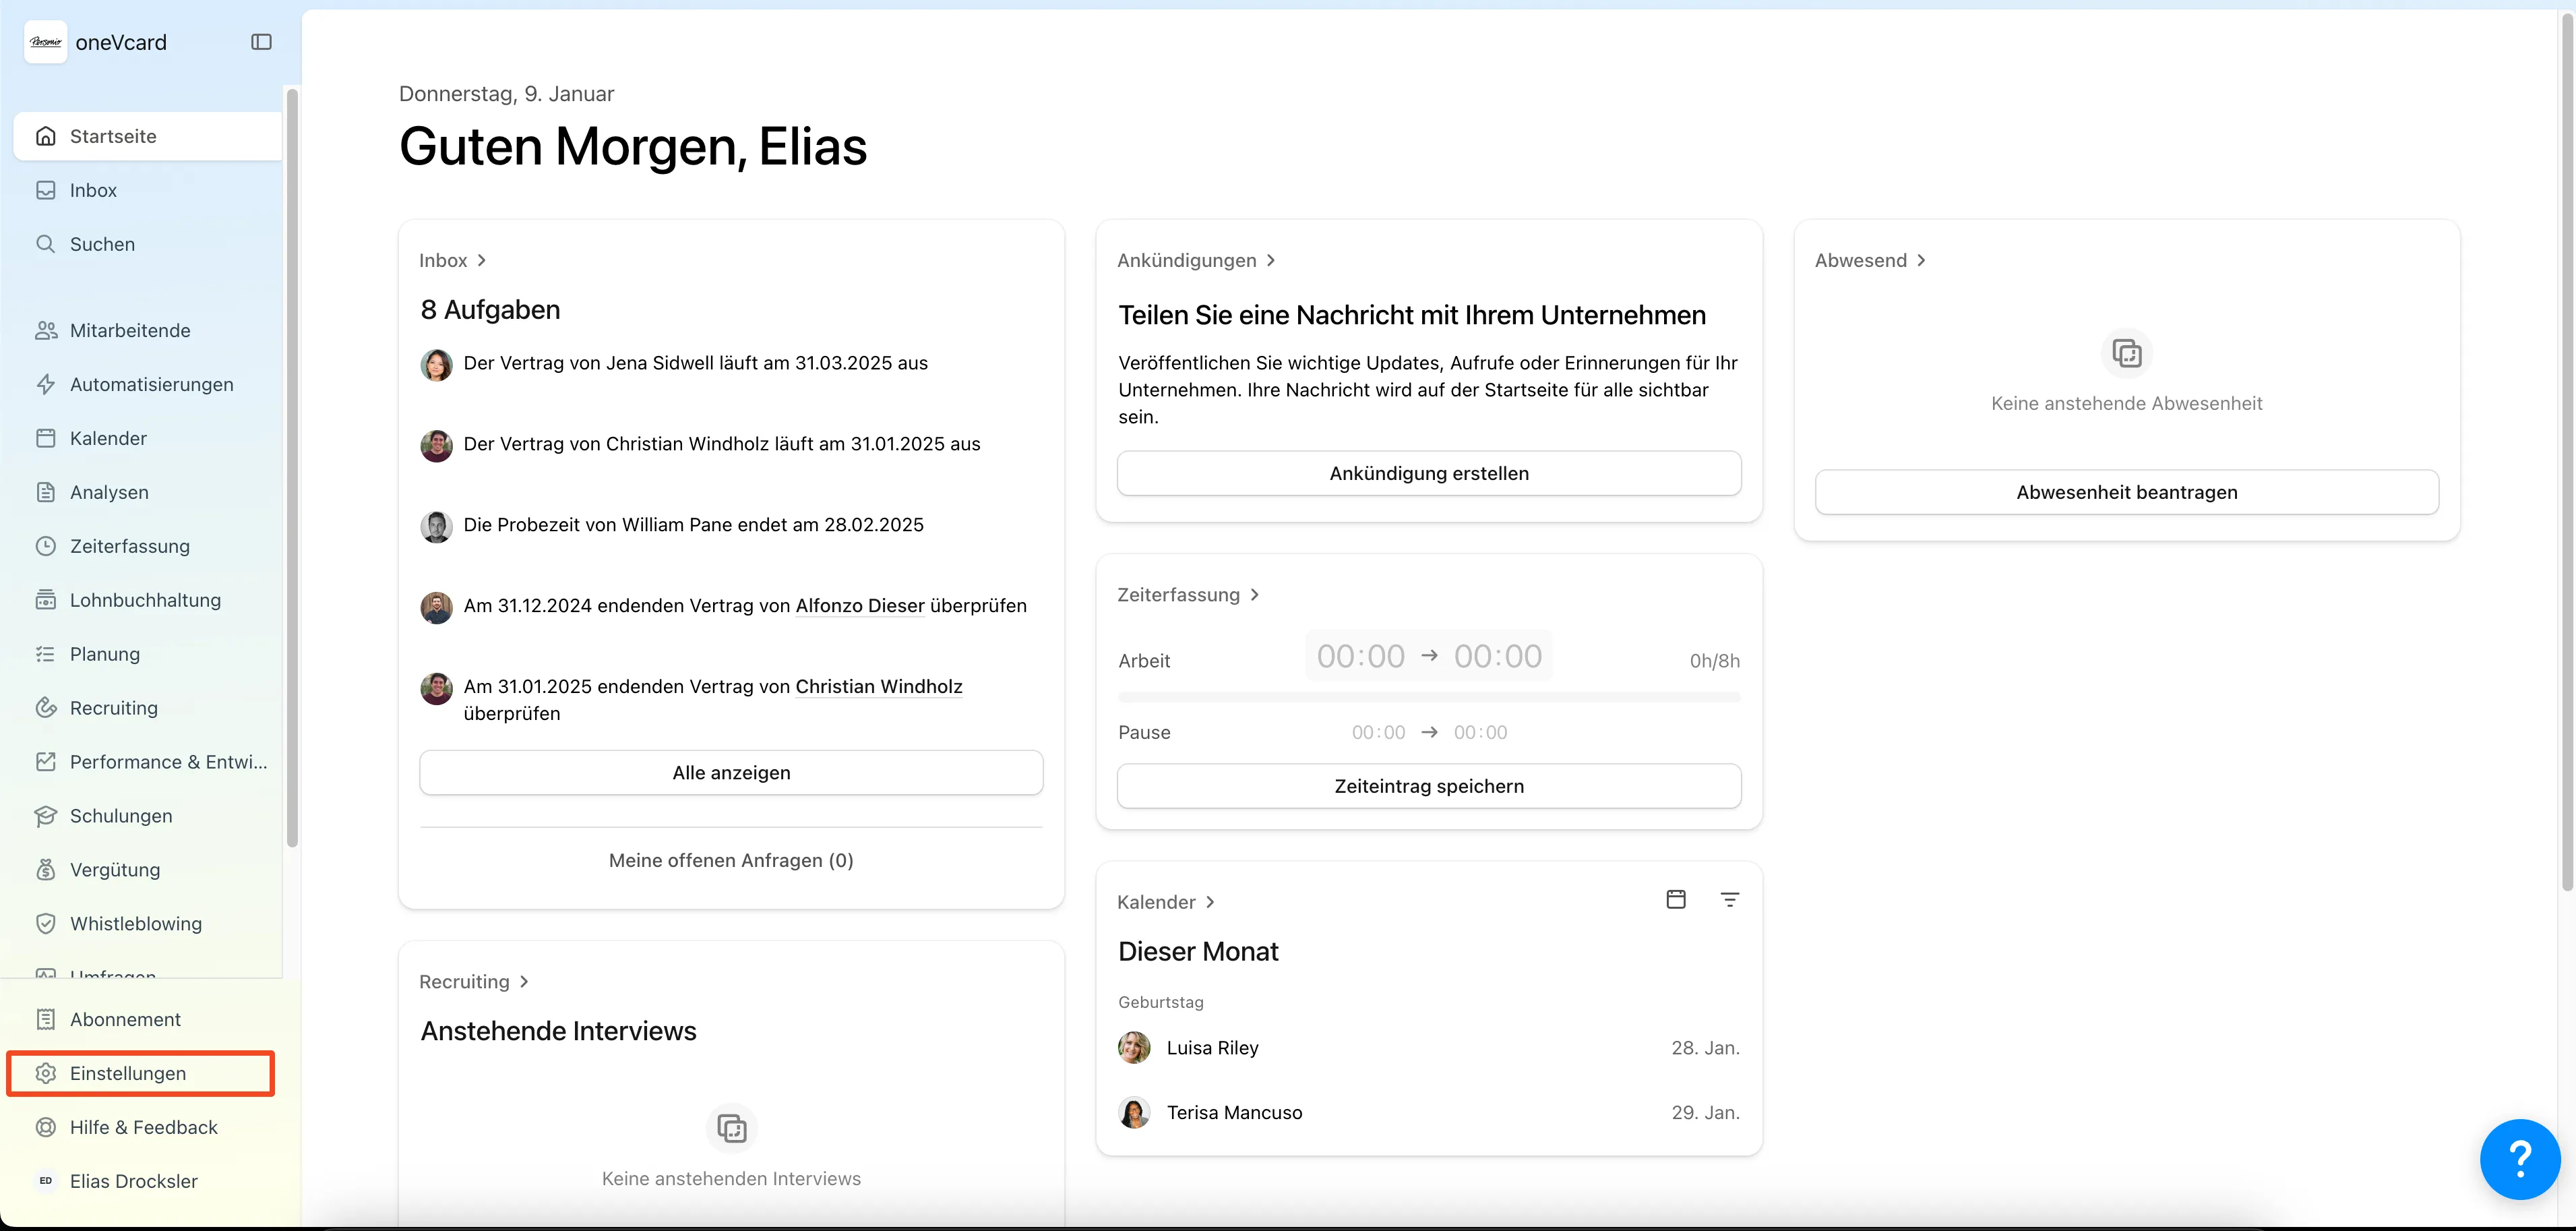
Now navigate to the settings in the left sidebar.
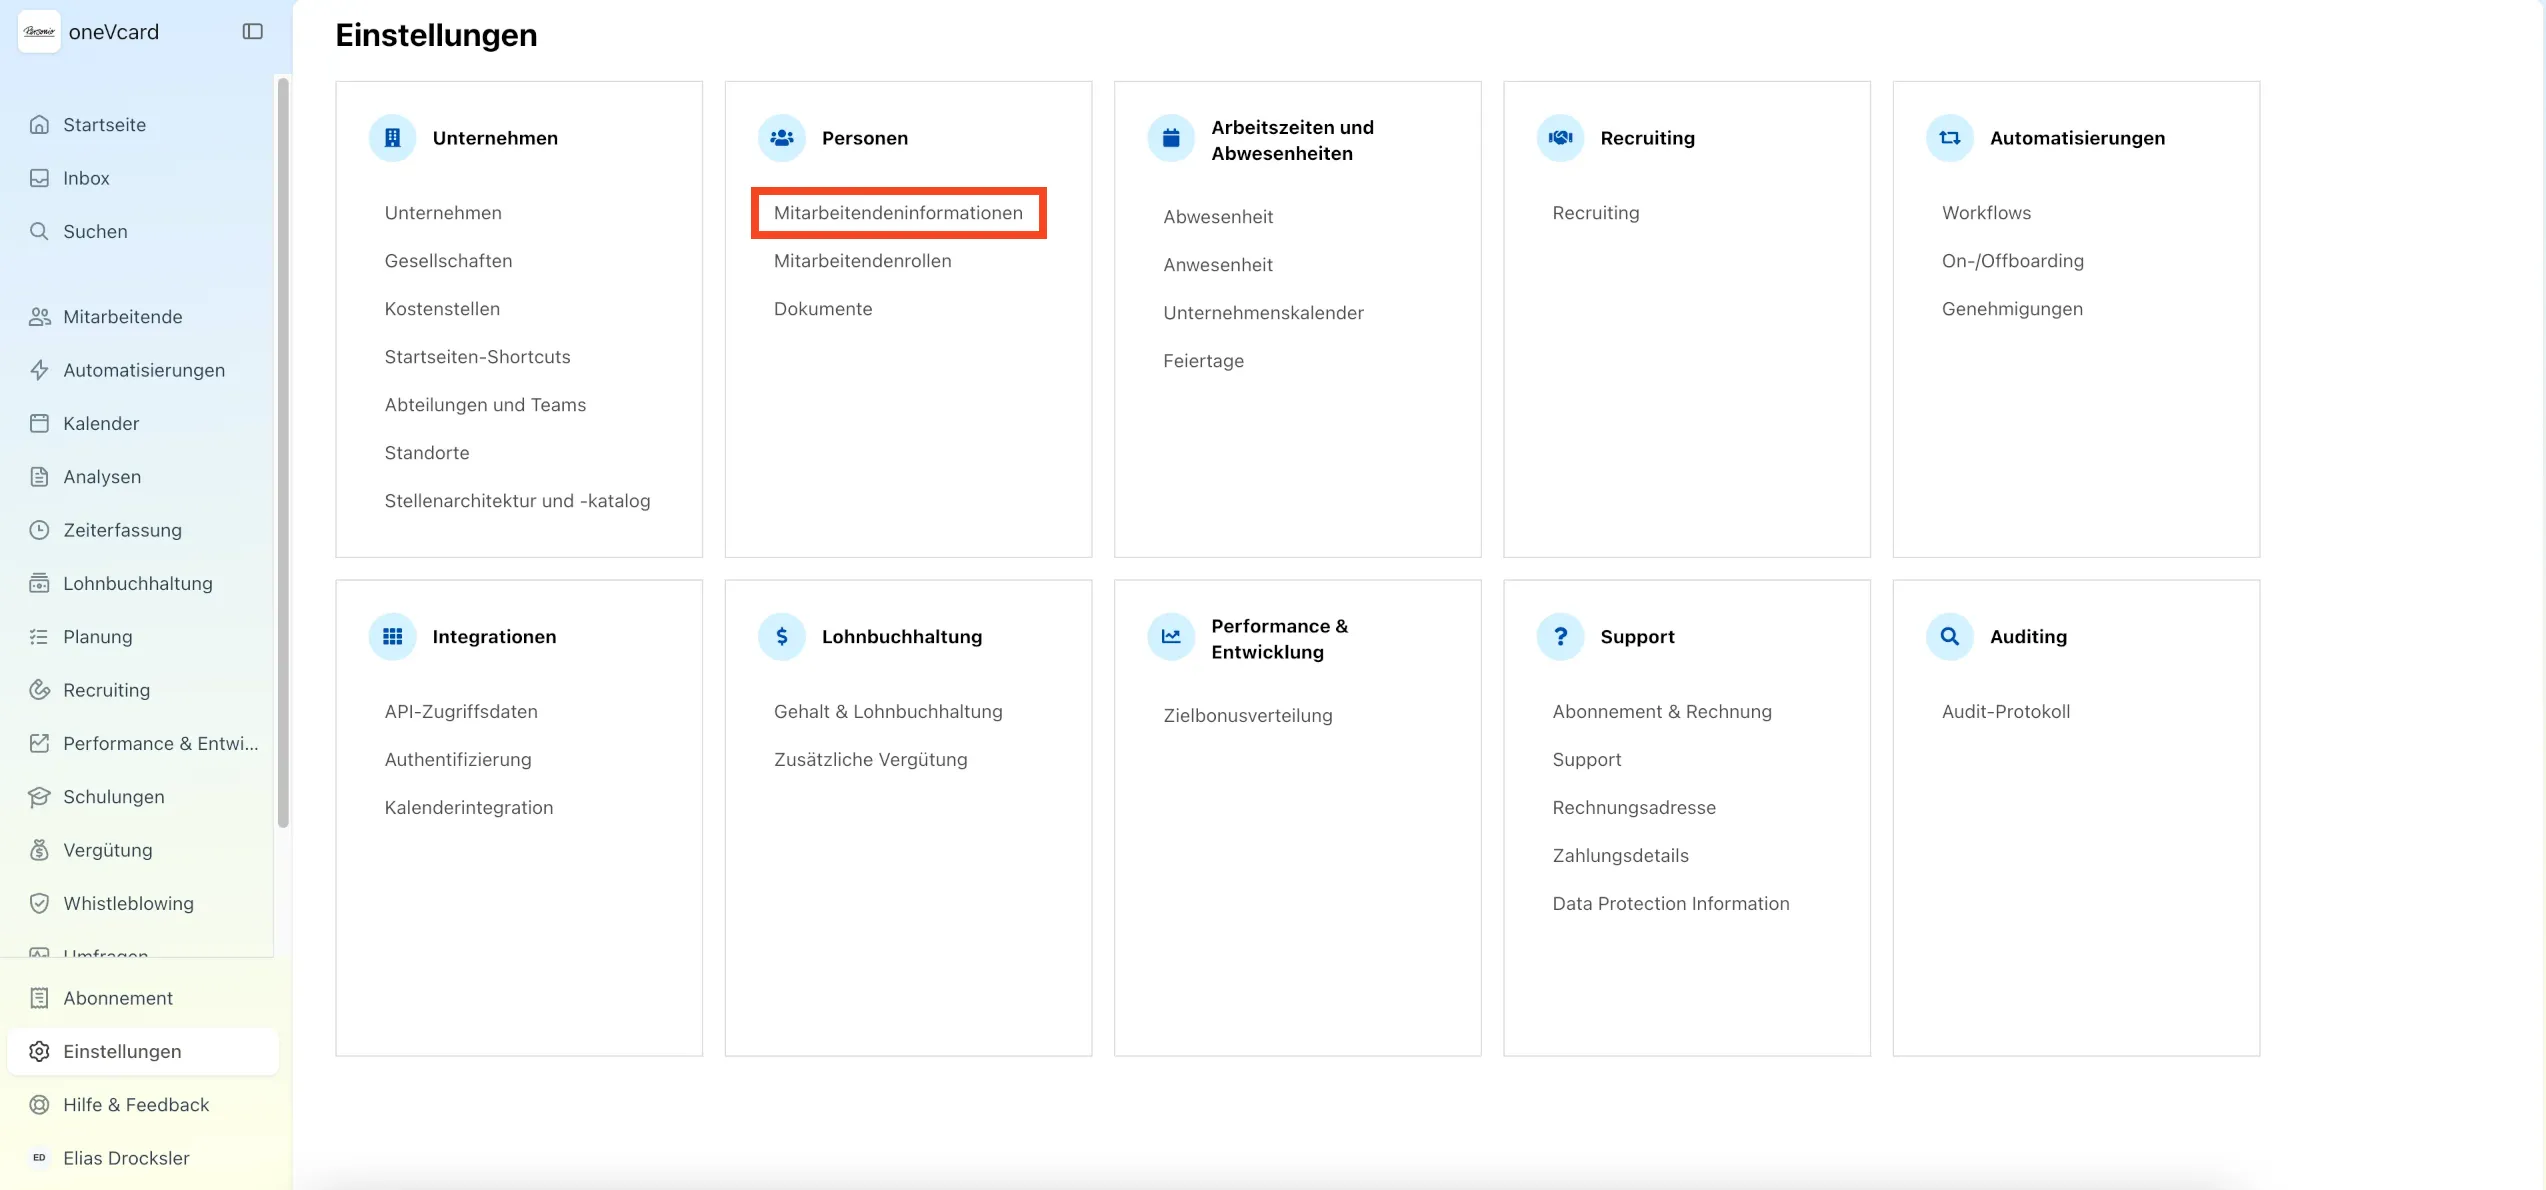
Now go to “Employee Information” in the “People” tile.
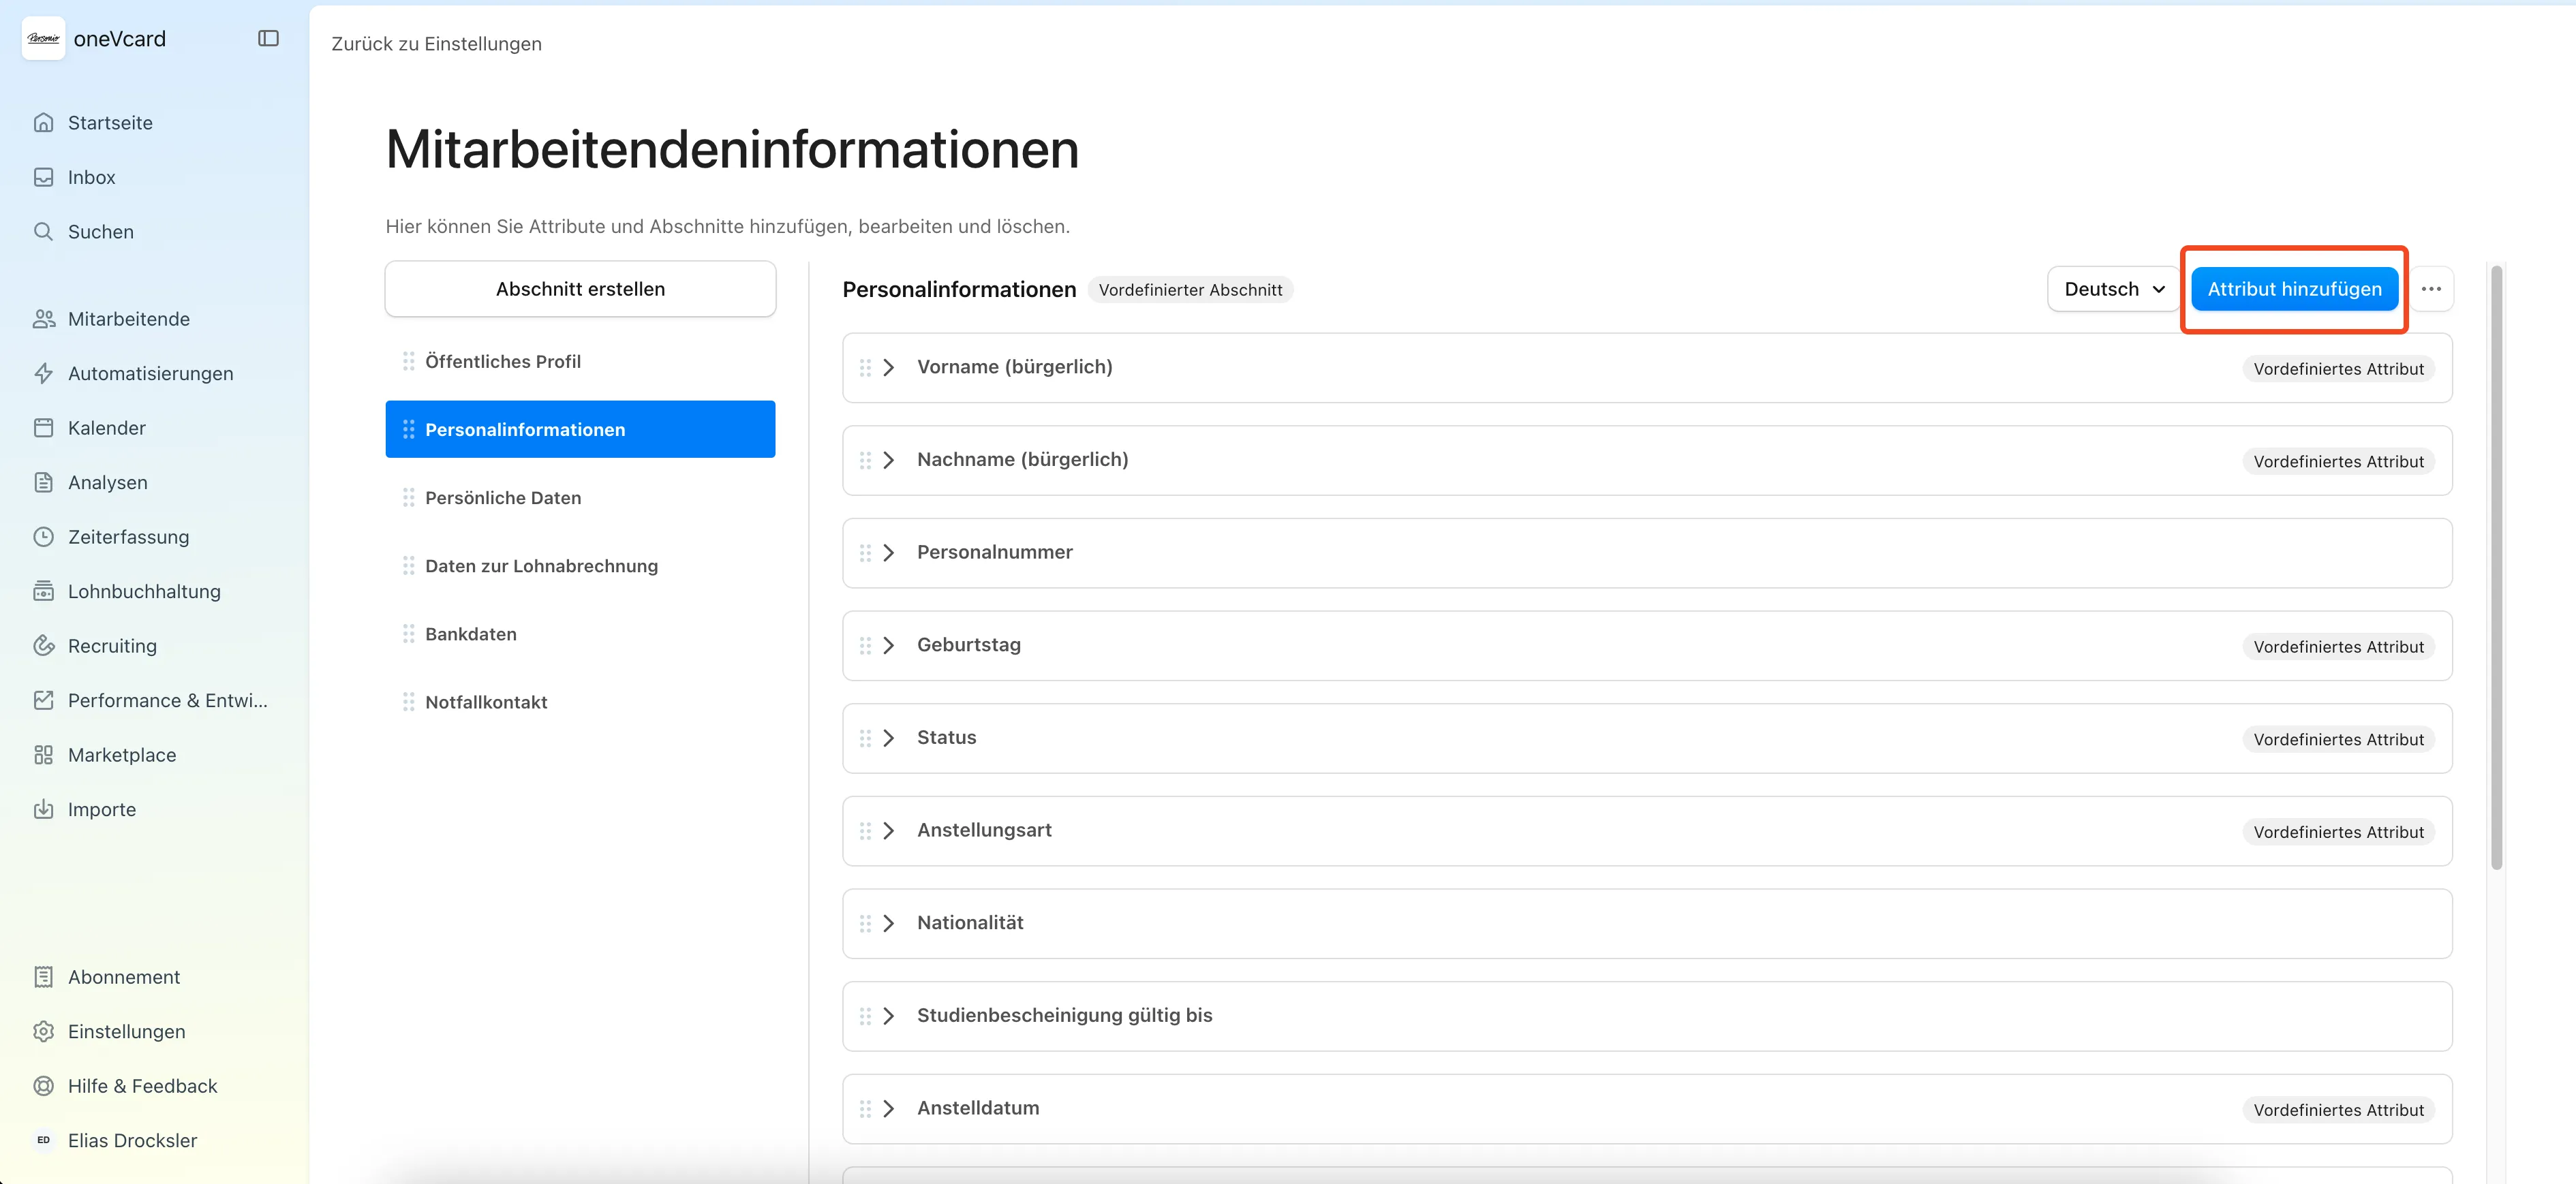
Now select the desired section where the attribute should be created and displayed later. In our example, we choose the “Personalinformation” section.
Now click on the “Add an attribute” button in the top right corner.
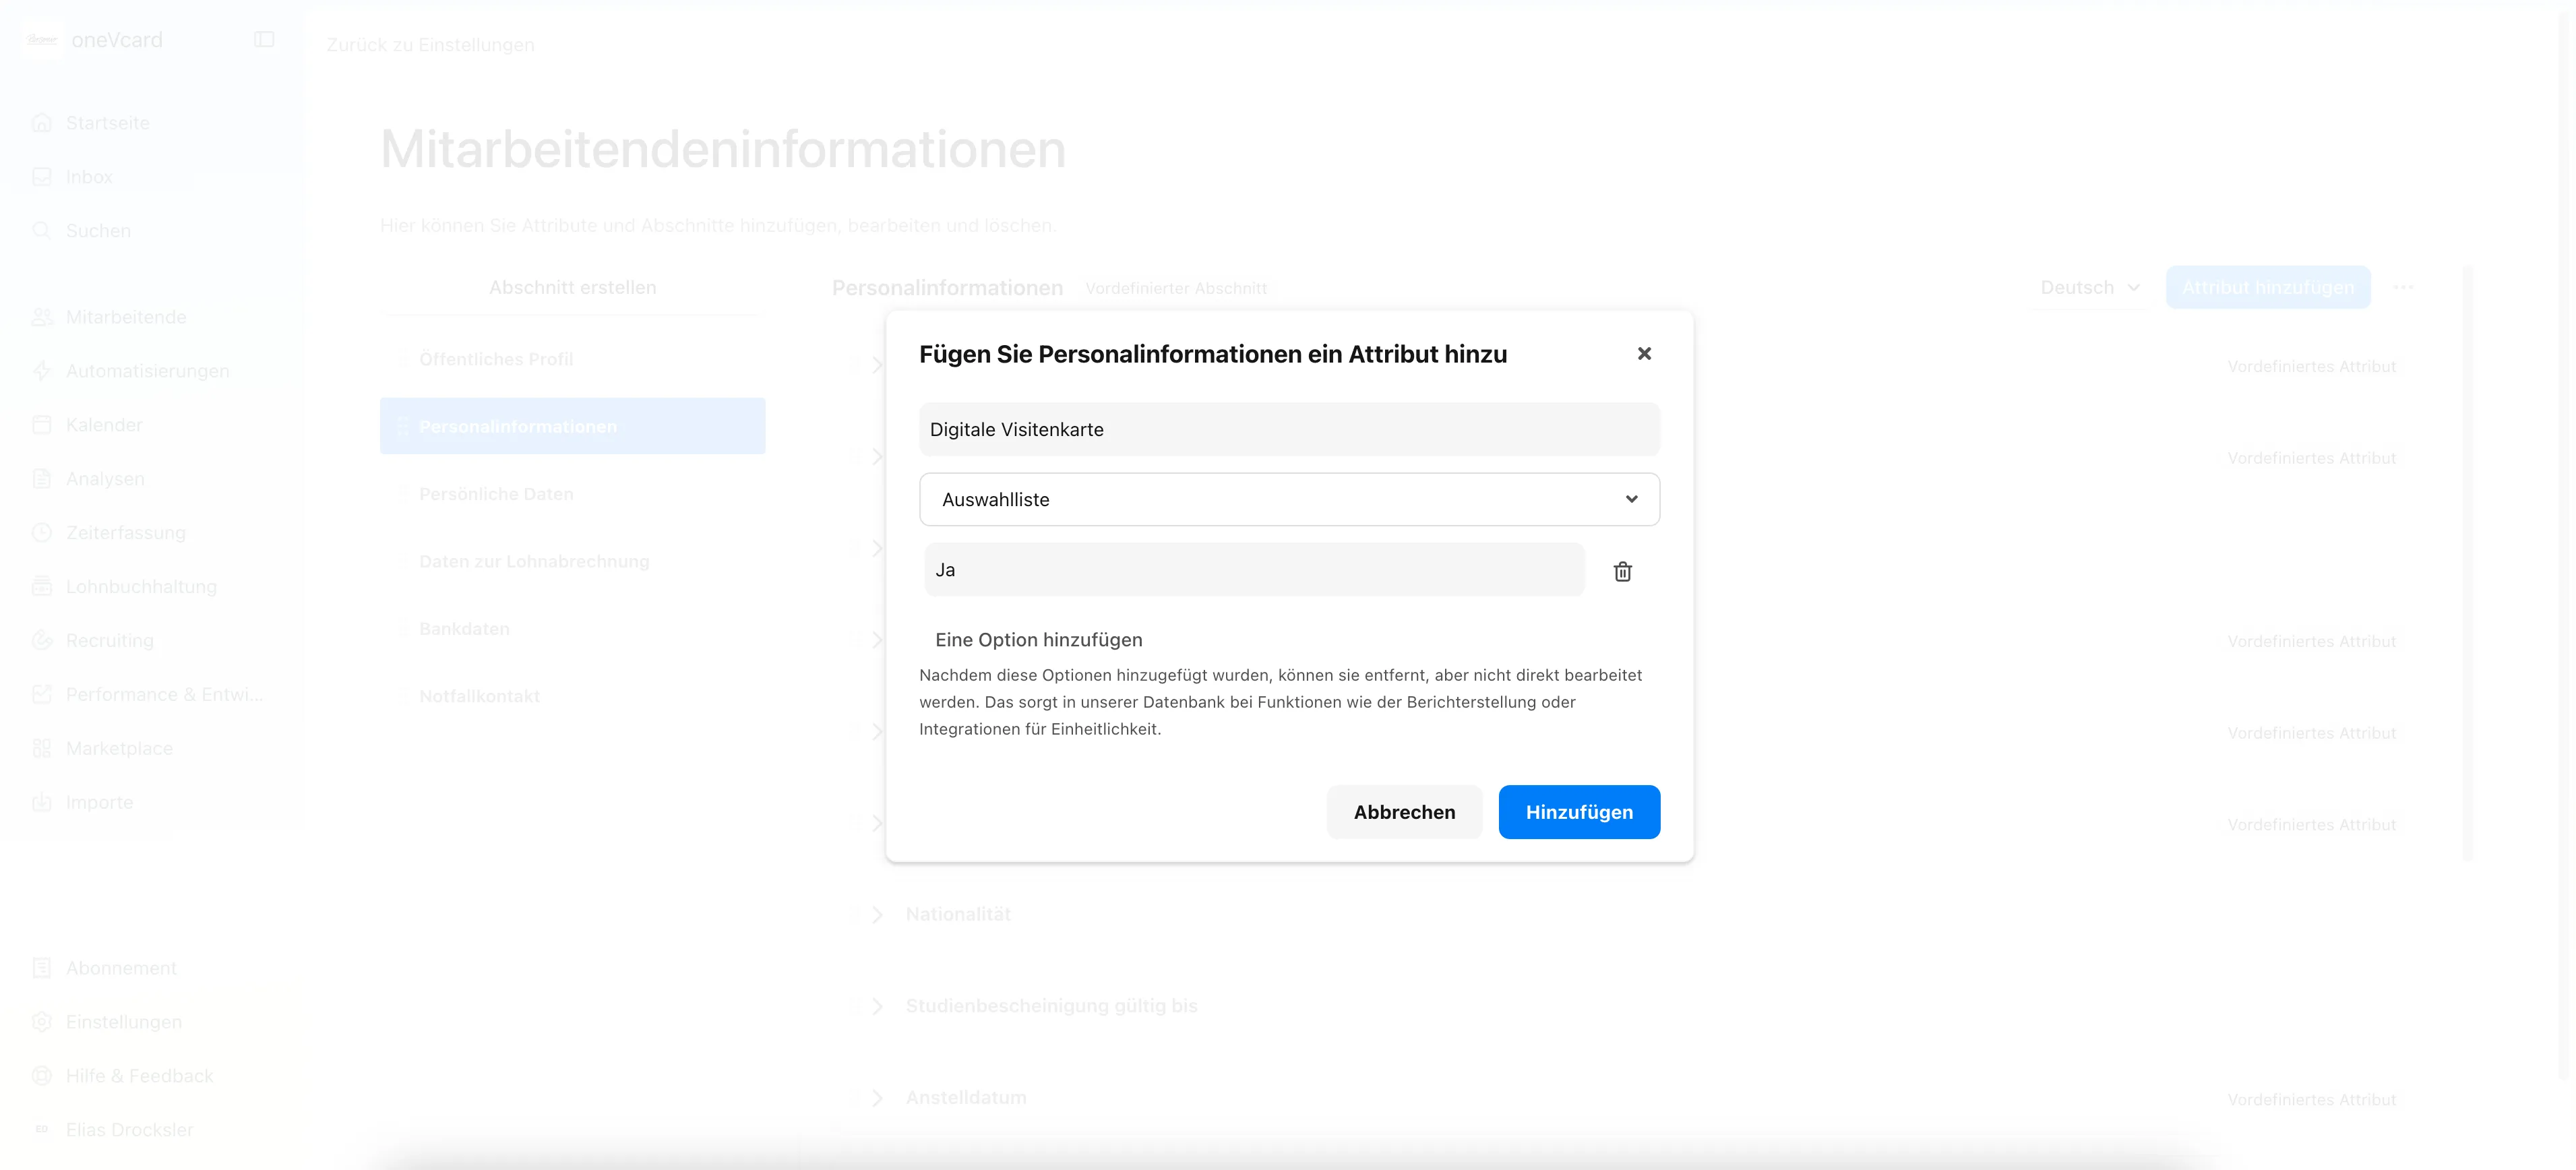
Now enter the name. The name must be “Digitale Visitenkarte”.
Now select “List of options” from the dropdown list below and enter the value “Ja”.
After that, complete the creation of the attribute by clicking on “Add”
Now navigate to “Employees” in the left sidebar.
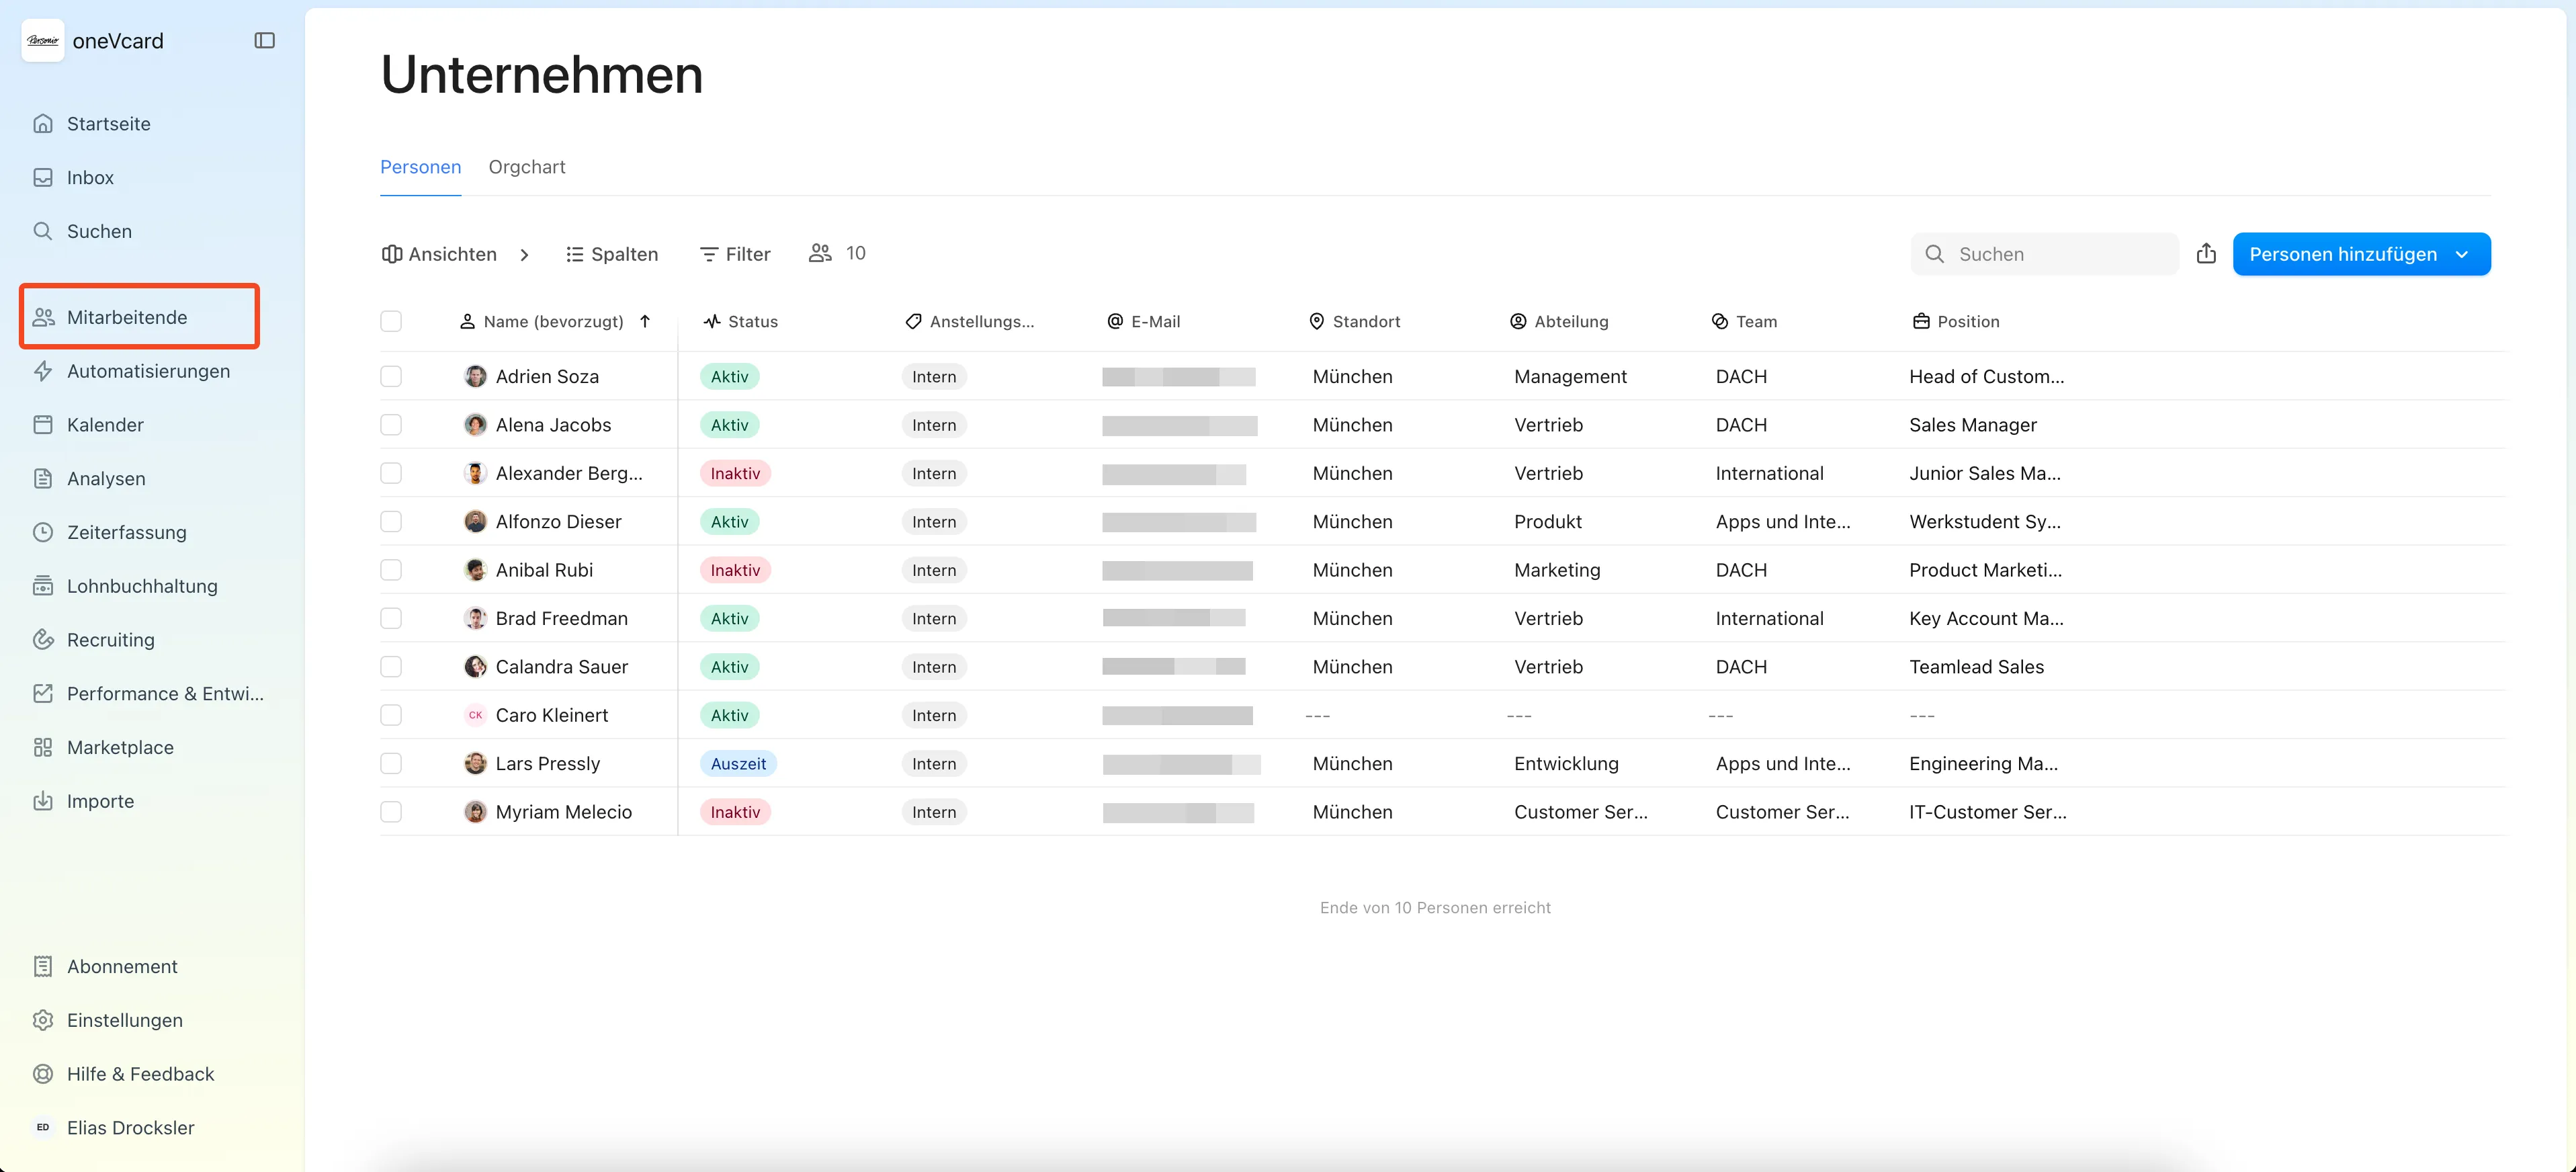
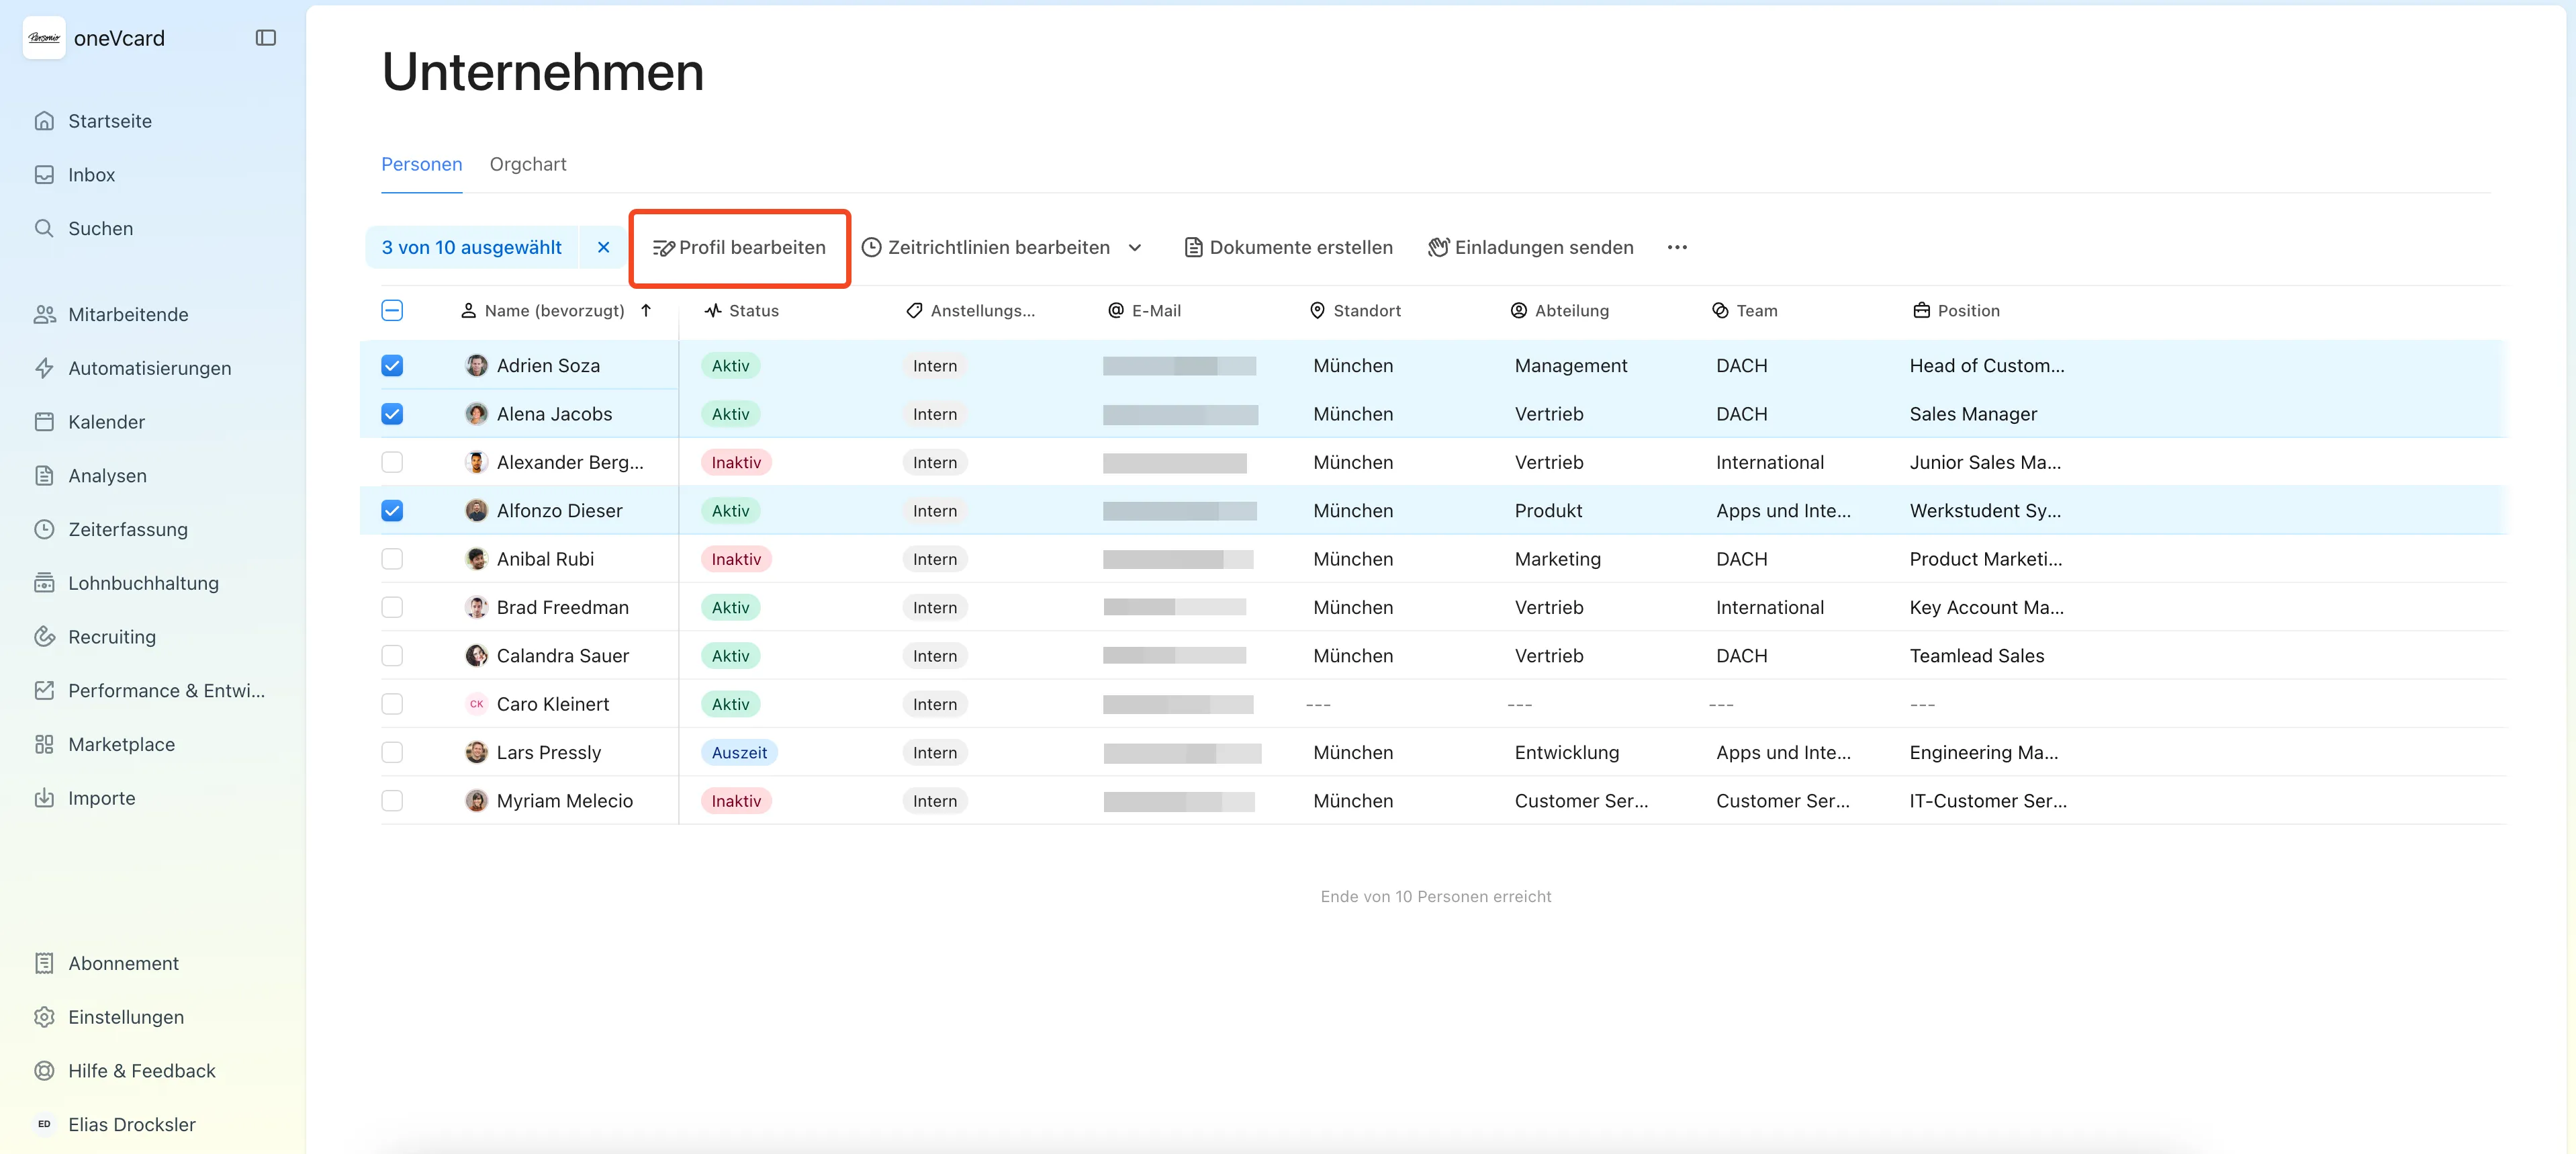
Now select all employees to be transferred to oneVcard using the checkbox on the left. Then click on the “Edit profile” button at the top.
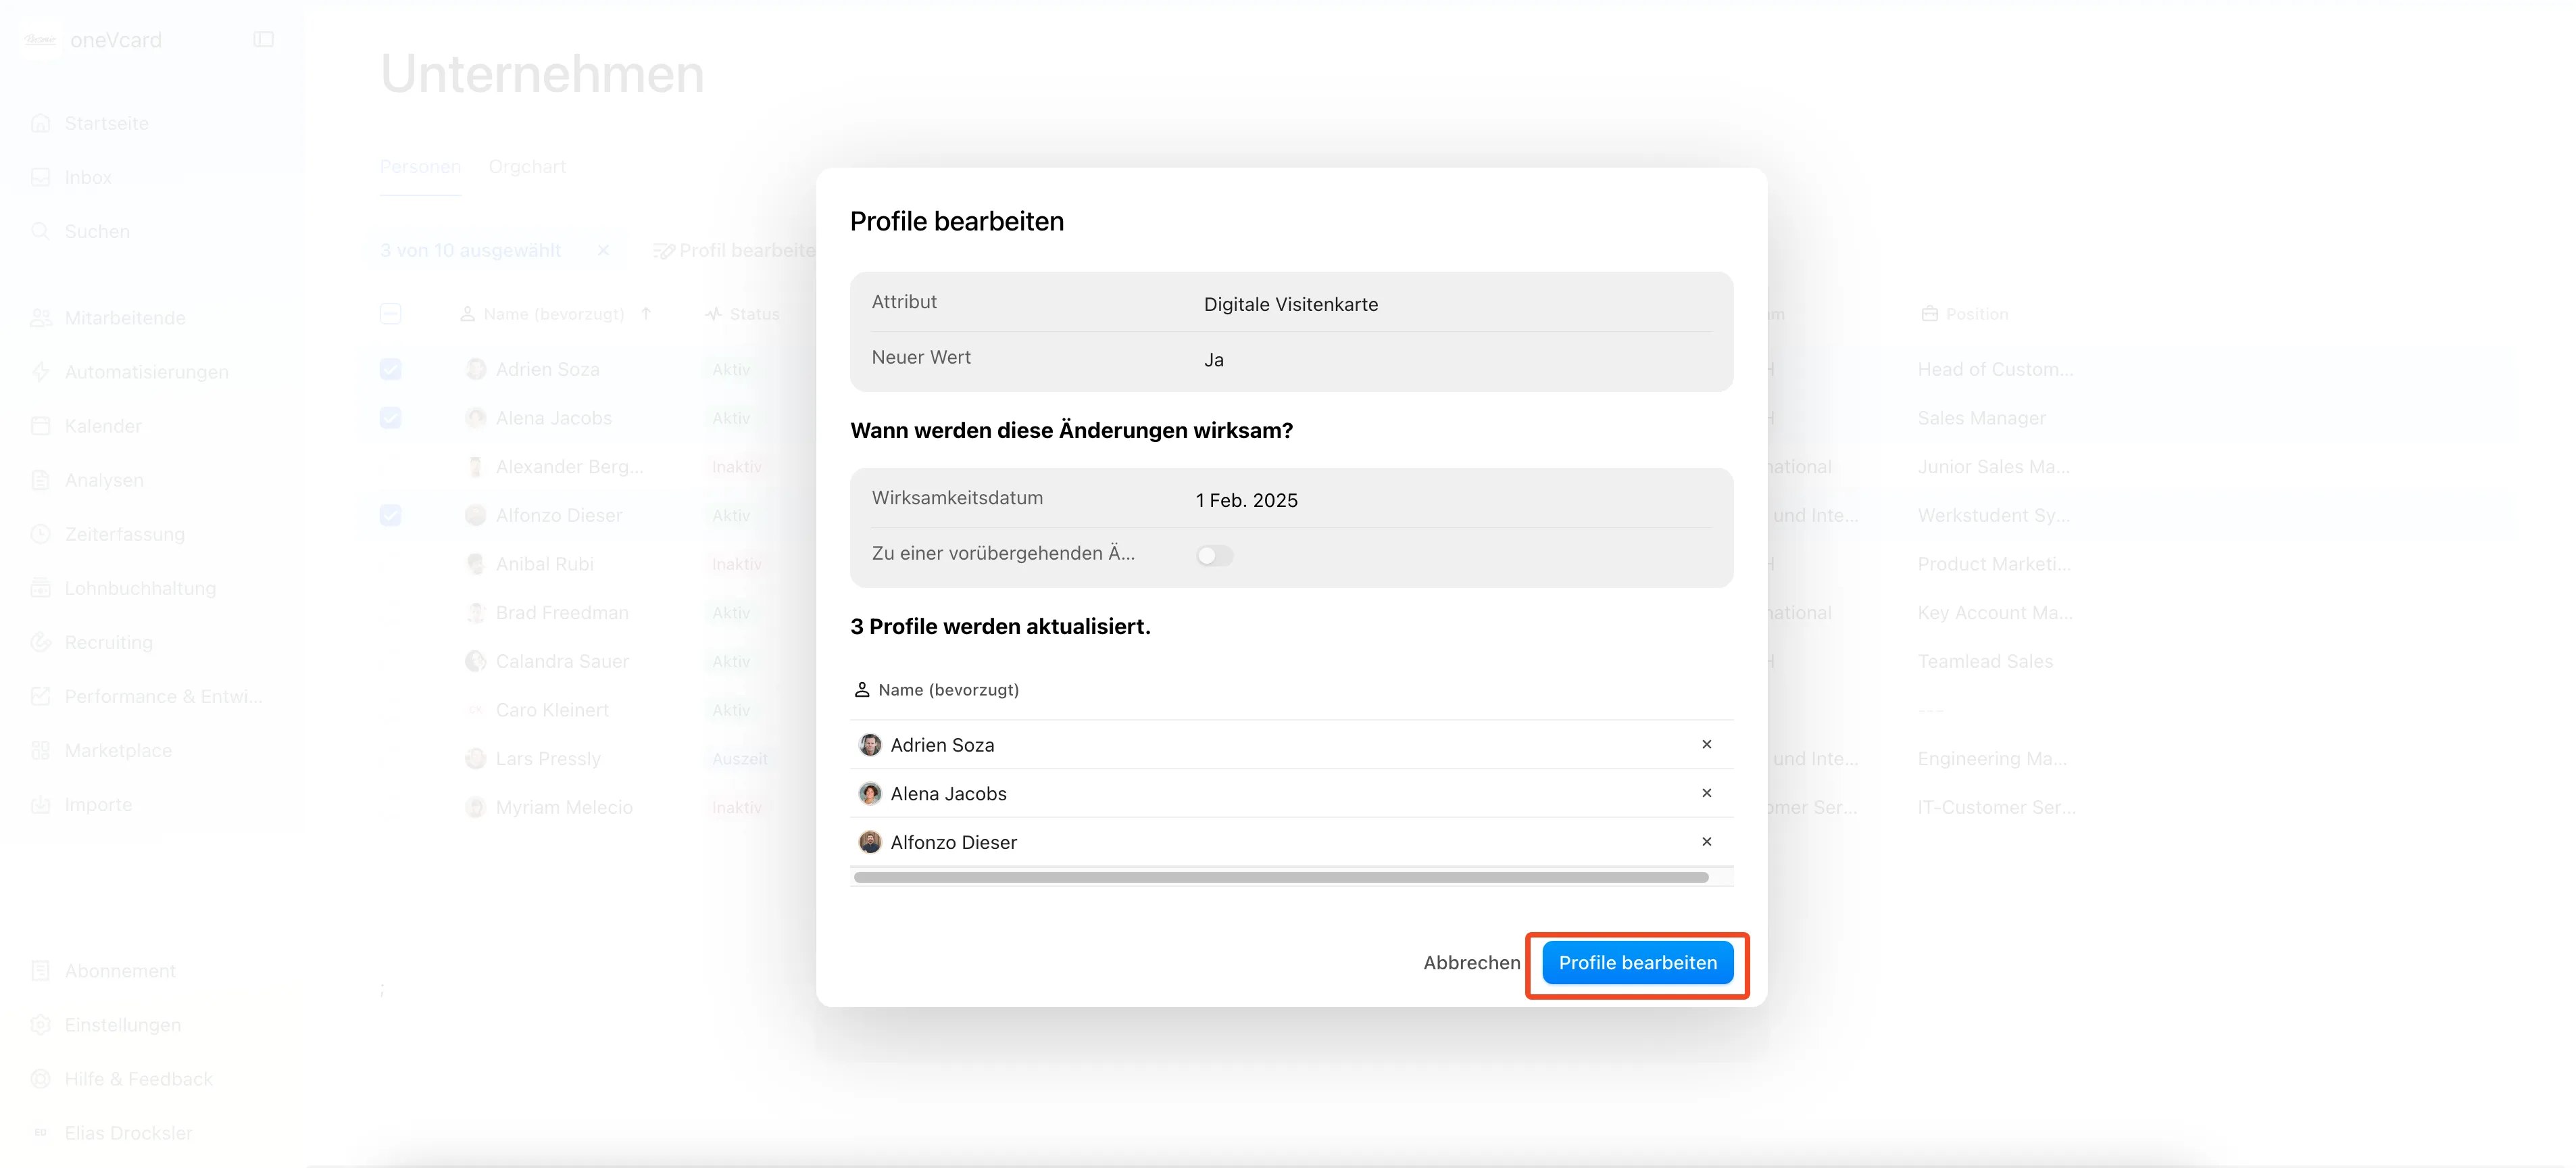
Now select the attribute “Digitale Visitenkarte” and set the new value to “Ja”.
Next, set an effective date. If you want to start immediately with oneVcard, the date should be in the past.
Confirm the change by clicking on “Edit profiles”.
Only these employees will be automatically transferred to oneVcard during the next synchronization after the setup in the following step B at 12:00 AM (UTC) and 12:00 PM (UTC).
B. Configuration in Personio
Start by navigating to the website https://www.personio.de/login and logging in to your Personio account if you are not already logged in.
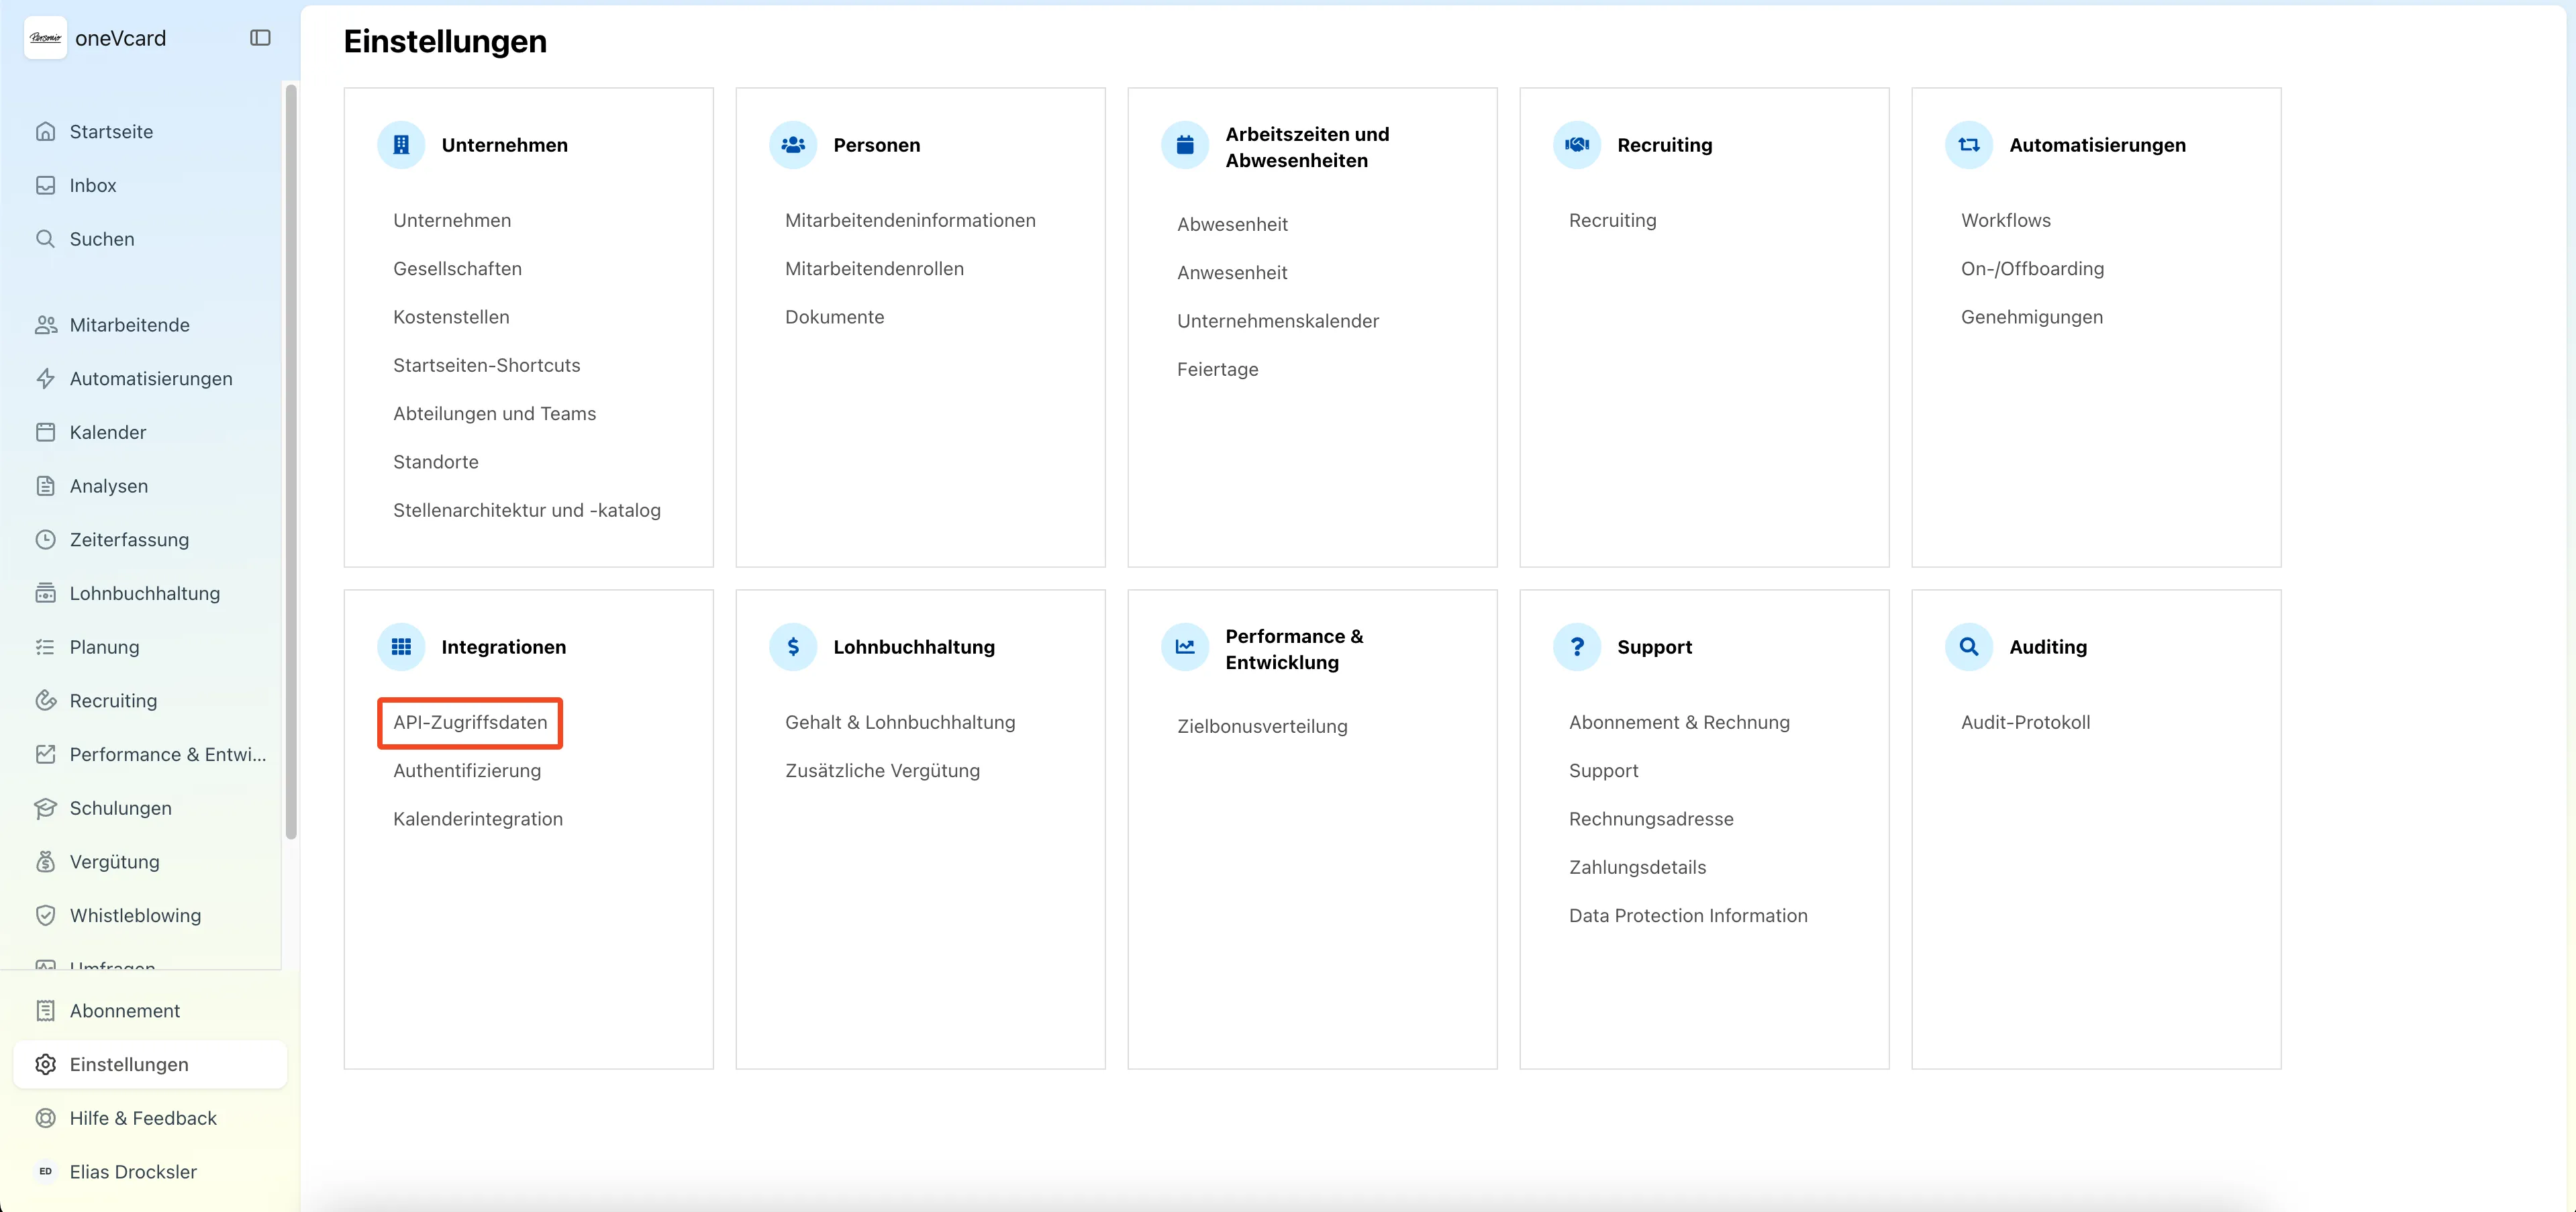
Next, navigate to the settings in the left sidebar.
Click on “API access data” within the “Integrations” section.
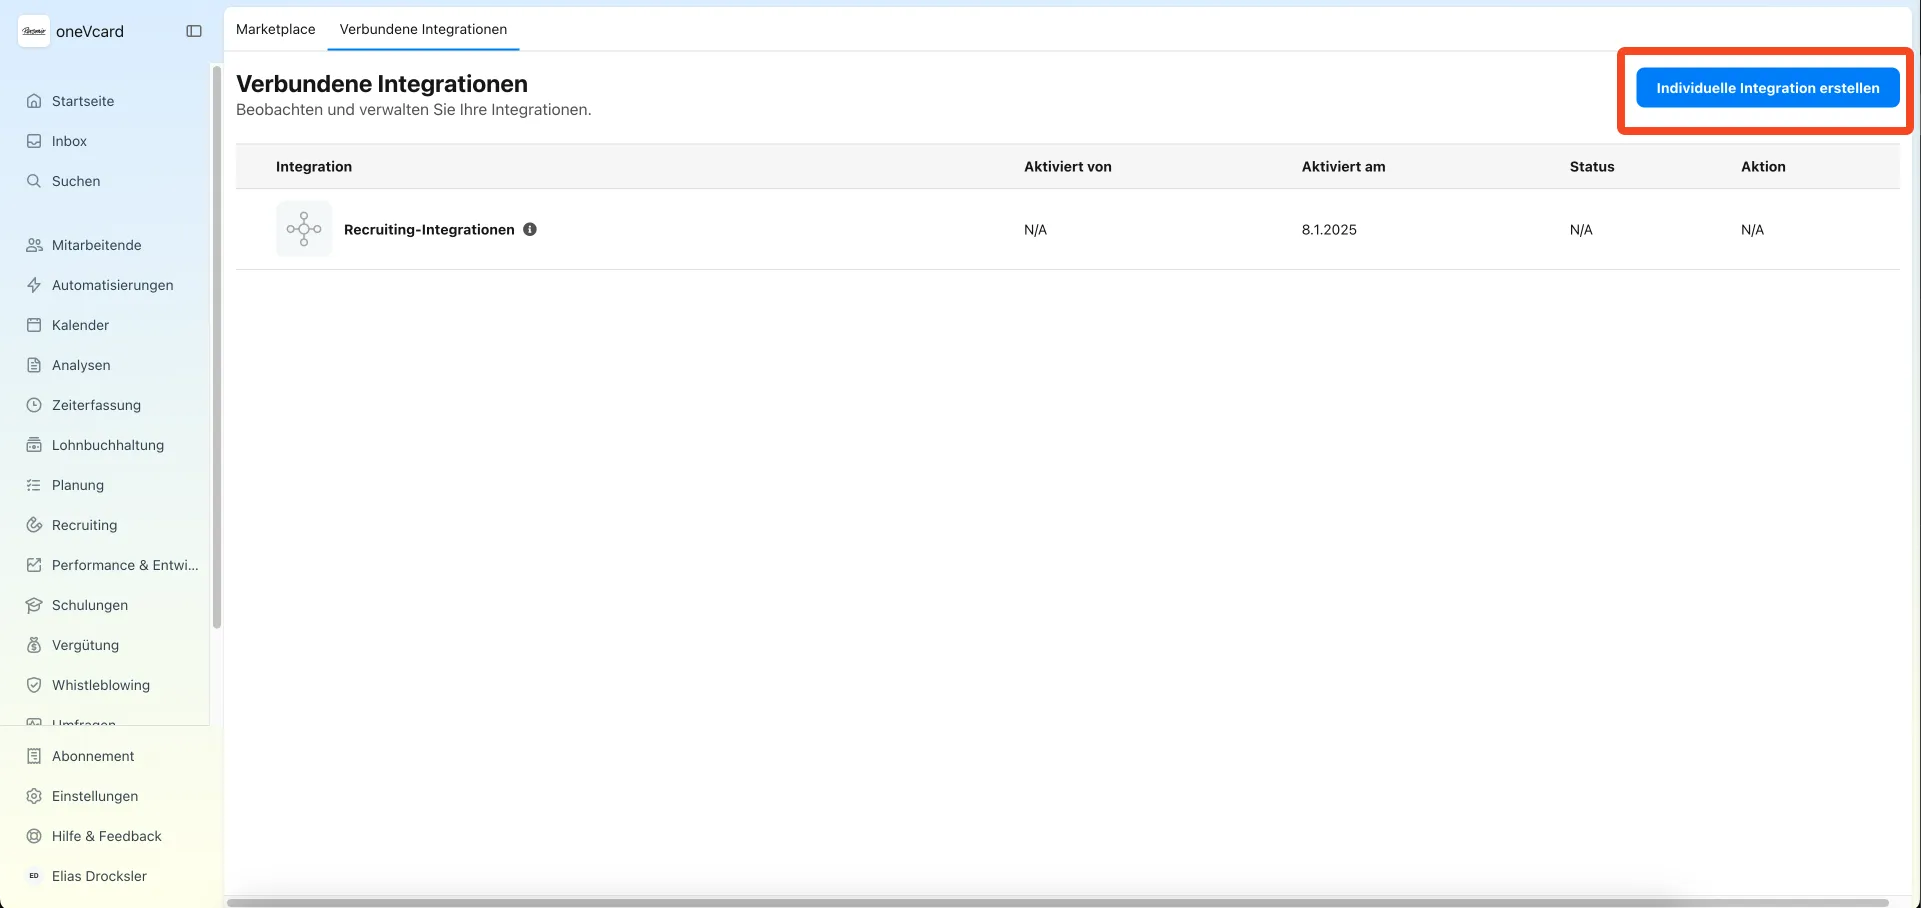
Create a new integration by clicking the “Create custom integration” button.
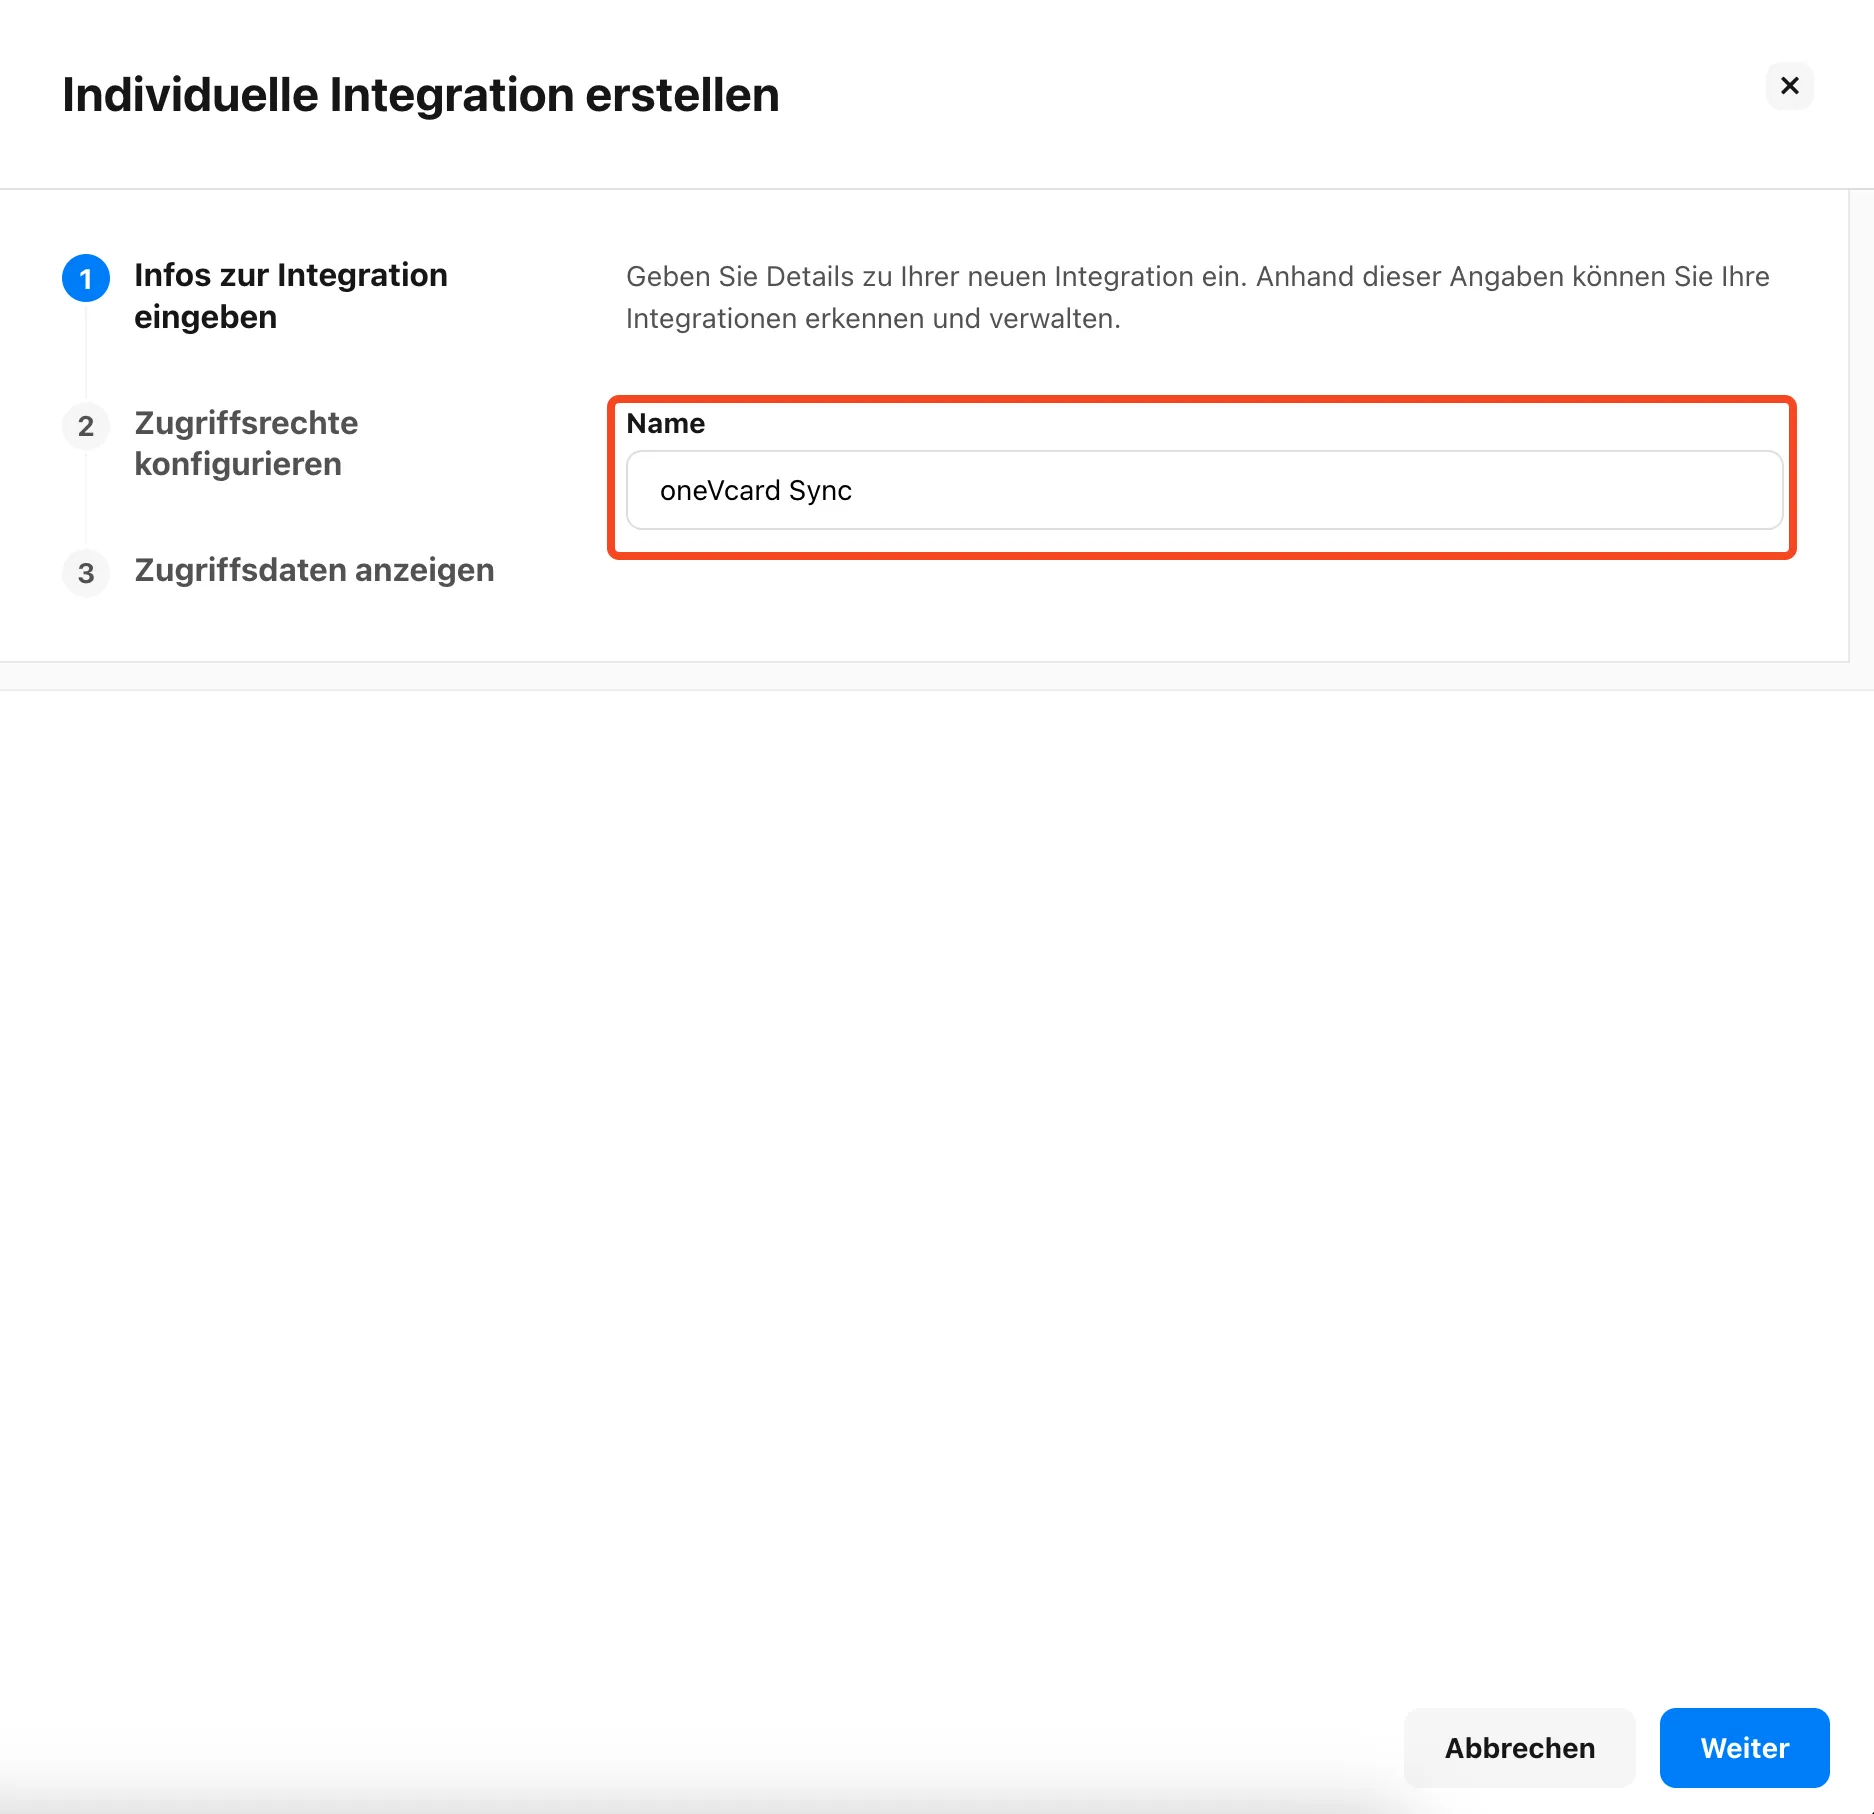
Enter a suitable name, such as “oneVcard Sync”.
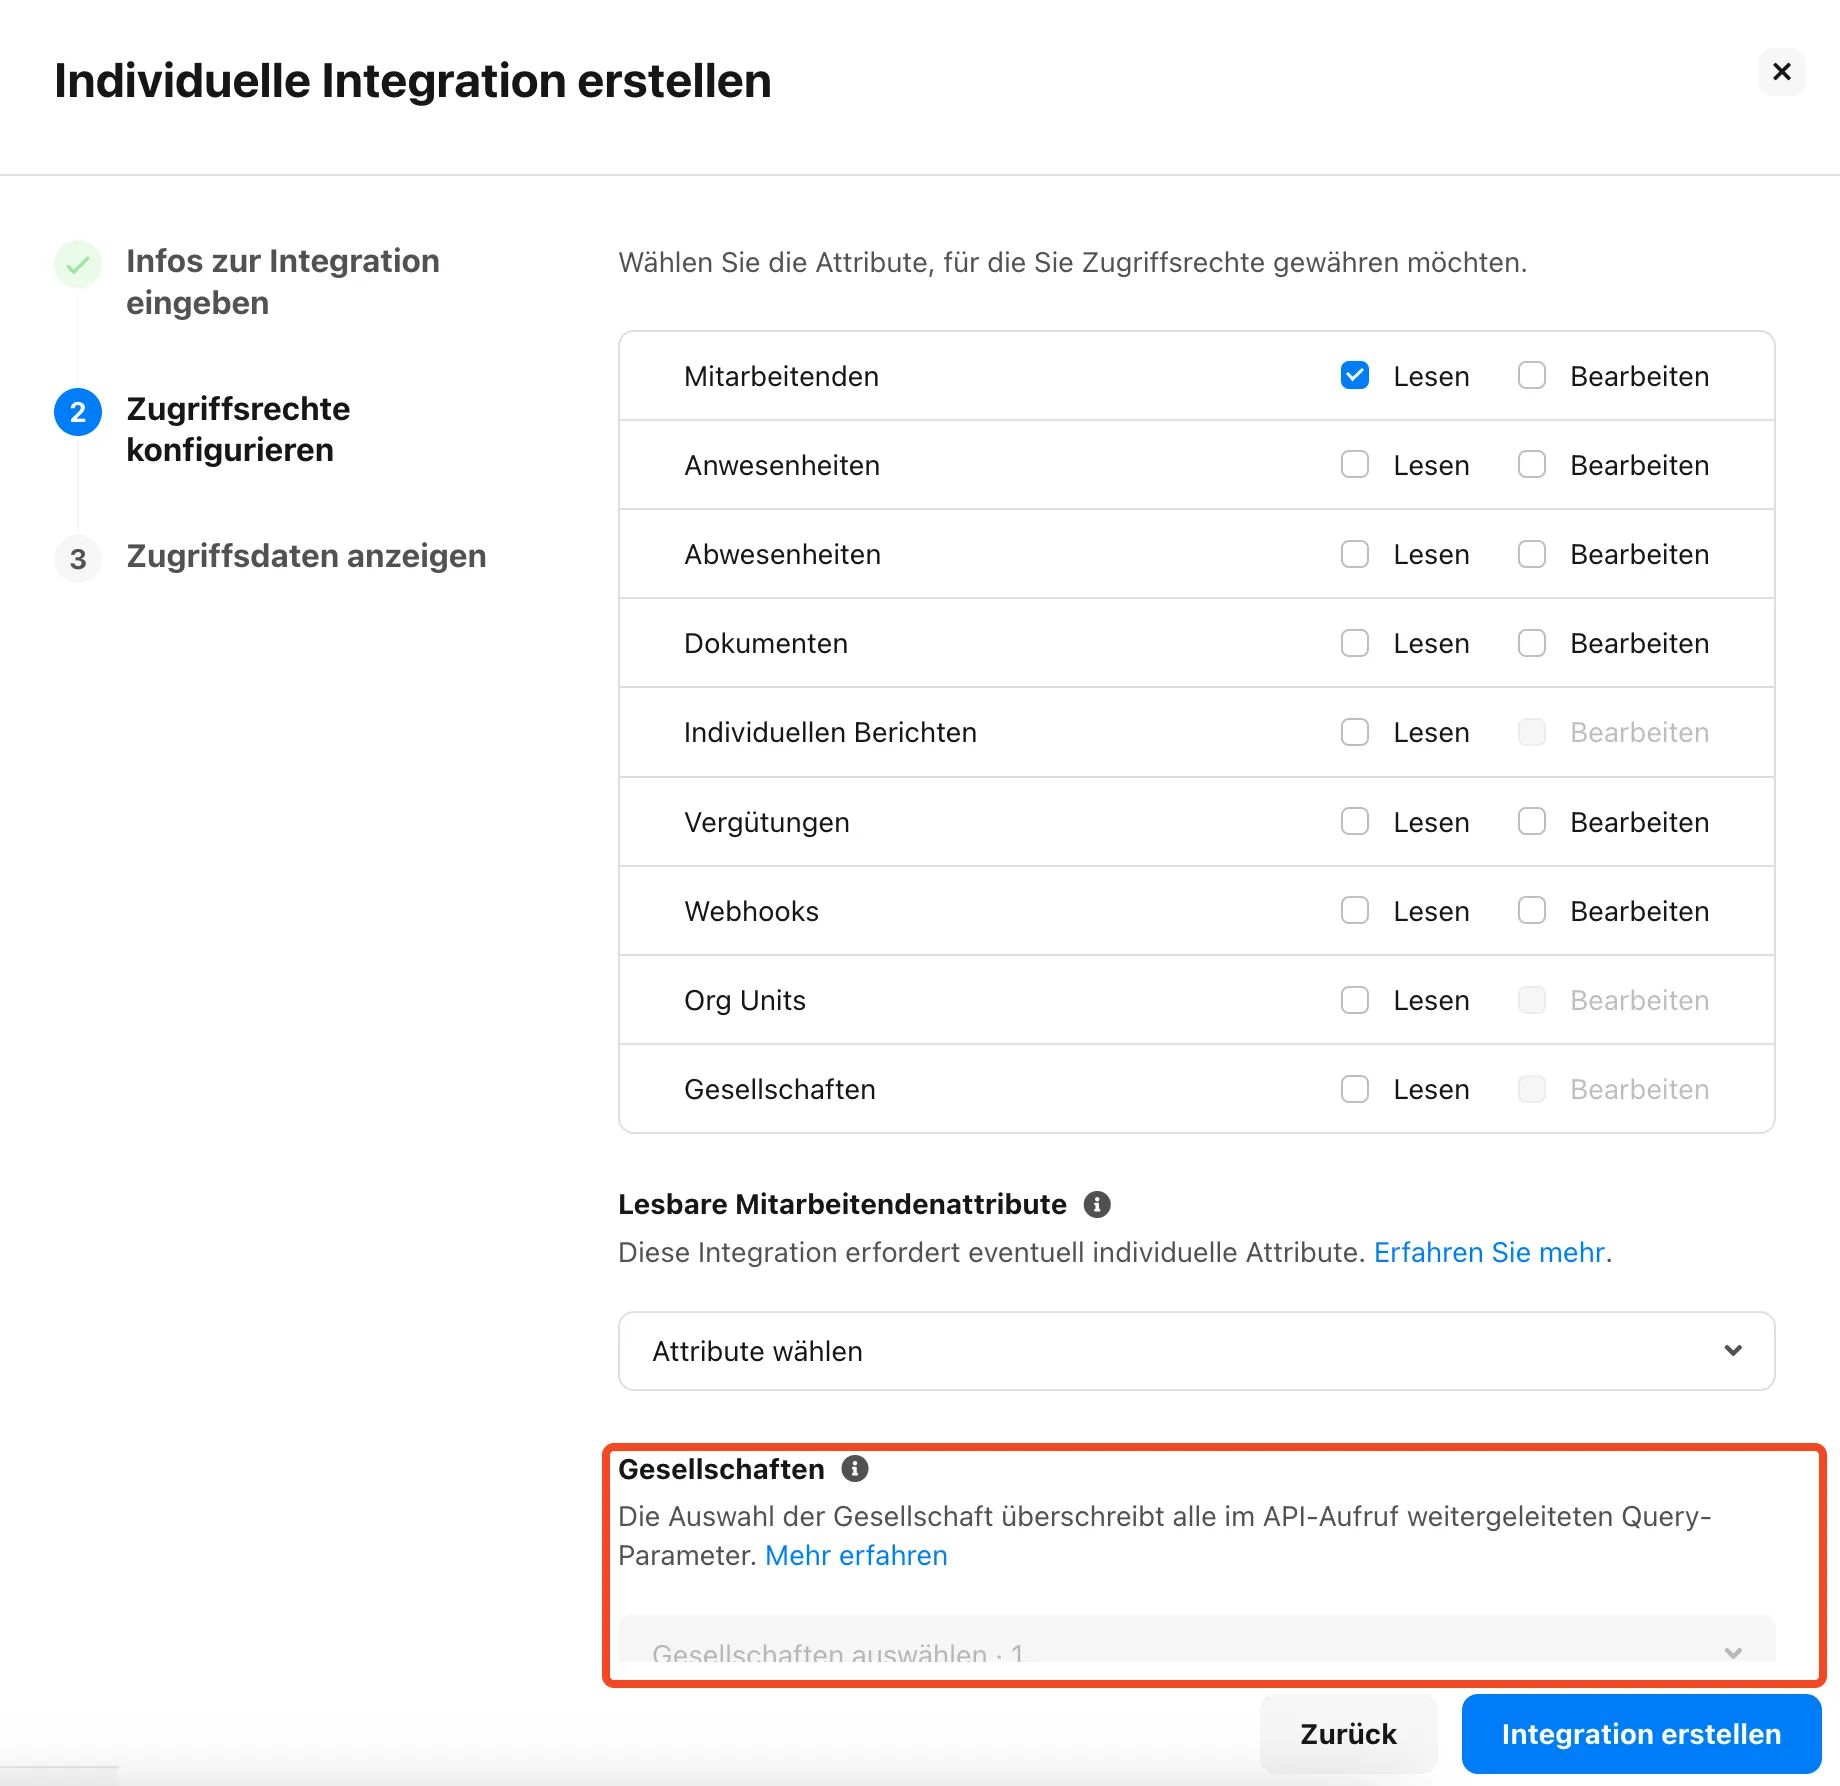
Now configure the access rights for the oneVcard Sync. It is mandatory to select the “Read” option under the “Employees” category. This is necessary for the oneVcard integration to read all required employee data.
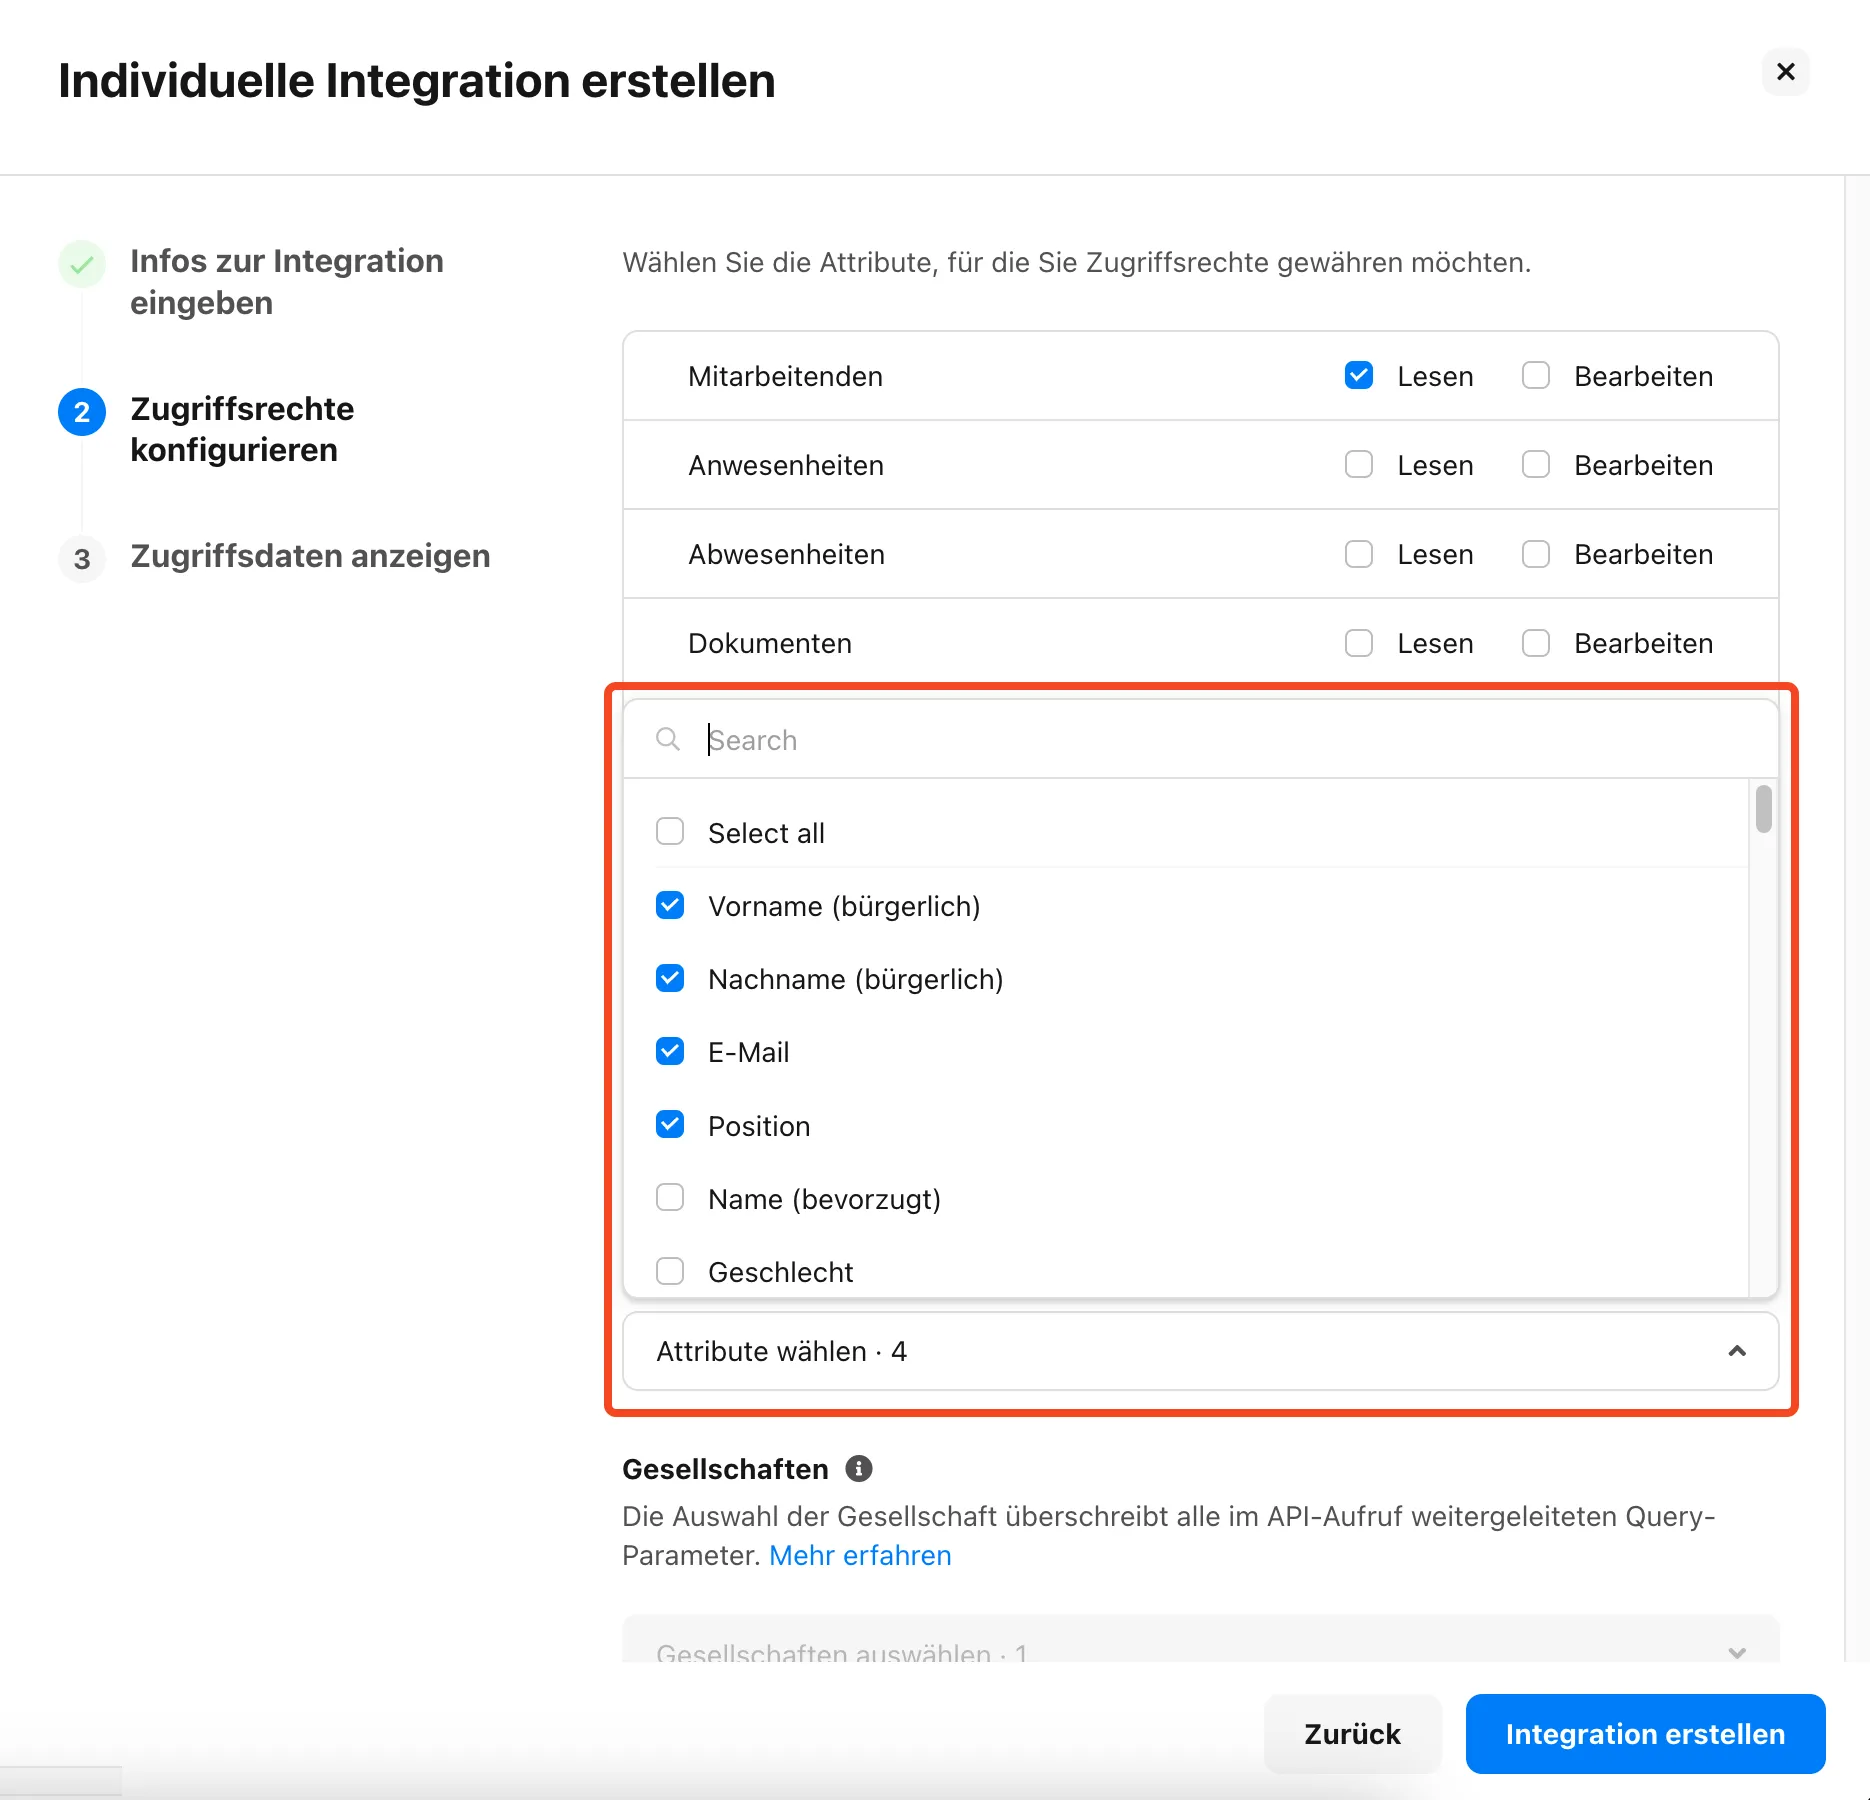
Now, you can select all attributes that are important to you. All attributes you select here will be transferred to oneVcard. Attributes you do not select will not be transferred.
If you created the attribute “Digitale Visitenkarte” in the previous step, it must be selected.
As the second-to-last step, you can select your companies, if applicable. This allows for more granular control over which employees can be transferred to oneVcard.
As the final step, copy both your Client ID and your API Secret. Save them in a location where you can easily retrieve them later. The API Secret should never be shared and cannot be viewed again after completing the configuration.
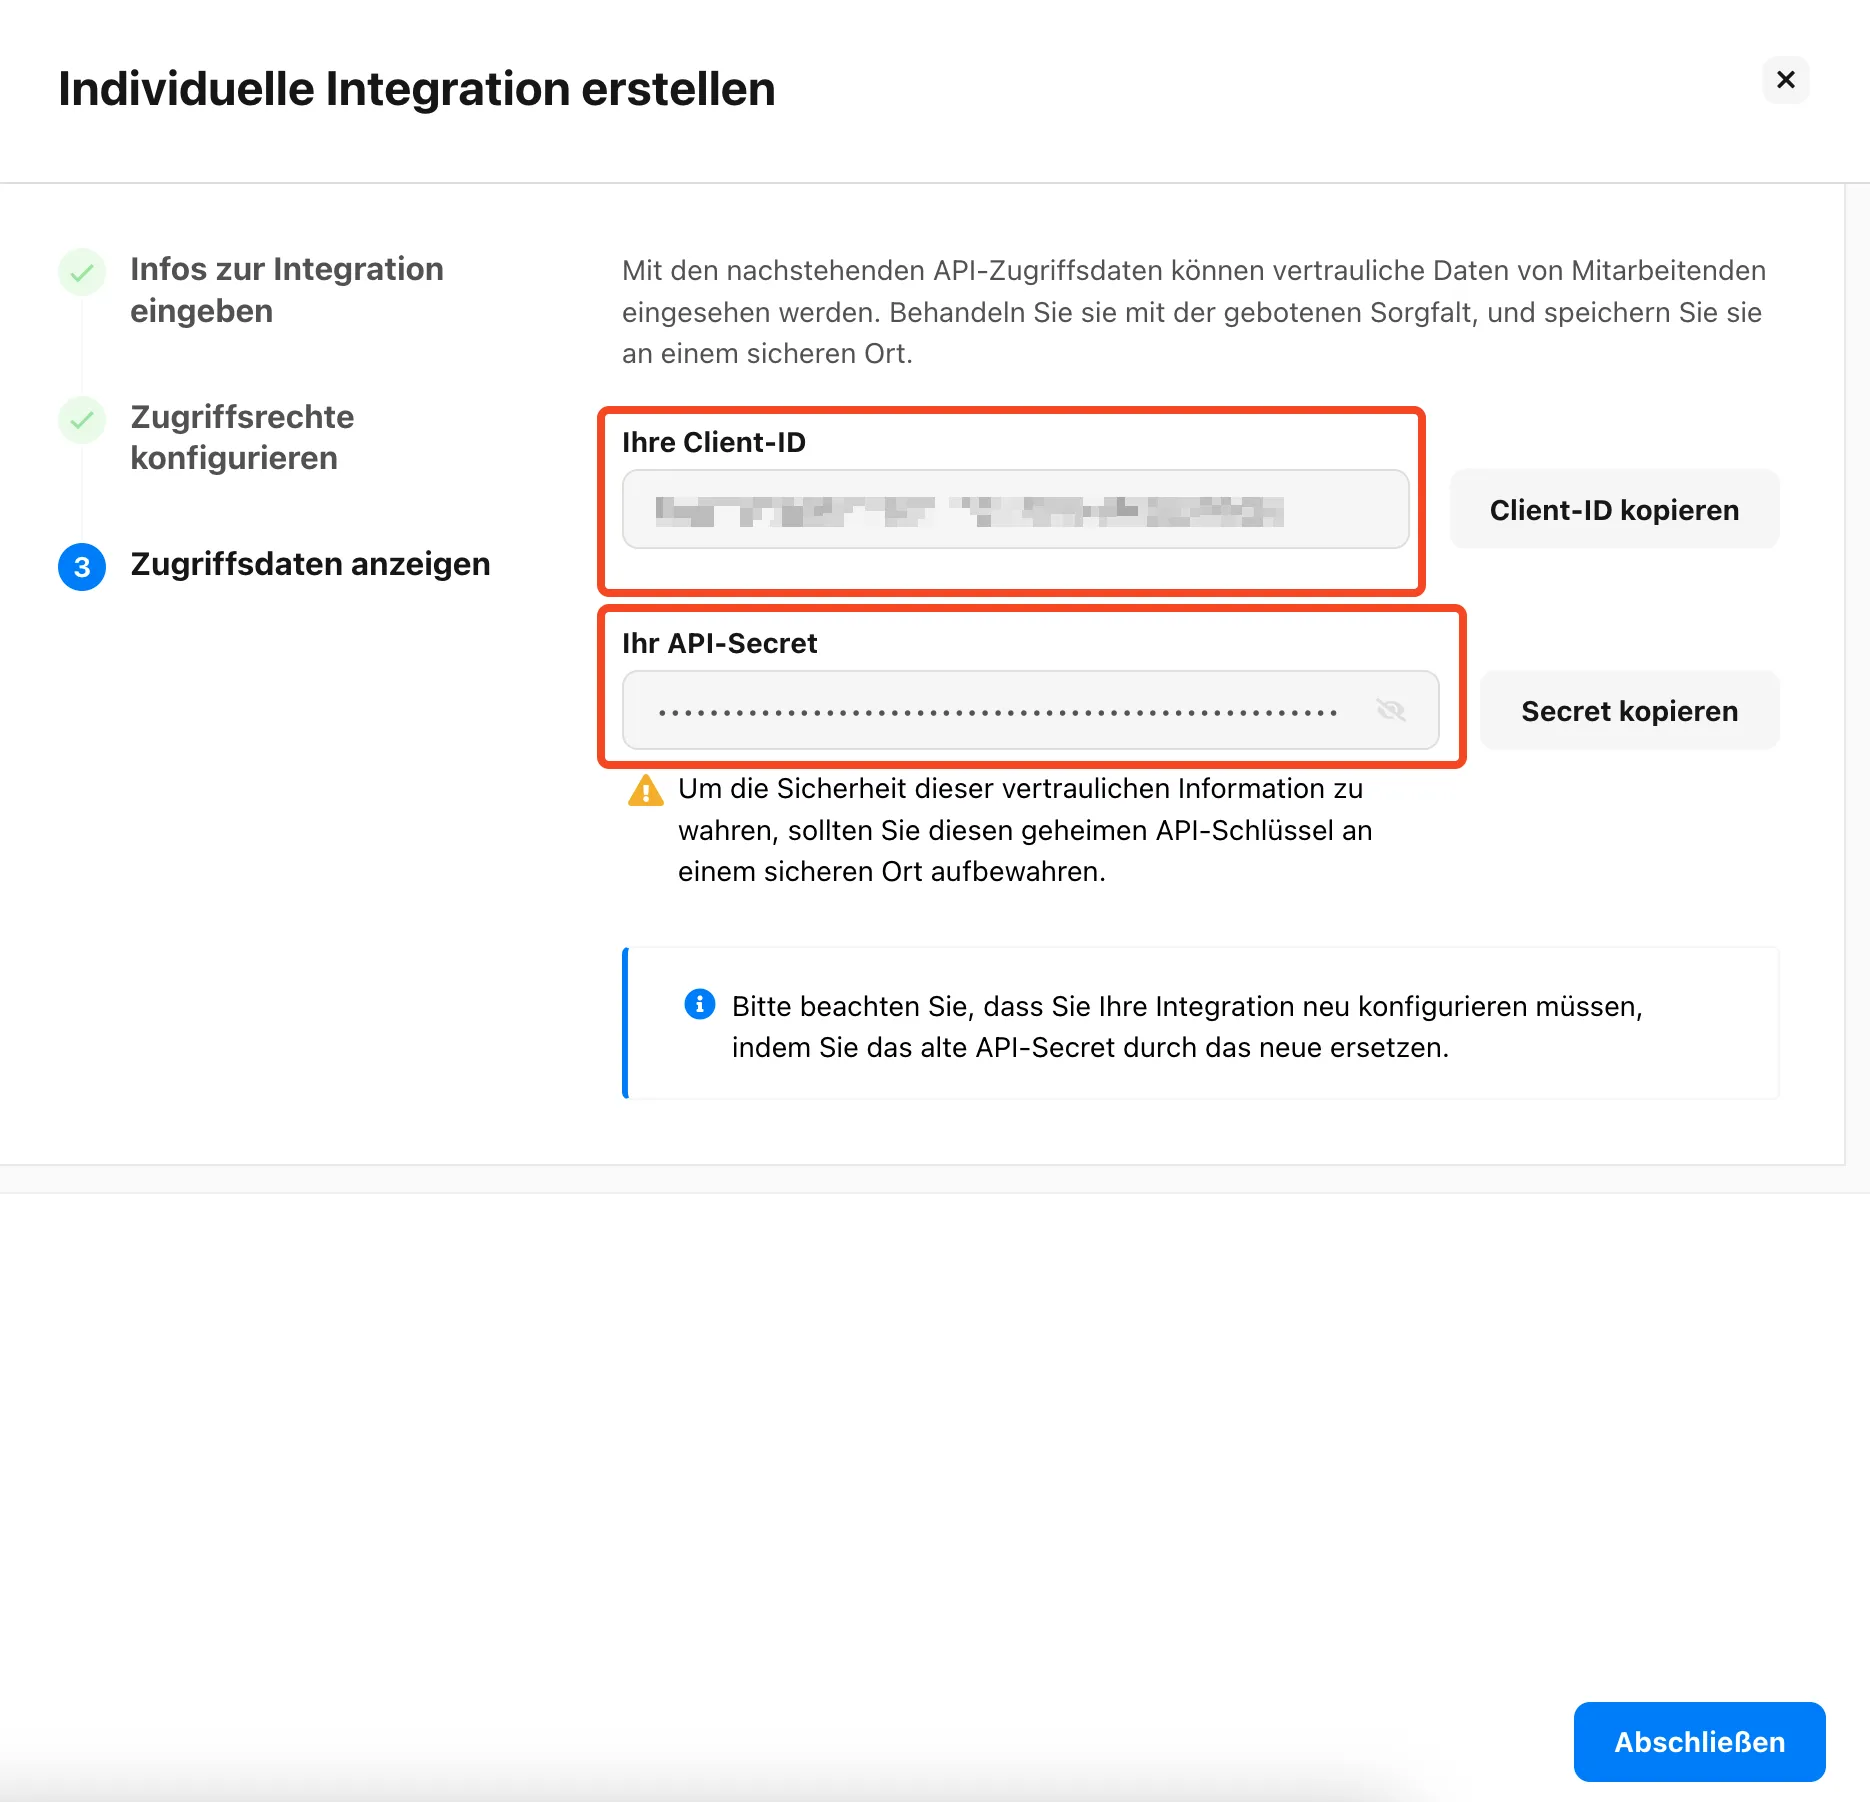
Click the “Complete” button to finish the process.
You have now completed the configuration in Personio.
C. oneVcard Settings
C1. Basic setup
Go to the Personio integration in your oneVcard team under the “Integrations” tab.
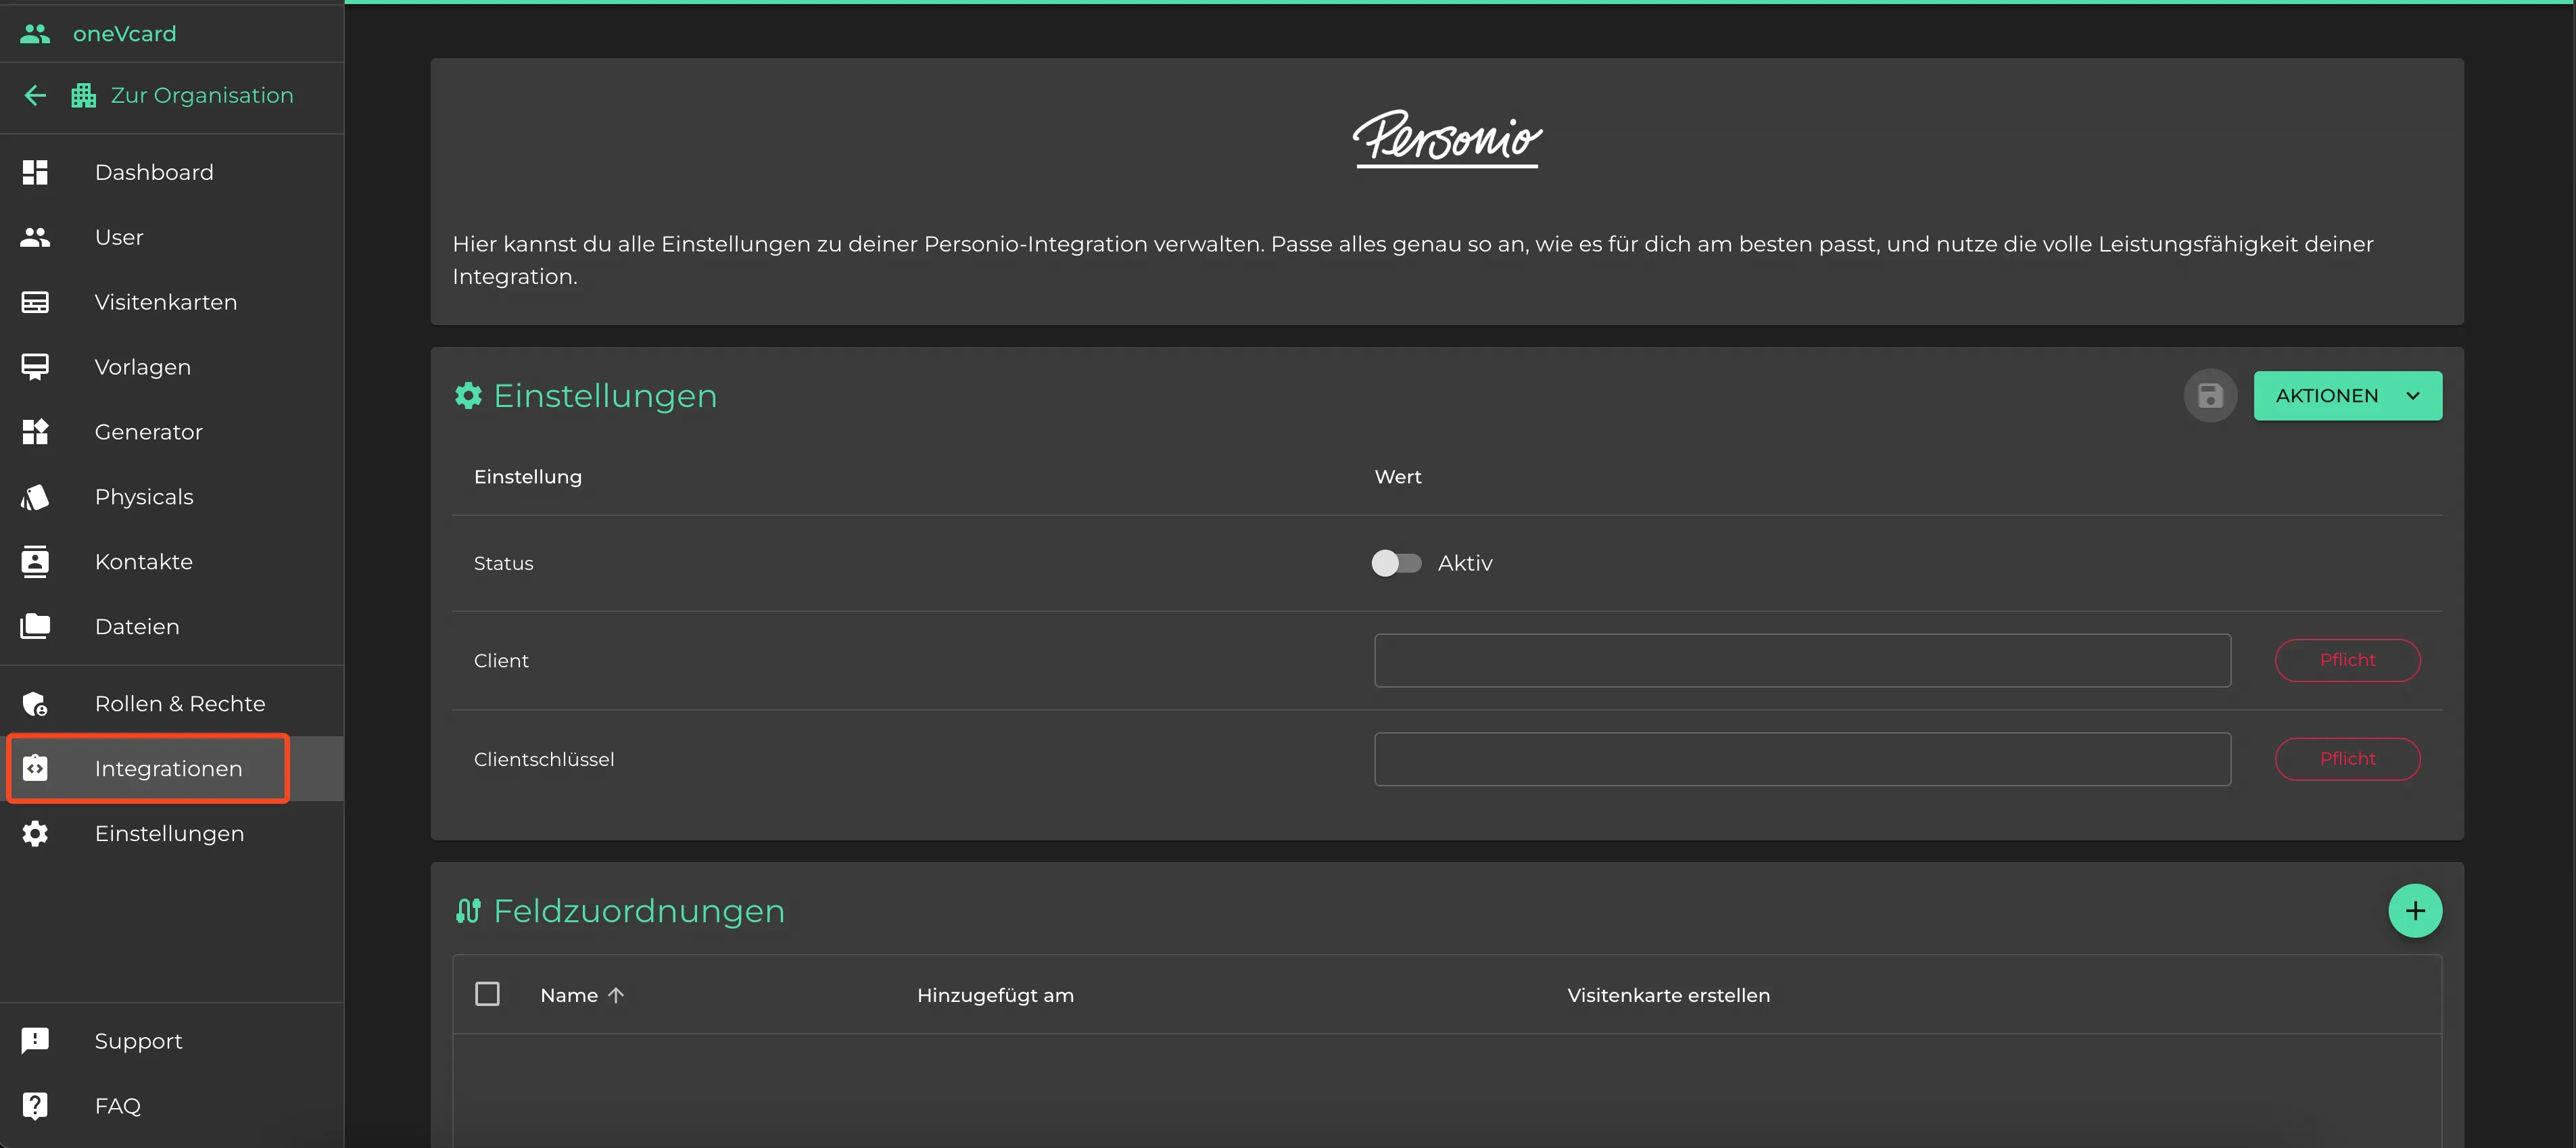
Now, enter the “Client ID” from the previous step into the “Client” field and your “API Secret” into the “Client Secret” field.
You have now completed all the necessary settings. Save the settings using the icon next to the header.
C2. Determine Custom Fields
If you have not created any custom fields in Personio, you can skip this step.
To easily determine the paths to your custom fields, our oneVcard Personio Helper provides a simple solution, as Personio does not offer such functionality in the interface by default.
Download the appropriate version:
- oneVcard Personio Helper Windows.
- oneVcard Personio Helper macOS (ARM).
- oneVcard Personio Helper macOS (x64).
It is possible that your computer will display a security warning. If you downloaded the software directly from this page, you can trust it.
(Support for Apple devices)
Start the executable file via the terminal or command prompt (CMD). If necessary (e.g., on macOS), grant the file the required permissions using the command “chmod +x your_file”.
Follow the instructions in the oneVcard Personio Helper. After successful completion, a CSV file containing all custom fields will be created in the directory where the executable file is located.
In the next step, use the path from the column titled “Path” to create a mapping for custom fields.
C3. Create field assignment
As described here, create a field mapping in the “Field Mappings” section below.
You can now start a synchronization by clicking “Synchronize Now.” After a waiting period, the employees will be created in oneVcard.
If the setup did not work, an error will be displayed under “Last Executions.” If you need help, don’t hesitate to contact us.