Connecting and Setting Up oneVcard Teams Enterprise with Microsoft Entra ID
Enterprise
This article describes the requirements and implementation of the Microsoft Entra ID integration to automatically create and maintain user and business card data in oneVcard.
Technical Requirements
- oneVcard Teams Enterprise Subscription (paid)
- Microsoft Entra ID
- Microsoft Entra ID administrator with the required permissions
A. Setup in Microsoft Entra ID
A1. Create a new App Registration
- Start by navigating to https://portal.azure.com/#view/Microsoft_AAD_IAM/ActiveDirectoryMenuBlade/~/RegisteredApps and click “New registration”.
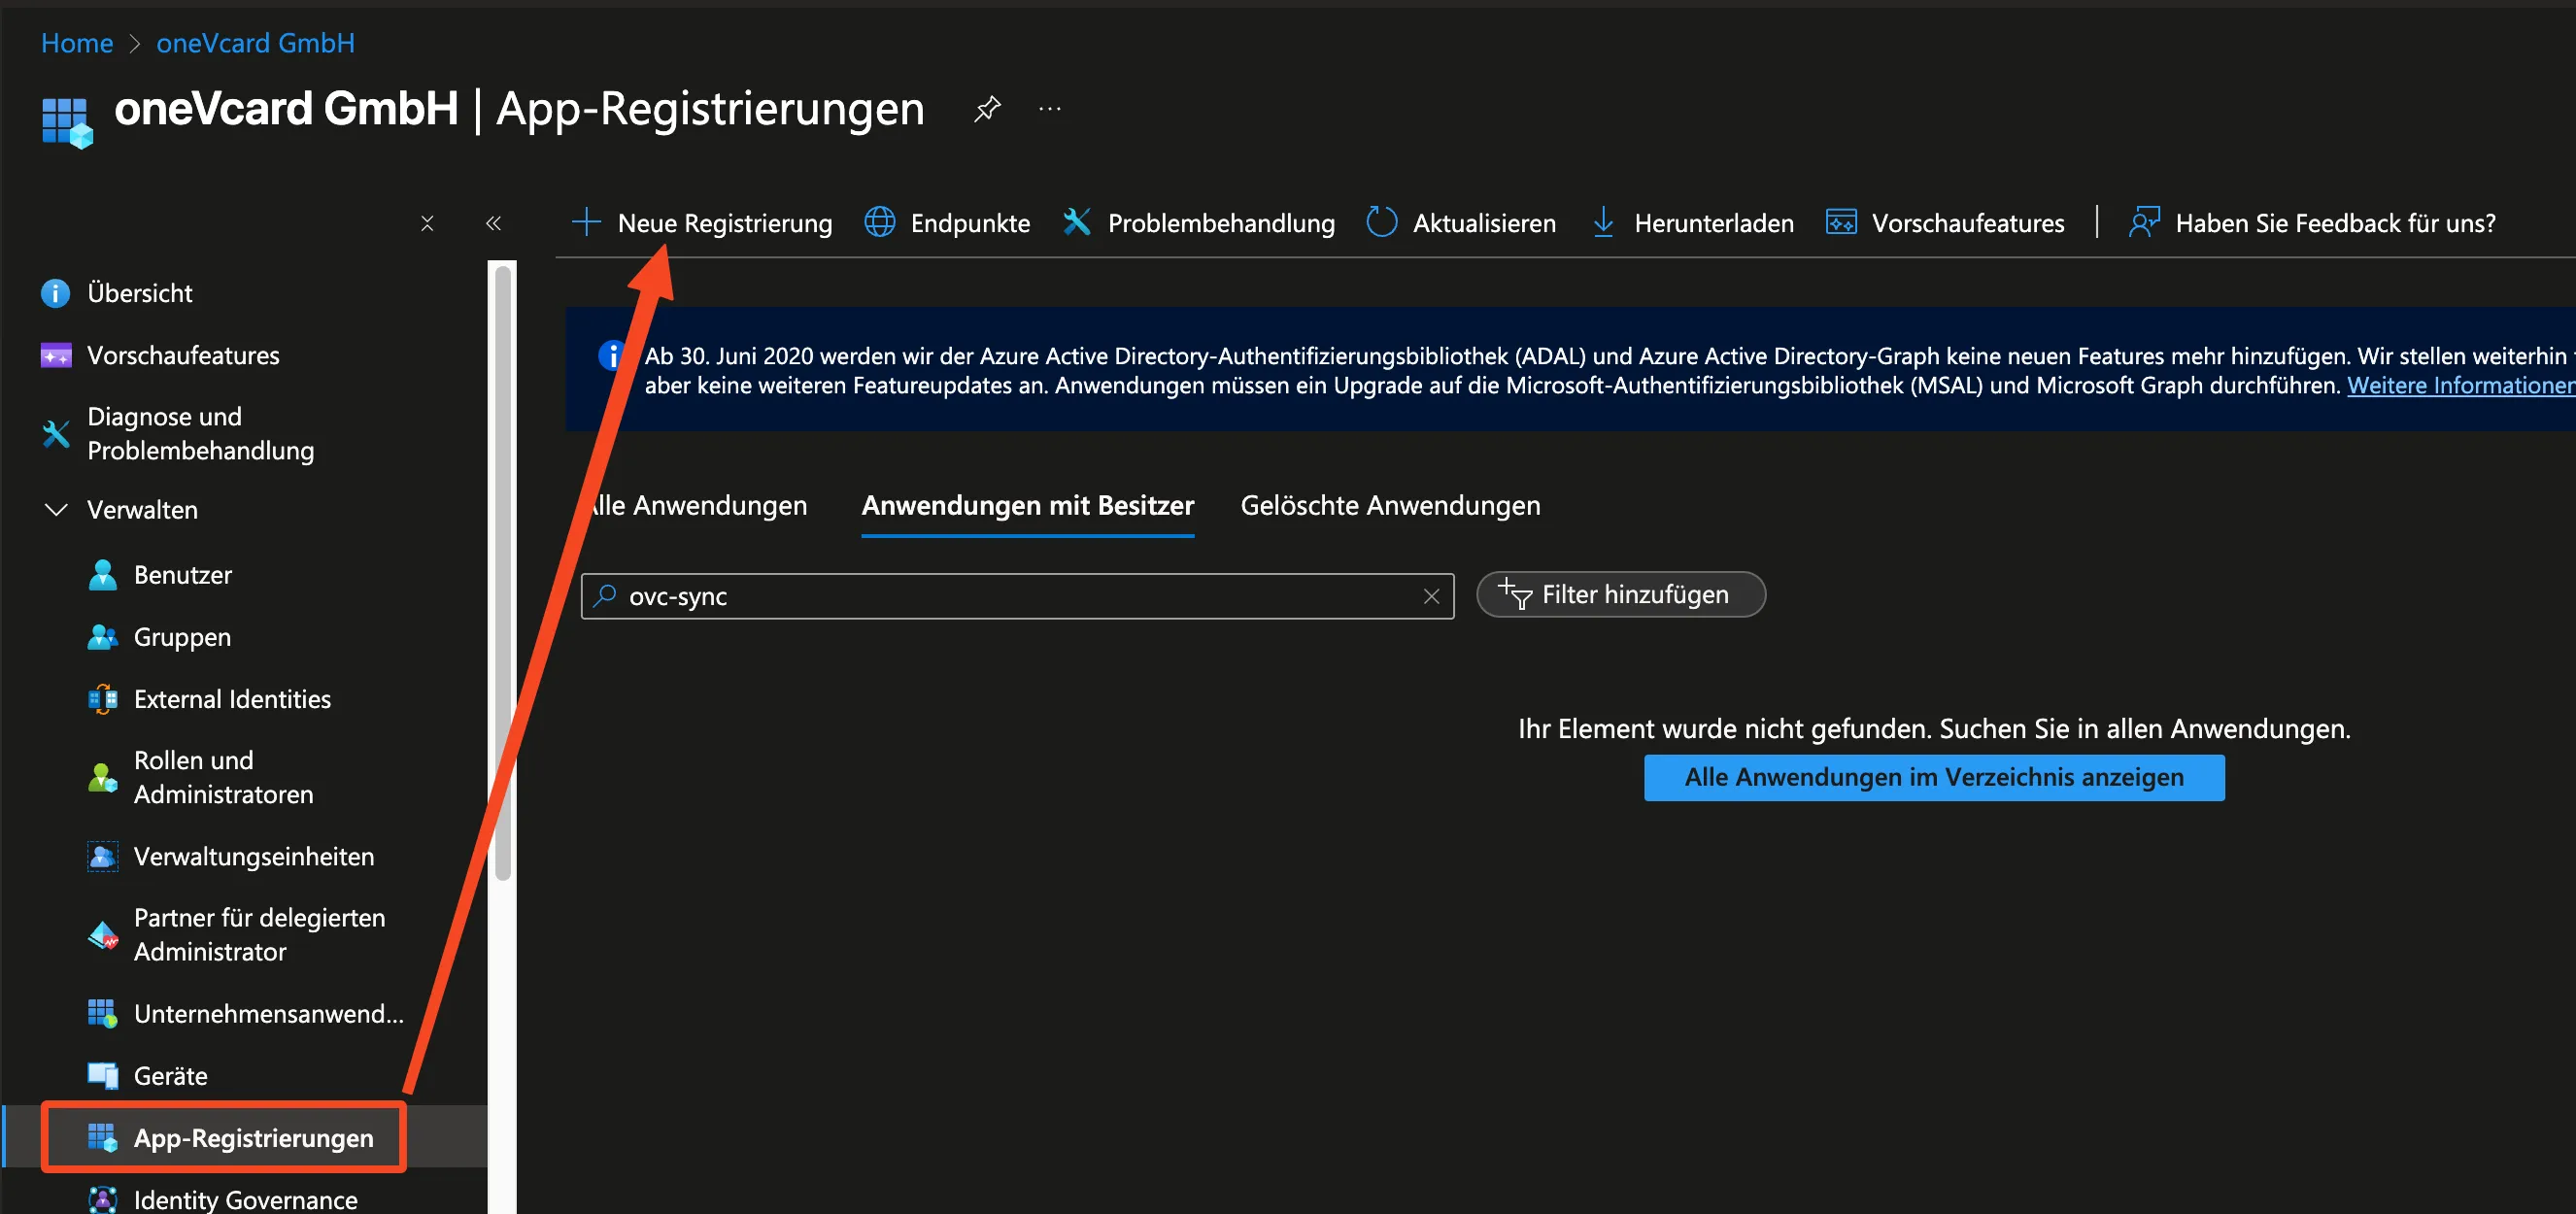
- Assign a name for the registration (for example, “onevcard-sync”) and click “Register”.

A2. Configure Authentication
- Save the values for “Directory (tenant) ID” and “Application (client) ID”.

- Navigate to “Certificates & Secrets” and click “New client secret”.
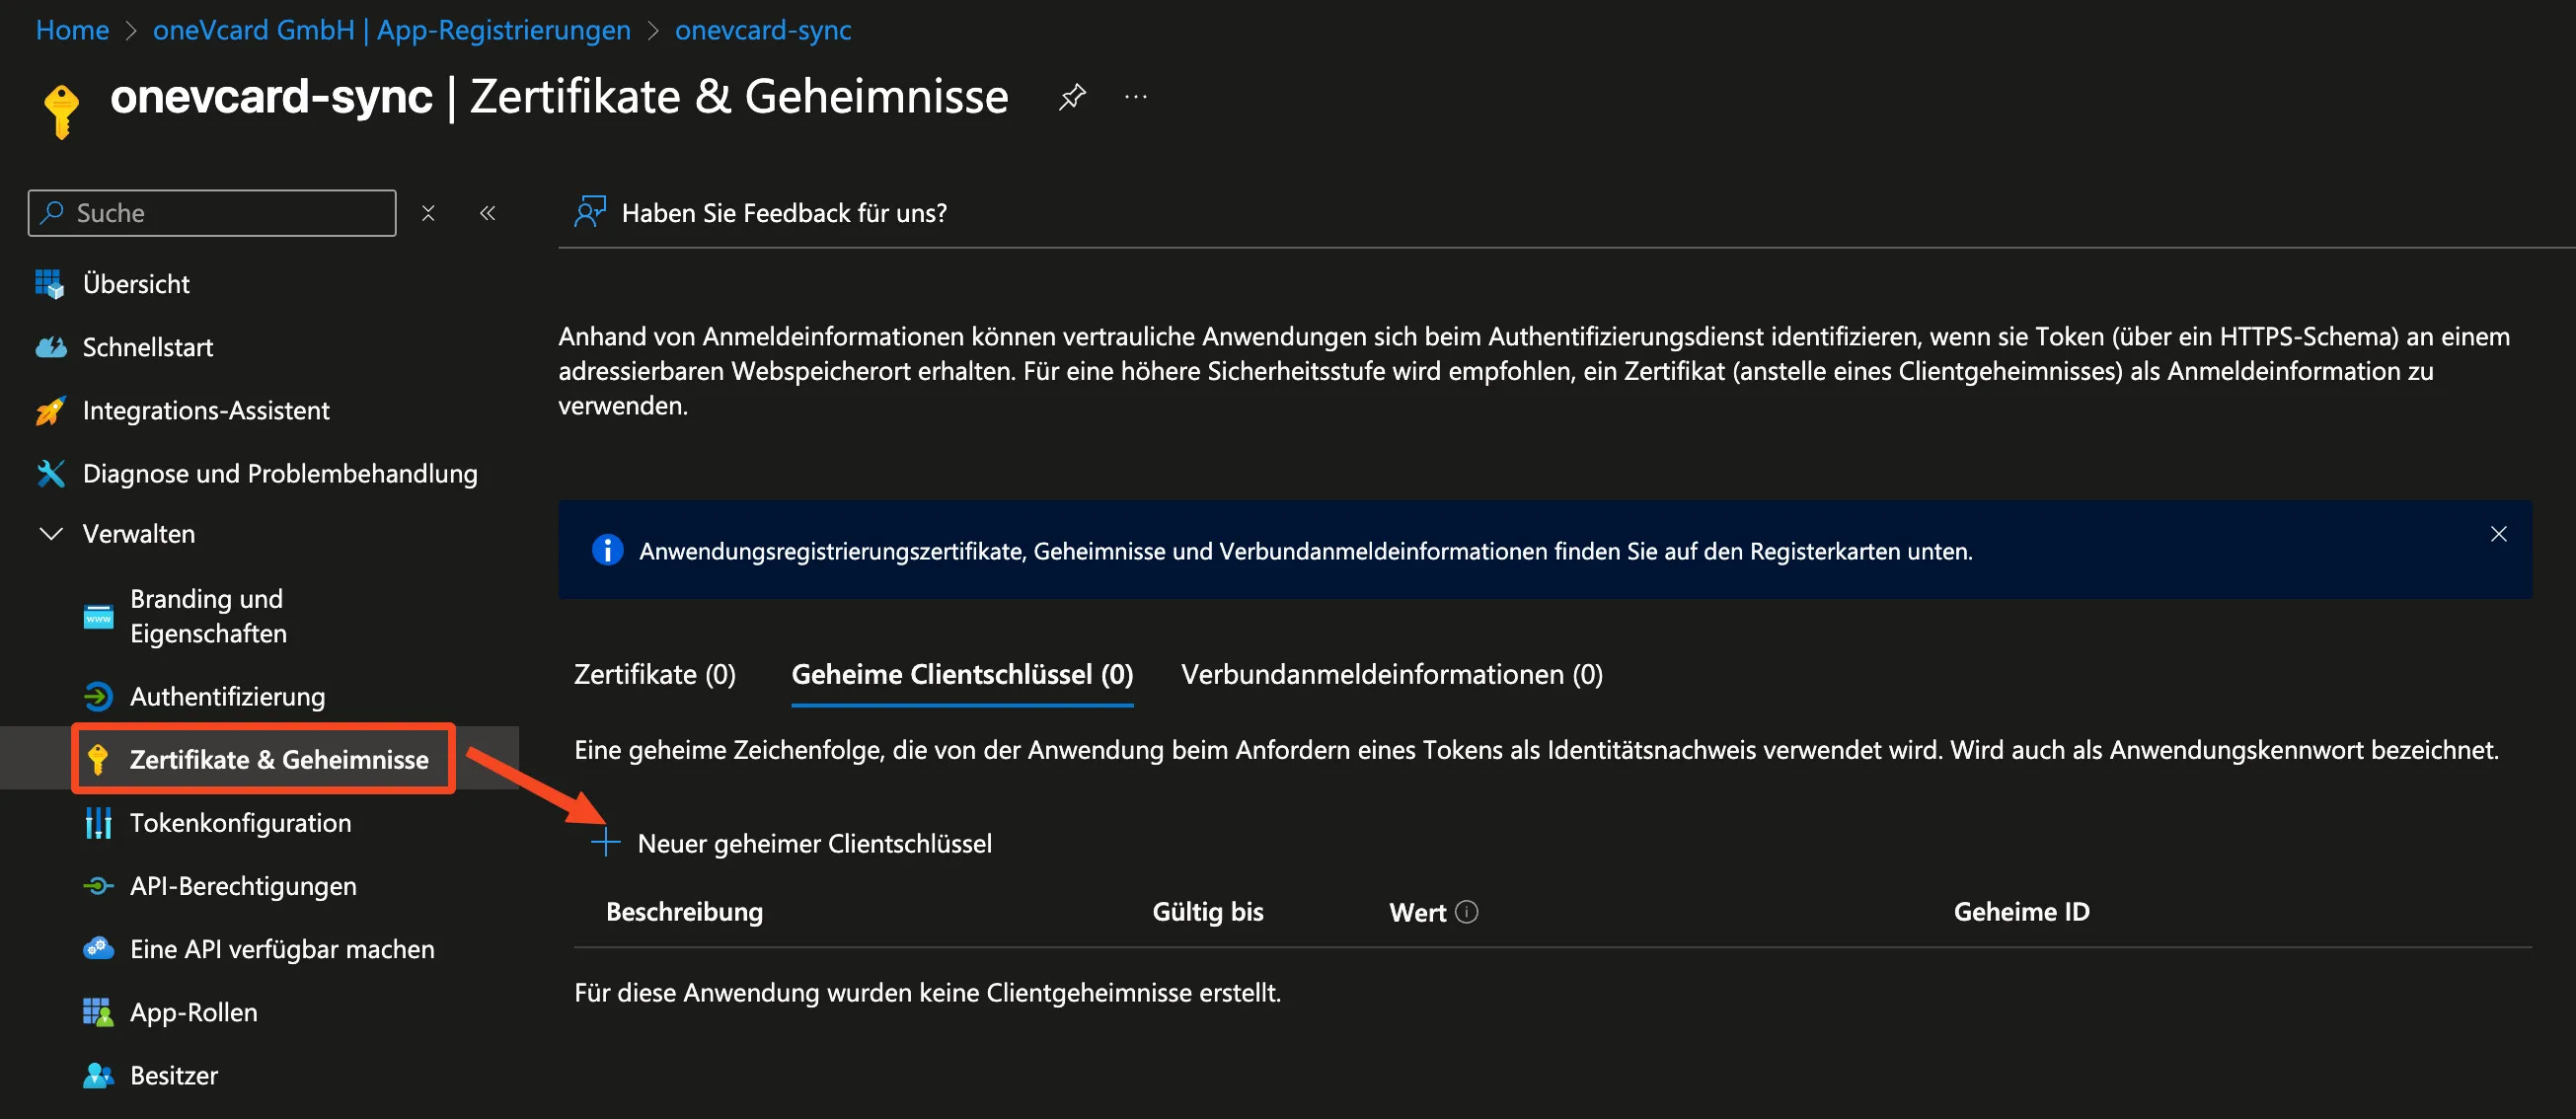
- Assign a name and define the validity period for the secret.
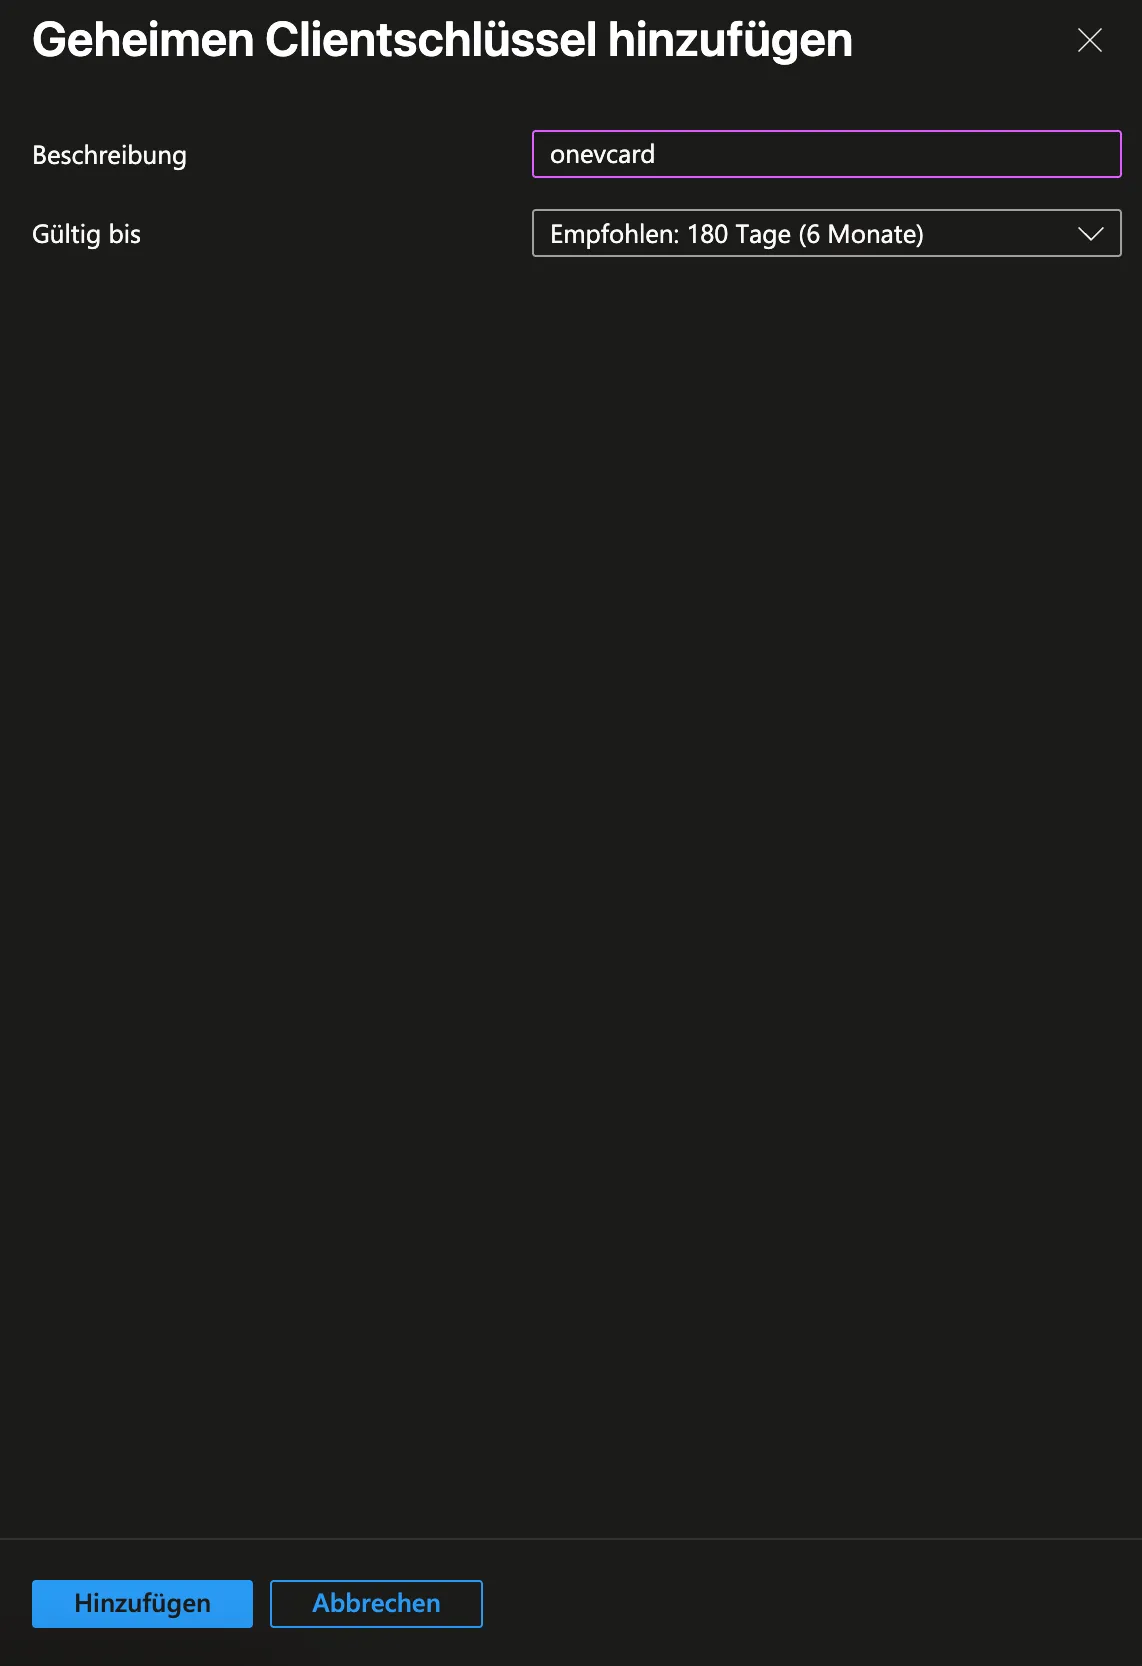
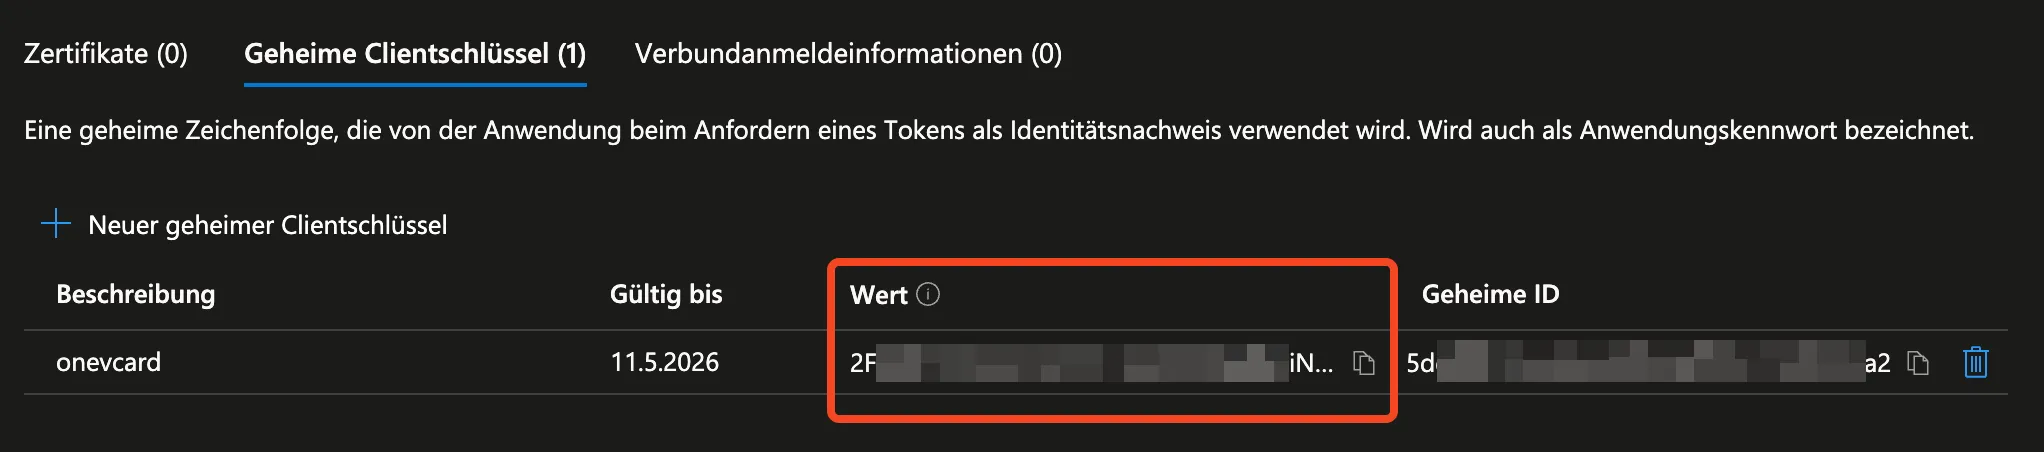
- Then click “Add” and save the “Value” field.
A3. Microsoft Entra ID – Permissions
For oneVcard to access the necessary data, permissions must be added in Microsoft Entra ID.
- Navigate to “API permissions” and click “Add a permission”.
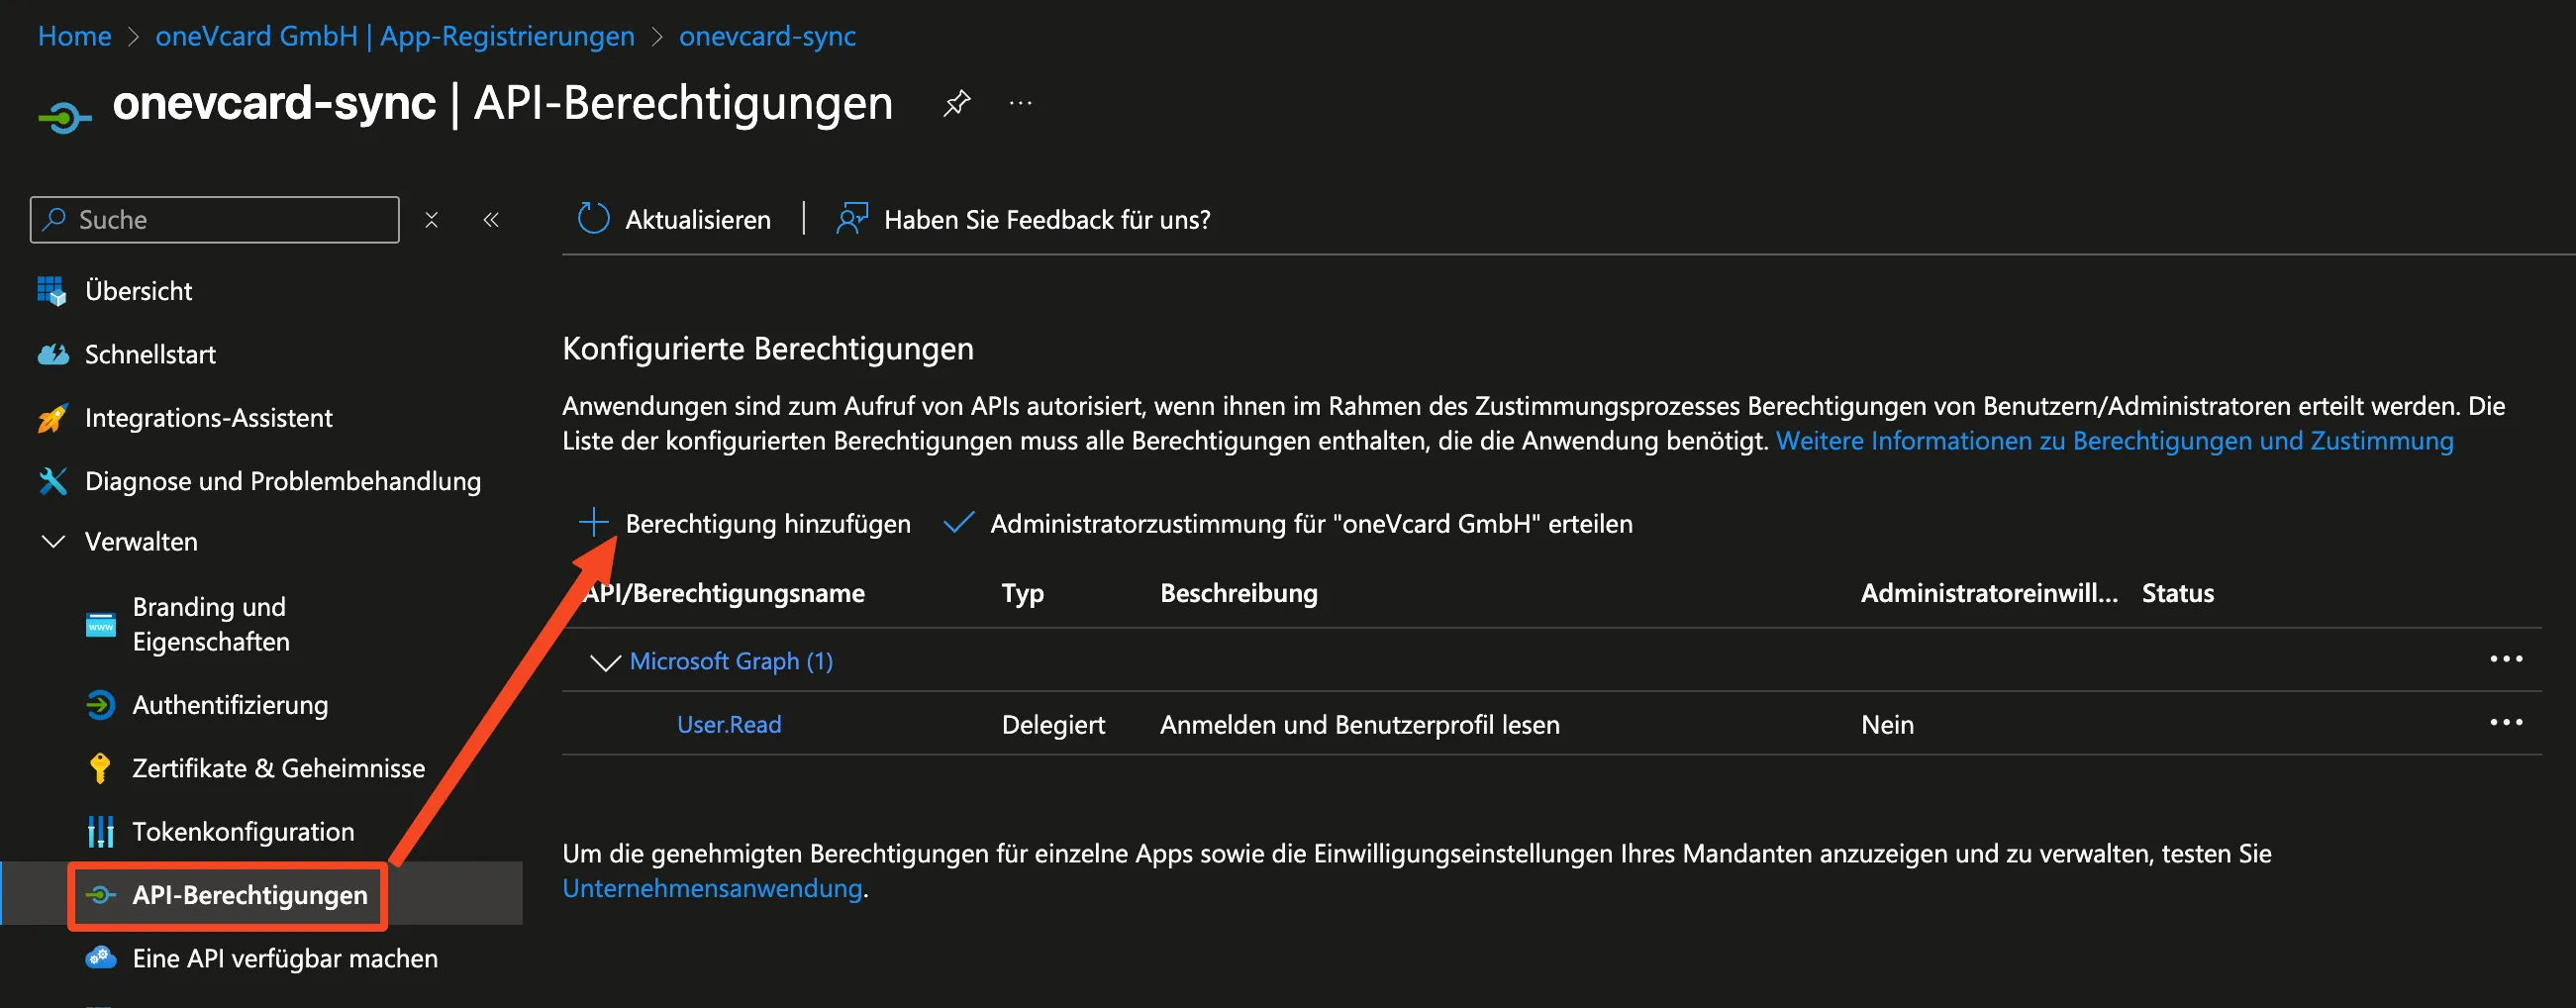
- Click “Microsoft Graph” and then “Application permissions”.

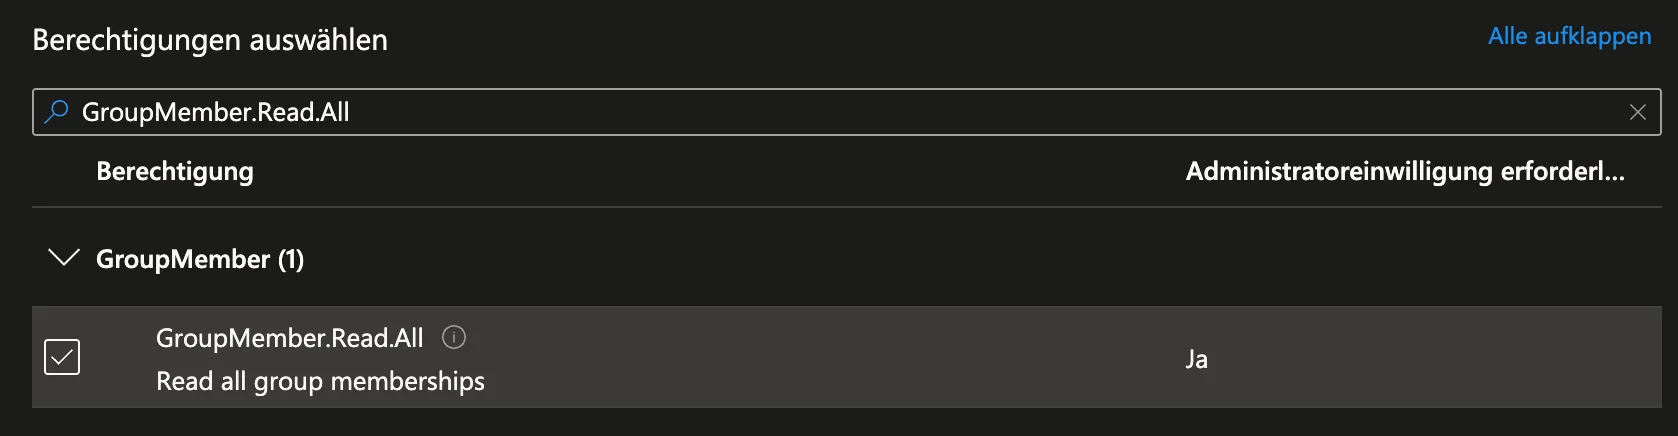
- Select the following permissions:
User.Read.AllGroupMember.Read.All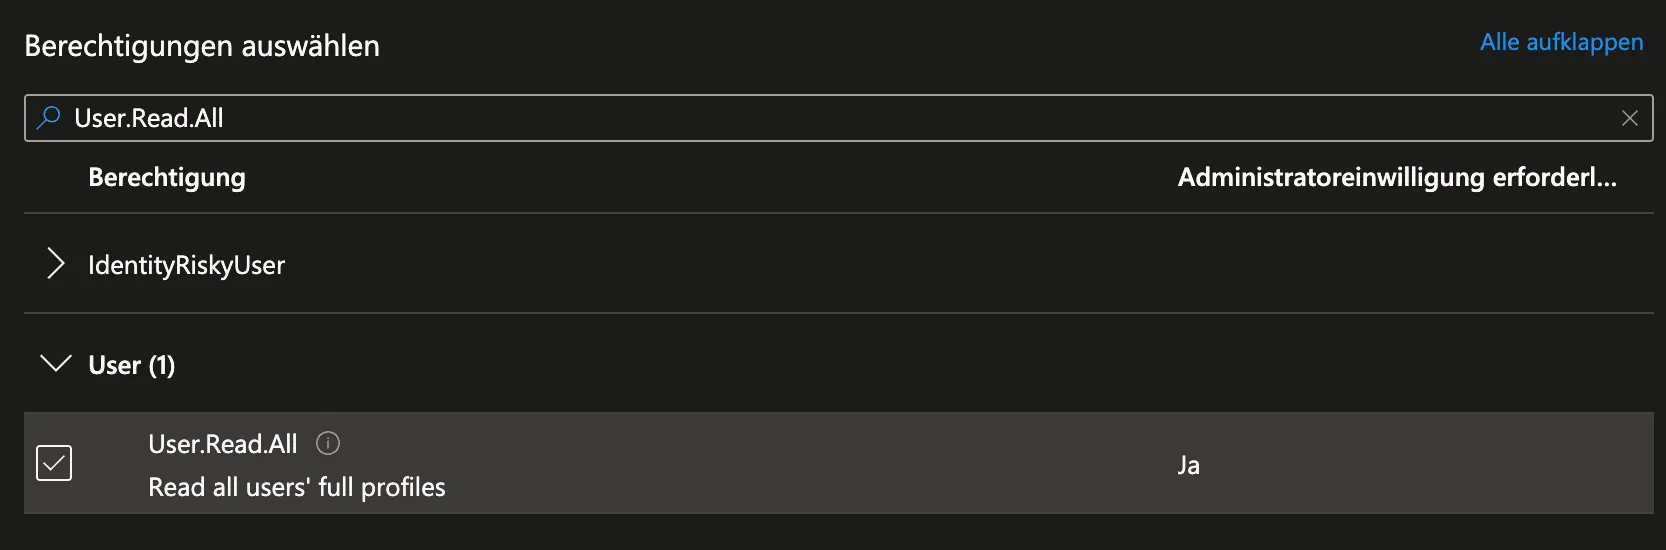
Explanation:
These two scopes allow oneVcard read access to users who are part of a group or exist in Microsoft Entra ID in general. Without these permissions, synchronization cannot occur because user data cannot be retrieved.
-
Click “Add permissions”
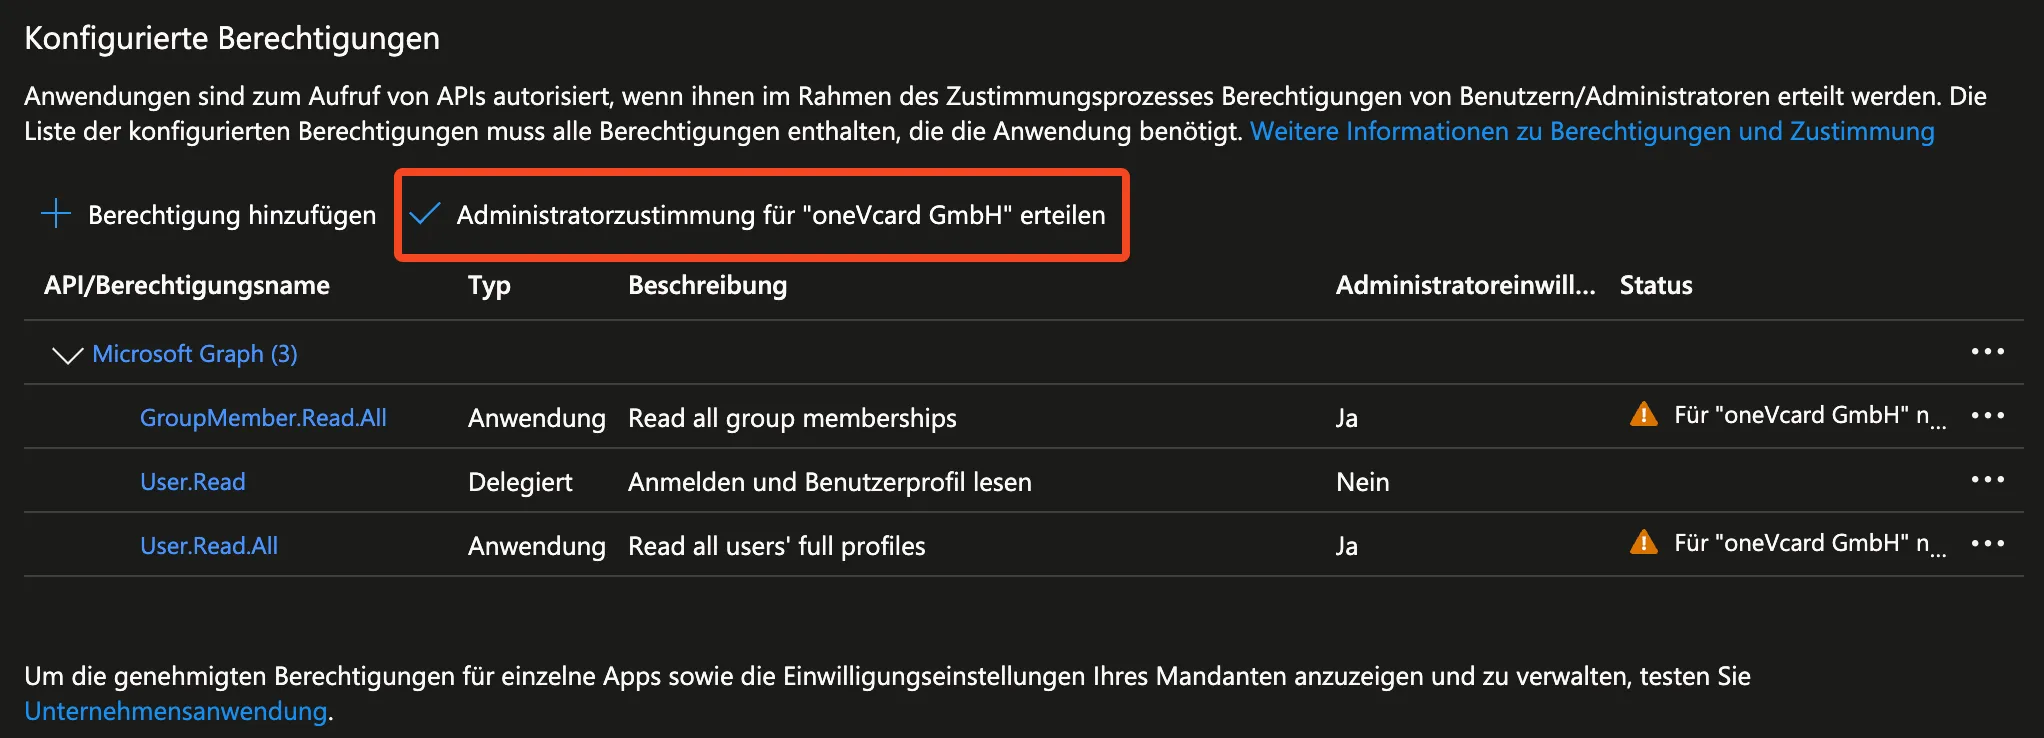
-
Finally, click “Grant admin consent for ‘XYZ’“
B. Setup in oneVcard
B1. oneVcard Settings
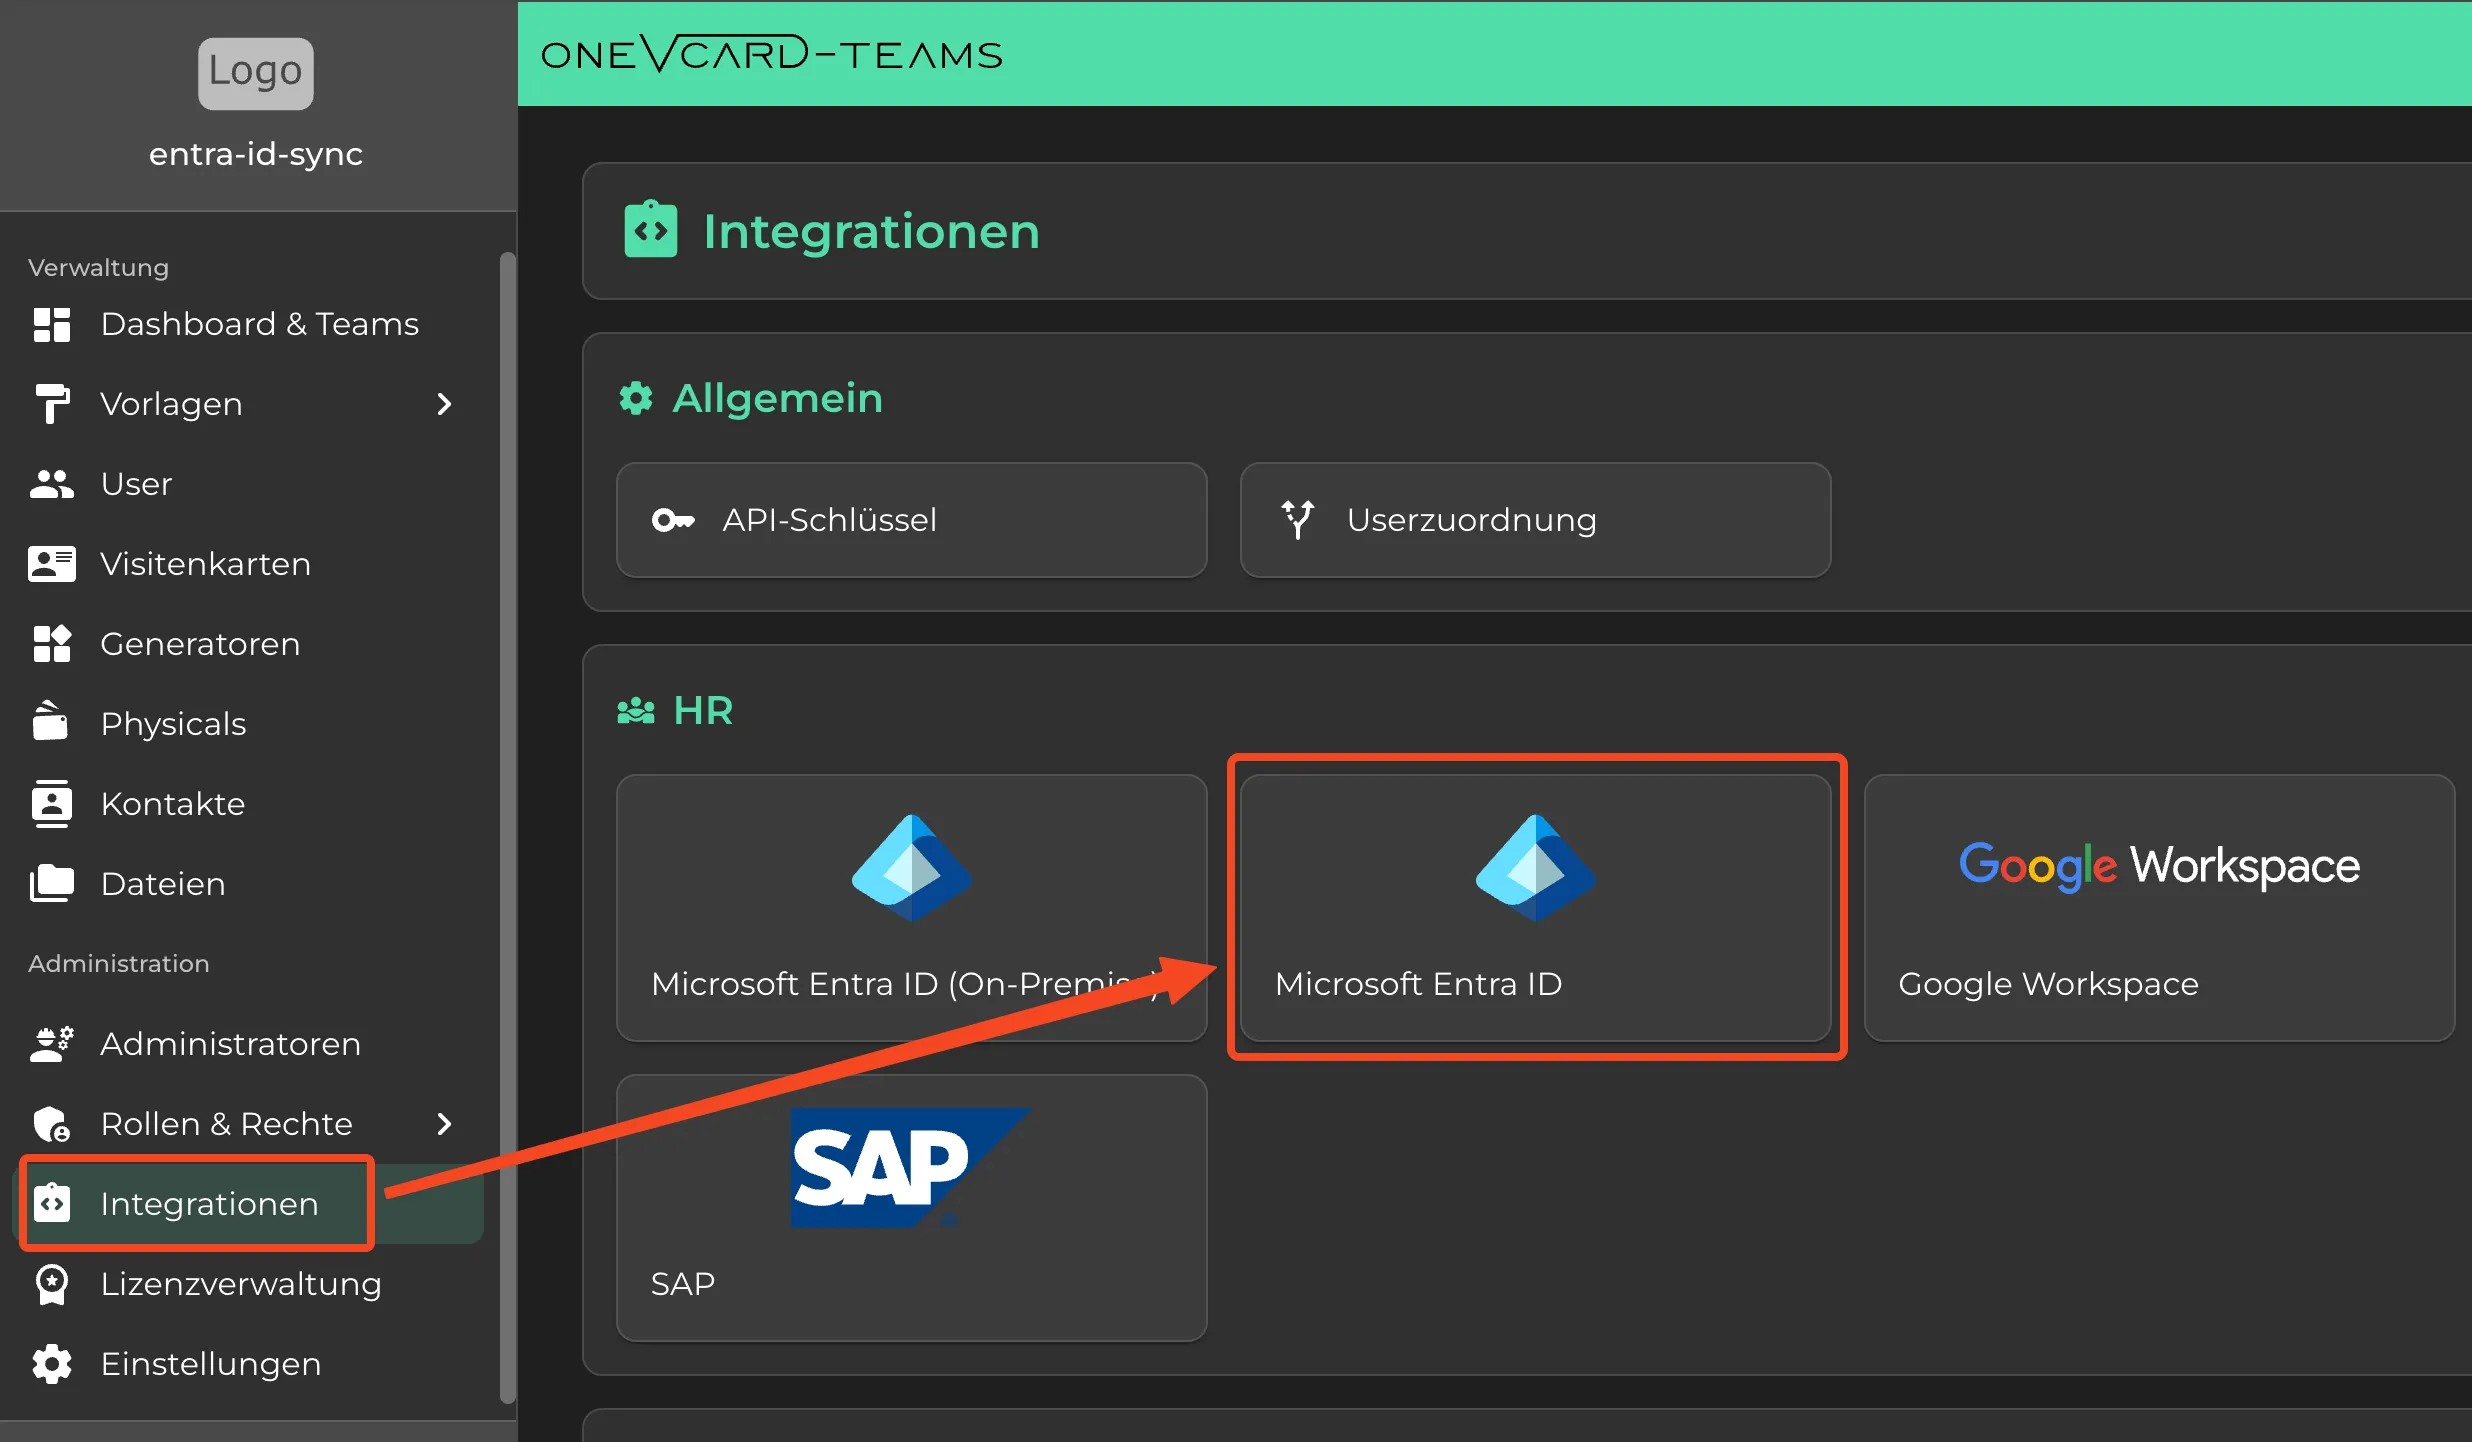
- In your oneVcard Team, navigate to the Microsoft Entra ID Integration under the Integrations tab.
- Under Tenant, enter the value of “Directory (tenant) ID” saved in step A2.
- Under Client, enter the value of “Application (client) ID” from step A2.
- Under Client Secret, enter the “Value” from the “Certificates & Secrets” page in step A2.
You have now completed all required settings.
Save the settings by clicking the “Save” button.
Optionally, you can enable Single Sign-On for users and specify certain groups (Group IDs).
To enable Single Sign-On, please contact oneVcard Support to complete the setup.
B2. Create Field Mapping
Now, as described here, create a field mapping under the Field Mappings section.
You can then start synchronization by clicking “Synchronize now.”
After a short waiting period, the employees will be created in oneVcard.
If the setup did not work, an error will be displayed under “Logs.”
If you need help, don’t hesitate to contact us.